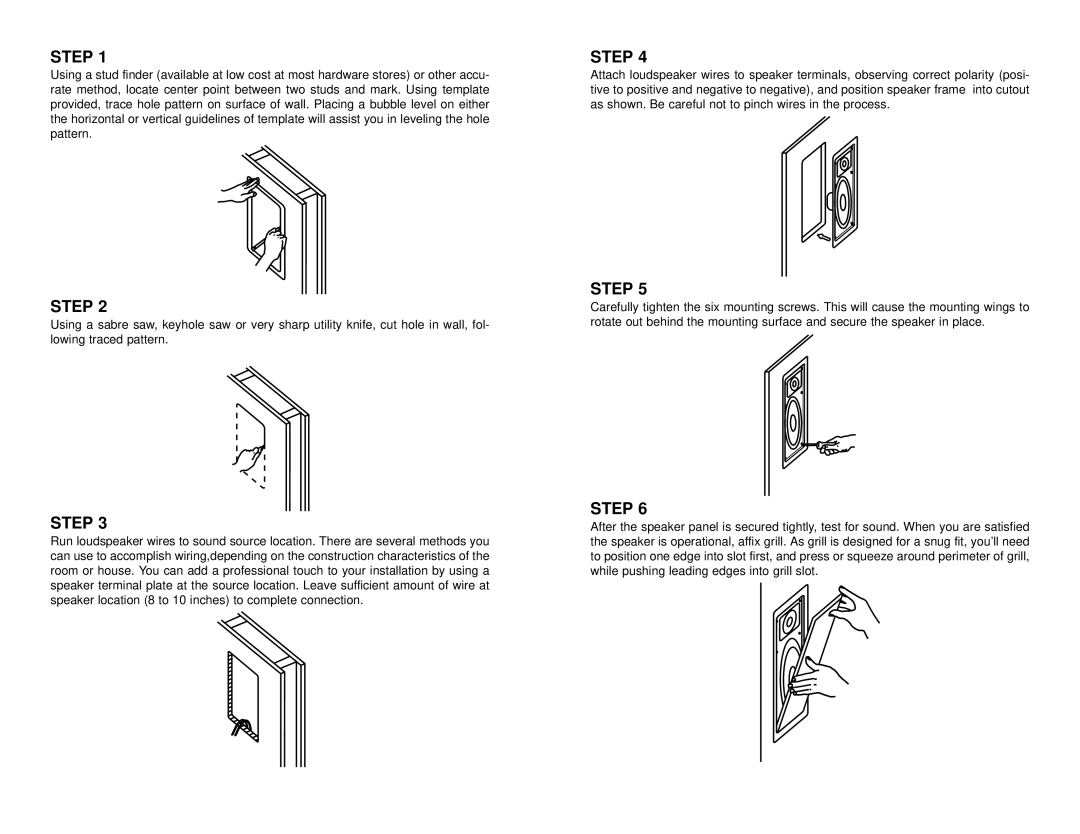
STEP 1
Using a stud finder (available at low cost at most hardware stores) or other accu- rate method, locate center point between two studs and mark. Using template provided, trace hole pattern on surface of wall. Placing a bubble level on either the horizontal or vertical guidelines of template will assist you in leveling the hole pattern.
STEP 2
Using a sabre saw, keyhole saw or very sharp utility knife, cut hole in wall, fol- lowing traced pattern.
STEP 3
Run loudspeaker wires to sound source location. There are several methods you can use to accomplish wiring,depending on the construction characteristics of the room or house. You can add a professional touch to your installation by using a speaker terminal plate at the source location. Leave sufficient amount of wire at speaker location (8 to 10 inches) to complete connection.
STEP 4
Attach loudspeaker wires to speaker terminals, observing correct polarity (posi- tive to positive and negative to negative), and position speaker frame into cutout as shown. Be careful not to pinch wires in the process.
STEP 5
Carefully tighten the six mounting screws. This will cause the mounting wings to rotate out behind the mounting surface and secure the speaker in place.
STEP 6
After the speaker panel is secured tightly, test for sound. When you are satisfied the speaker is operational, affix grill. As grill is designed for a snug fit, you’ll need to position one edge into slot first, and press or squeeze around perimeter of grill, while pushing leading edges into grill slot.