Clearing jams
200 and 201 paper jams
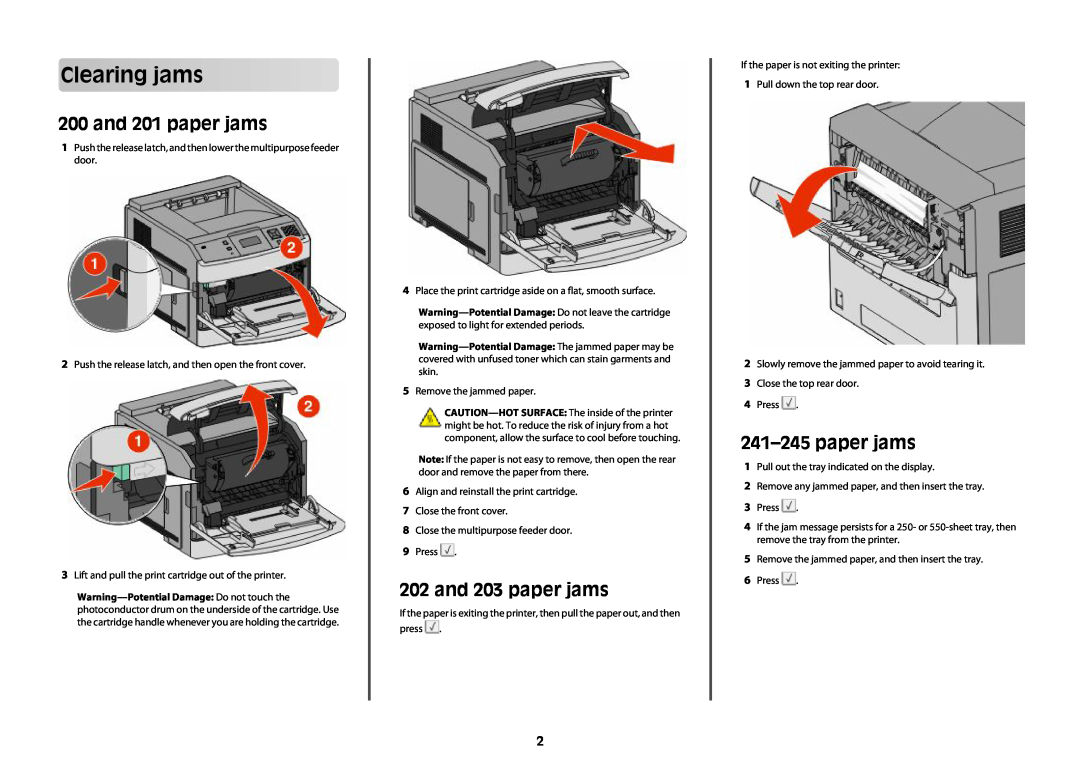
1Push the release latch, and then lower the multipurpose feeder door.
2Push the release latch, and then open the front cover.
3Lift and pull the print cartridge out of the printer.
4Place the print cartridge aside on a flat, smooth surface.
5Remove the jammed paper.
Note: If the paper is not easy to remove, then open the rear door and remove the paper from there.
6Align and reinstall the print cartridge.
7Close the front cover.
8Close the multipurpose feeder door.
9Press ![]() .
.
202 and 203 paper jams
If the paper is exiting the printer, then pull the paper out, and then press ![]() .
.
If the paper is not exiting the printer:
1Pull down the top rear door.
2Slowly remove the jammed paper to avoid tearing it.
3Close the top rear door.
4Press ![]() .
.
241–245 paper jams
1Pull out the tray indicated on the display.
2Remove any jammed paper, and then insert the tray.
3Press ![]() .
.
4If the jam message persists for a 250- or
5Remove the jammed paper, and then insert the tray.
6Press ![]() .
.
2