1.Plug the power cables for your computer and monitor into a nearby outlet.
2.Turn on the monitor and the computer.
If your monitor displays an image, installation is complete. If it does not display an image, see Solving Problems.
Organizing Your Cables
After attaching all necessary cables to your monitor and computer (see Connecting Your Monitor), use the cable management slot to organize all cables as shown above.
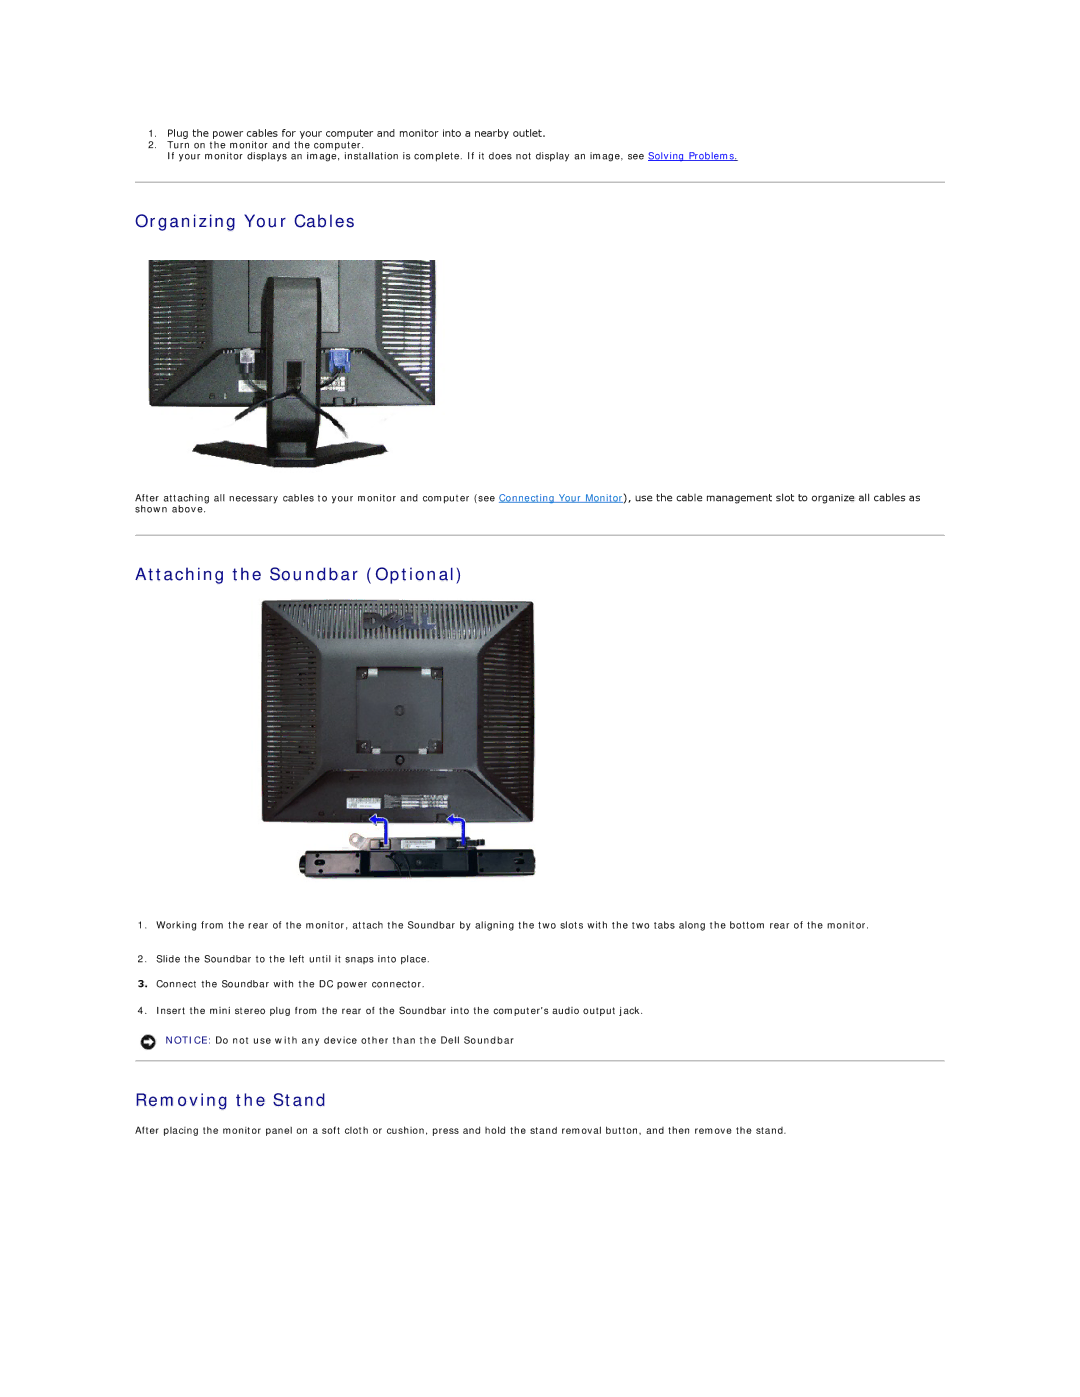
Attaching the Soundbar (Optional)
1.Working from the rear of the monitor, attach the Soundbar by aligning the two slots with the two tabs along the bottom rear of the monitor.
2.Slide the Soundbar to the left until it snaps into place.
3.Connect the Soundbar with the DC power connector.
4.Insert the mini stereo plug from the rear of the Soundbar into the computer's audio output jack.
NOTICE: Do not use with any device other than the Dell Soundbar
Removing the Stand
After placing the monitor panel on a soft cloth or cushion, press and hold the stand removal button, and then remove the stand.