
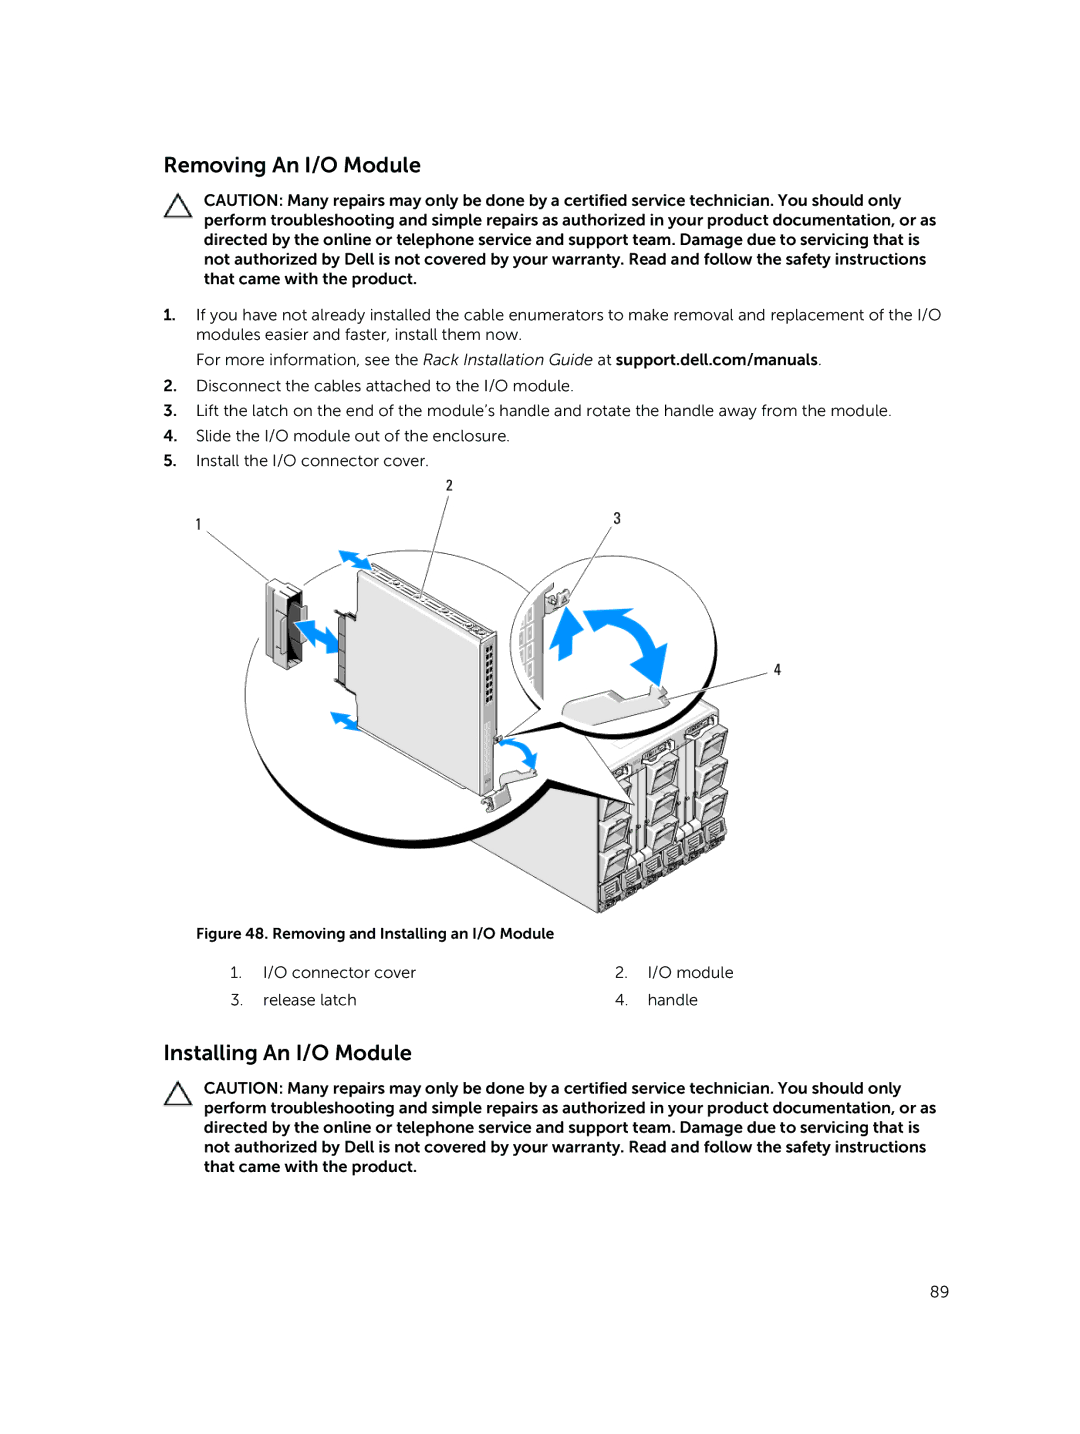
M1000E specifications
The Dell M1000E blade enclosure is a robust and versatile platform designed to optimize data center efficiency and streamline server management. A fundamental component of Dell's PowerEdge series, the M1000E is engineered to house multiple server blades in a compact, modular chassis, enabling organizations to conserve space and reduce power consumption while enhancing performance.One of the main features of the Dell M1000E is its ability to accommodate up to 16 half-height server blades or 8 full-height server blades. This flexibility allows for a diverse range of configurations tailored to specific workloads, whether for virtualization, database management, or application hosting. The chassis provides shared power supplies and cooling, further contributing to the enclosure's efficient operation.
In terms of connectivity, the M1000E includes integrated high-speed networking capabilities. It can support multiple generations of networking technologies, ranging from Gigabit Ethernet to 10 Gigabit Ethernet, and offers options for Fibre Channel and InfiniBand connections. This extensive range of networking options ensures that organizations can integrate the M1000E into existing infrastructures seamlessly.
The Dell M1000E also utilizes advanced management tools to simplify administration and monitoring. One of the standout features is the Dell OpenManage suite, which provides a comprehensive set of tools for hardware management and system updates. Users gain insights into system health, performance, and power usage, enabling proactive maintenance and optimization of resources.
The enclosure is designed with scalability in mind. As businesses grow, the M1000E can be expanded easily by adding more blades without the need for significant reconfiguration. This scalability ensures that IT departments can respond rapidly to changing demands, ensuring that resources align with organizational requirements.
From a security standpoint, the M1000E provides multiple layers of protection, including secure access controls and configurable management interfaces. This helps safeguard sensitive information and ensures compliance with stringent data protection regulations.
Overall, the Dell M1000E blade enclosure represents a compelling solution for modern data centers, merging performance, efficiency, and scalability into a single chassis designed to meet the demands of today’s enterprise environments. Its advanced technologies and features make it a valuable asset for organizations looking to enhance their IT infrastructure.