For more information about installing the expansion enclosure, see the Dell Storage Center
SCv2000/SCv2020 Storage System Deployment Guide.
Installing the Front Bezel
Install the bezel on the front of the expansion enclosure.
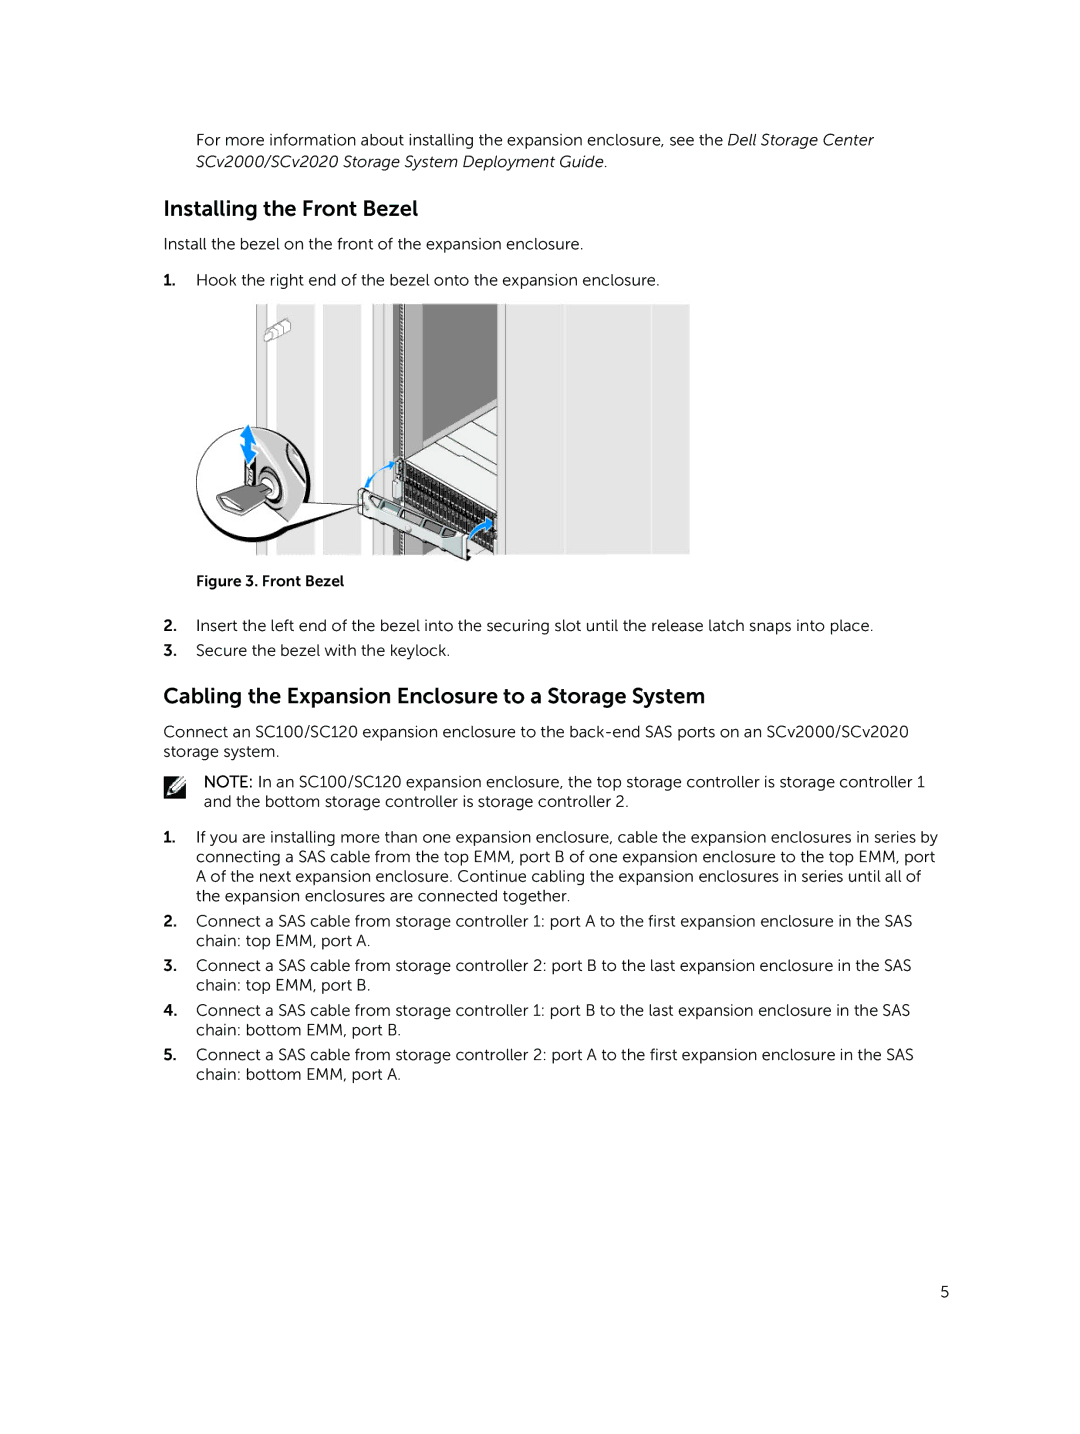
1.Hook the right end of the bezel onto the expansion enclosure.
Figure 3. Front Bezel
2.Insert the left end of the bezel into the securing slot until the release latch snaps into place.
3.Secure the bezel with the keylock.
Cabling the Expansion Enclosure to a Storage System
Connect an SC100/SC120 expansion enclosure to the
NOTE: In an SC100/SC120 expansion enclosure, the top storage controller is storage controller 1 and the bottom storage controller is storage controller 2.
1.If you are installing more than one expansion enclosure, cable the expansion enclosures in series by connecting a SAS cable from the top EMM, port B of one expansion enclosure to the top EMM, port A of the next expansion enclosure. Continue cabling the expansion enclosures in series until all of the expansion enclosures are connected together.
2.Connect a SAS cable from storage controller 1: port A to the first expansion enclosure in the SAS
chain: top EMM, port A.
3.Connect a SAS cable from storage controller 2: port B to the last expansion enclosure in the SAS
chain: top EMM, port B.
4.Connect a SAS cable from storage controller 1: port B to the last expansion enclosure in the SAS
chain: bottom EMM, port B.
5.Connect a SAS cable from storage controller 2: port A to the first expansion enclosure in the SAS
chain: bottom EMM, port A.
5
