HOW TO USE YOUR HEATER
Required Tools (not included): 1 Screwdriver PH 2 x 100 (Phillips type)
Estimated assembly time: 5 minutes
FEET ASSEMBLING
Remove the feet from the packing.
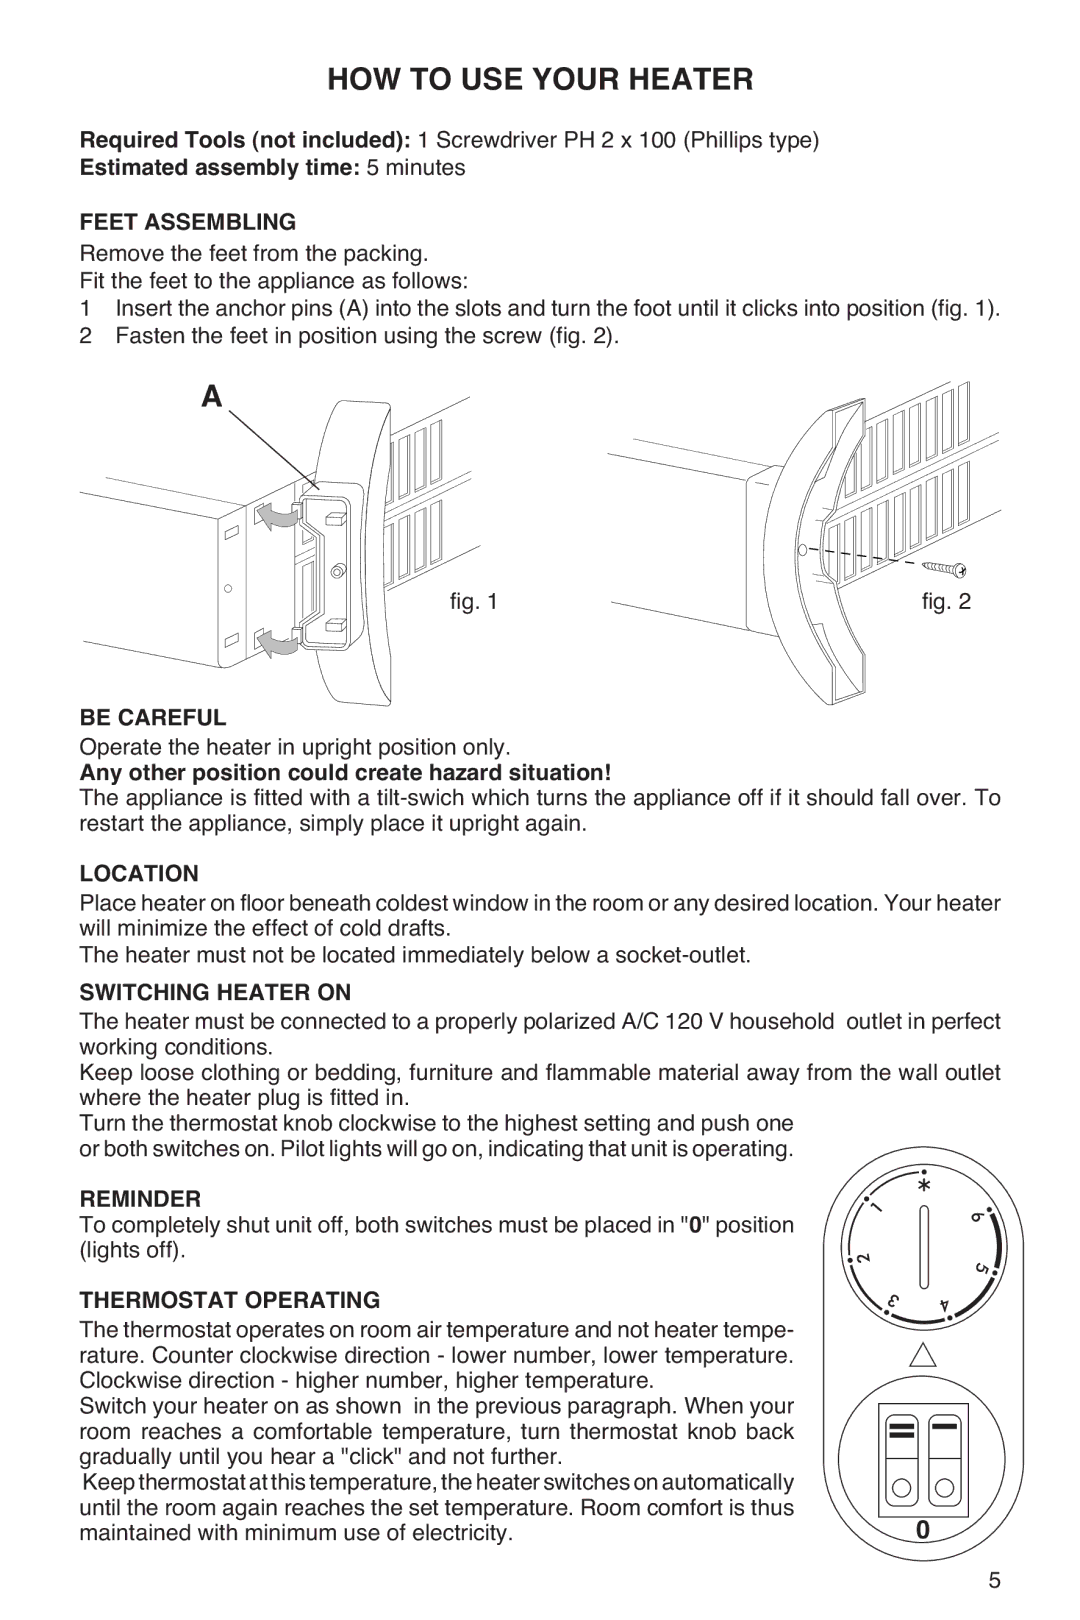
Fit the feet to the appliance as follows:
1Insert the anchor pins (A) into the slots and turn the foot until it clicks into position (fig. 1).
2 Fasten the feet in position using the screw (fig. 2).
A
fig. 1 | fig. 2 |
BE CAREFUL
Operate the heater in upright position only.
Any other position could create hazard situation!
The appliance is fitted with a
LOCATION
Place heater on floor beneath coldest window in the room or any desired location. Your heater will minimize the effect of cold drafts.
The heater must not be located immediately below a
SWITCHING HEATER ON
The heater must be connected to a properly polarized A/C 120 V household outlet in perfect working conditions.
Keep loose clothing or bedding, furniture and flammable material away from the wall outlet where the heater plug is fitted in.
Turn the thermostat knob clockwise to the highest setting and push one or both switches on. Pilot lights will go on, indicating that unit is operating.
REMINDER
To completely shut unit off, both switches must be placed in "0" position (lights off).
THERMOSTAT OPERATING |
|
The thermostat operates on room air temperature and not heater tempe- |
|
rature. Counter clockwise direction - lower number, lower temperature. |
|
Clockwise direction - higher number, higher temperature. |
|
Switch your heater on as shown in the previous paragraph. When your |
|
room reaches a comfortable temperature, turn thermostat knob back |
|
gradually until you hear a "click" and not further. |
|
Keepthermostatatthistemperature,theheaterswitchesonautomatically |
|
until the room again reaches the set temperature. Room comfort is thus | 0 |
maintained with minimum use of electricity. |
5
