5) SW2 is used to enable or disable the converter.
For positive logic module, When SW2 is pose for the ON position, the converter is ON, and SW2 is pose for the OFF position, the converter is OFF.
For negative logic module, When SW2 is pose for the ON position, the converter is OFF, and SW2 is pose for the OFF position, the converter is ON.
6) SW3 is used for the Output Voltage
If the converter requires a trim up, push the SW3_1 to ON position.
If the converter requires a trim down, push the SW3_2 to ON position. By an external resistor:
If the converter requires a trim up to Vo,set, push the SW3_8 to ON position. If the converter requires a margin trim down, push the SW3_3 to ON position. If the converter requires a margin trim up, push the SW3_4 to ON position.
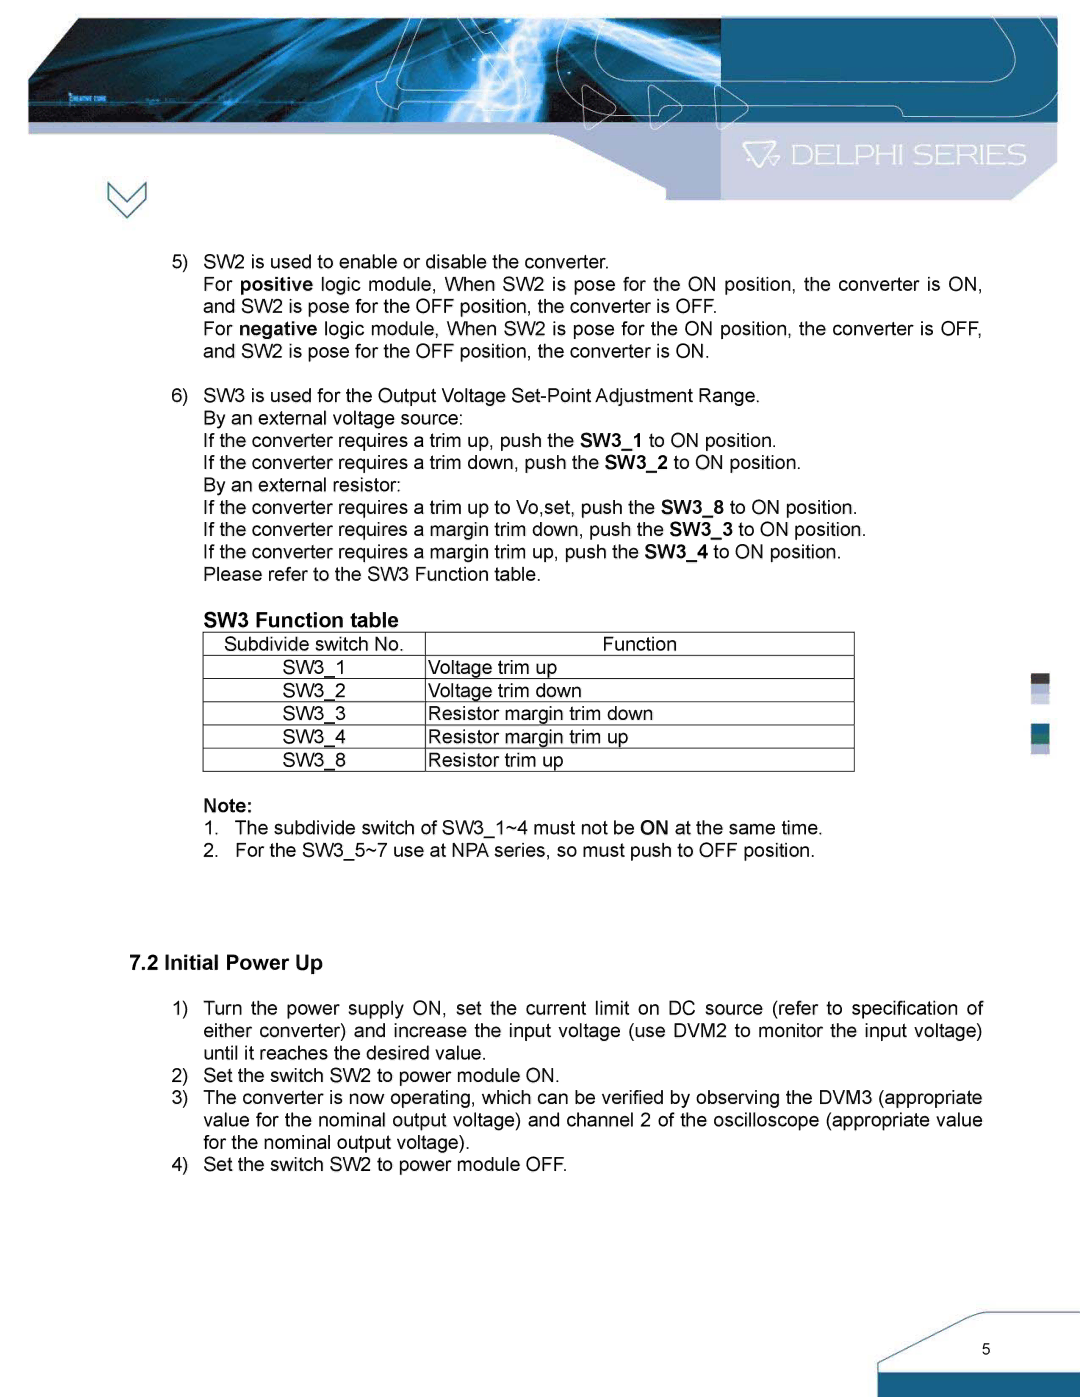
Please refer to the SW3 Function table.
SW3 Function table
| Subdivide switch No. | Function |
| SW3_1 | Voltage trim up |
| SW3_2 | Voltage trim down |
| SW3_3 | Resistor margin trim down |
| SW3_4 | Resistor margin trim up |
| SW3_8 | Resistor trim up |
Note: |
| |
1. | The subdivide switch of SW3_1~4 must not be ON at the same time. | |
2. | For the SW3_5~7 use at NPA series, so must push to OFF position. | |
7.2 Initial Power Up
1) Turn the power supply ON, set the current limit on DC source (refer to specification of either converter) and increase the input voltage (use DVM2 to monitor the input voltage) until it reaches the desired value.
2) Set the switch SW2 to power module ON.
3) The converter is now operating, which can be verified by observing the DVM3 (appropriate value for the nominal output voltage) and channel 2 of the oscilloscope (appropriate value for the nominal output voltage).
4) Set the switch SW2 to power module OFF.
5