VENT-FREE PROPANE/LP HEATER
ASSEMBLY
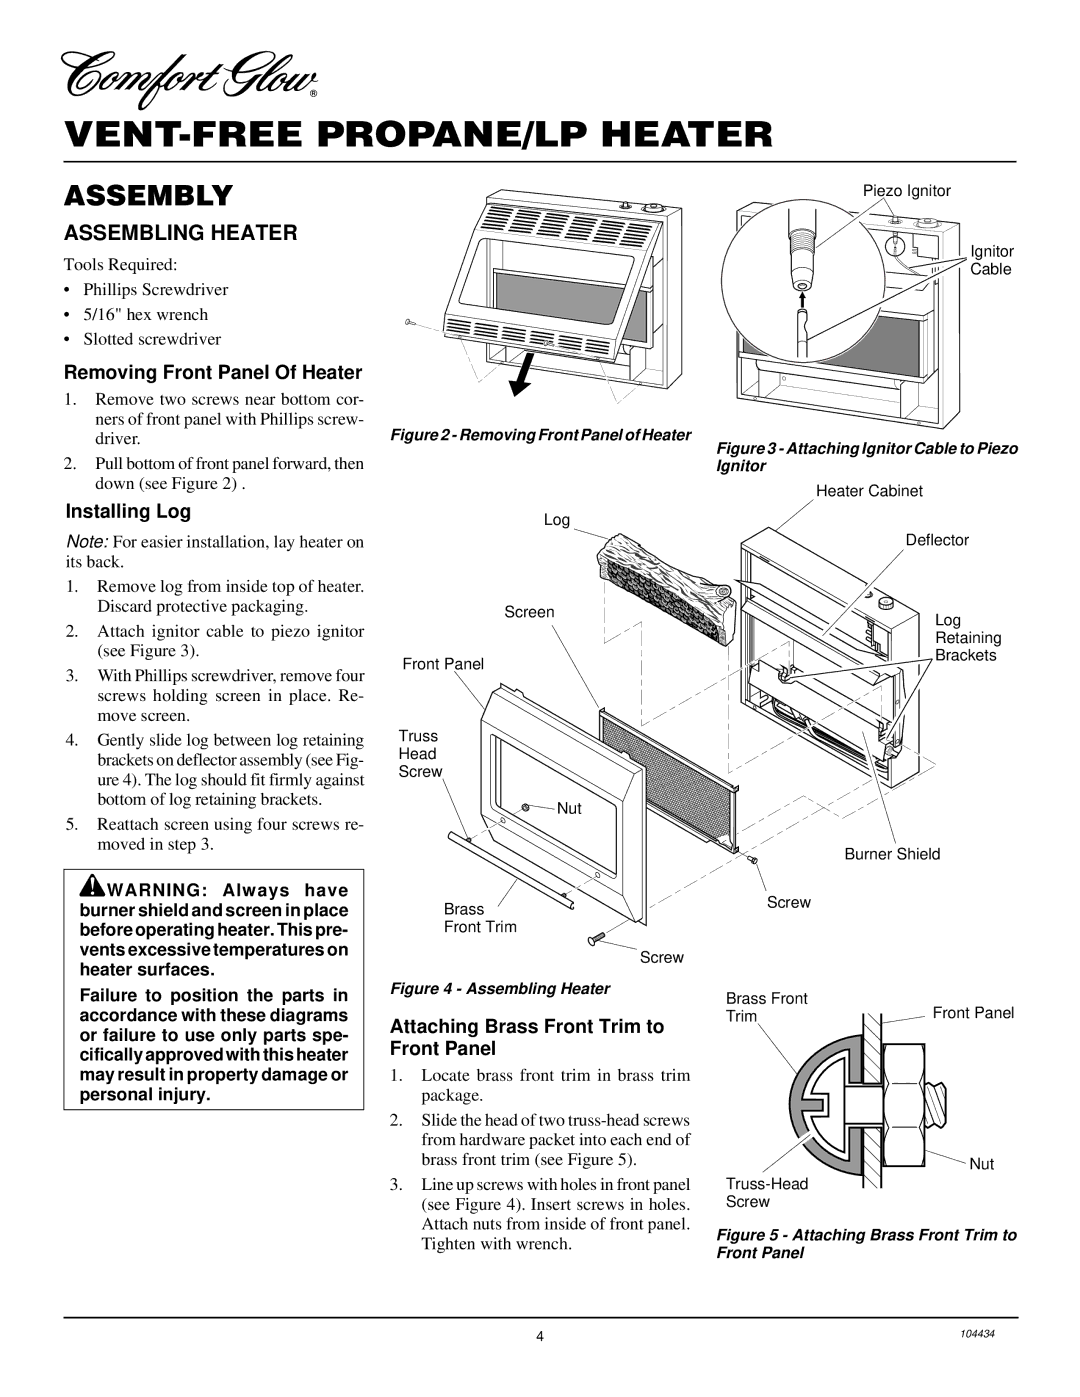
ASSEMBLING HEATER
Tools Required:
•Phillips Screwdriver
•5/16" hex wrench
•Slotted screwdriver
Removing Front Panel Of Heater
1.Remove two screws near bottom cor- ners of front panel with Phillips screw- driver.
2.Pull bottom of front panel forward, then down (see Figure 2) .
Installing Log
Note: For easier installation, lay heater on its back.
1.Remove log from inside top of heater. Discard protective packaging.
2.Attach ignitor cable to piezo ignitor (see Figure 3).
3.With Phillips screwdriver, remove four screws holding screen in place. Re- move screen.
4.Gently slide log between log retaining brackets on deflector assembly (see Fig- ure 4). The log should fit firmly against bottom of log retaining brackets.
5.Reattach screen using four screws re- moved in step 3.
WARNING: Always have burner shield and screen in place before operating heater. This pre- vents excessive temperatures on heater surfaces.
Failure to position the parts in accordance with these diagrams or failure to use only parts spe- cifically approved with this heater may result in property damage or personal injury.
Figure 2 - Removing Front Panel of Heater
Log
Screen
Front Panel
Truss
Head
Screw
Nut
Brass
Front Trim
Screw
Figure 4 - Assembling Heater
Attaching Brass Front Trim to Front Panel
1.Locate brass front trim in brass trim package.
2.Slide the head of two
3.Line up screws with holes in front panel (see Figure 4). Insert screws in holes. Attach nuts from inside of front panel. Tighten with wrench.
Piezo Ignitor
Ignitor
Cable
Figure 3 - Attaching Ignitor Cable to Piezo Ignitor
Heater Cabinet
Deflector
Log
Retaining
Brackets
Burner Shield
Screw
Brass Front | Front Panel |
Trim |
Nut
Screw
Figure 5 - Attaching Brass Front Trim to Front Panel
4 | 104434 |