OPERATION
To Start Heater (Cont.)
Flame Patterns
To Stop Heater
To Restart Heater
STORAGE
OPERATION
Continued
5
7.After ignition, hold control knob down for about 30 seconds. This activates the automatic control system.
8.When burner remains lit, set heater at the desired heat level by slightly depressing the control knob and turning it counterclock- wise to the MED or HIGH settings (see Figure 4, page 4).
9.If burner goes out, turn off gas. Slightly depress and turn con- trol knob fully clockwise to OFF. Check fuel supply. If ad- equate fuel is available, restart heater beginning at step #1, page 4.
FLAME PATTERNS
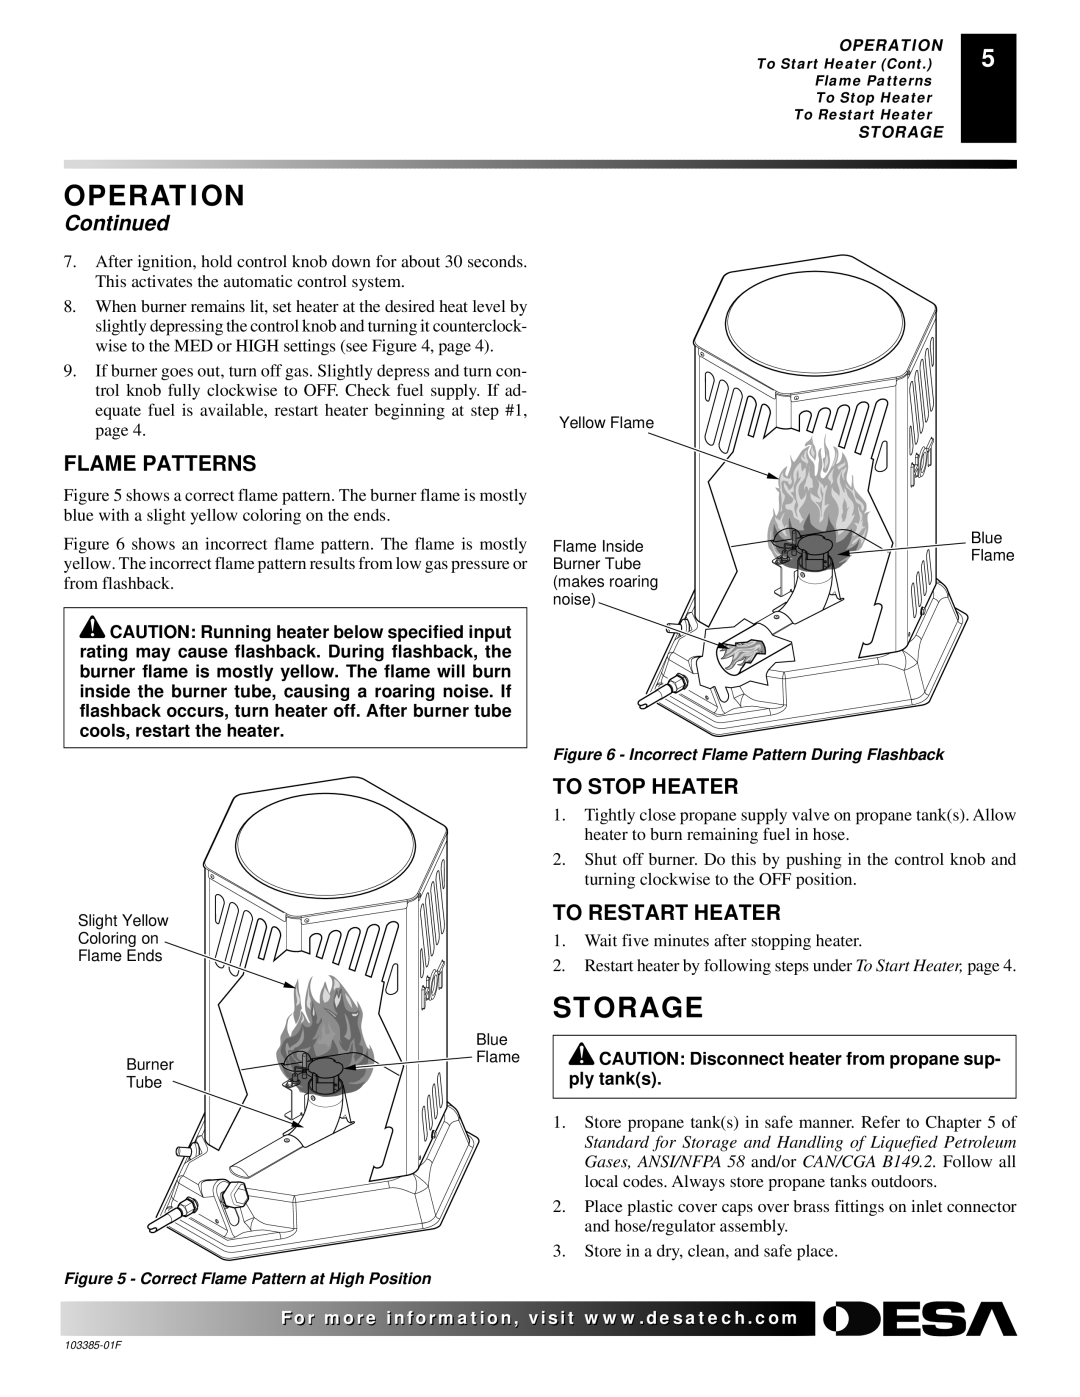
Figure 5 shows a correct flame pattern. The burner flame is mostly blue with a slight yellow coloring on the ends.
Figure 6 shows an incorrect flame pattern. The flame is mostly yellow. The incorrect flame pattern results from low gas pressure or from flashback.
![]() CAUTION: Running heater below specified input rating may cause flashback. During flashback, the burner flame is mostly yellow. The flame will burn inside the burner tube, causing a roaring noise. If flashback occurs, turn heater off. After burner tube cools, restart the heater.
CAUTION: Running heater below specified input rating may cause flashback. During flashback, the burner flame is mostly yellow. The flame will burn inside the burner tube, causing a roaring noise. If flashback occurs, turn heater off. After burner tube cools, restart the heater.
Yellow Flame
Flame Inside | Blue | |
Flame | ||
Burner Tube | ||
| ||
(makes roaring |
| |
noise) |
|
Figure 6 - Incorrect Flame Pattern During Flashback
Slight Yellow Coloring on Flame Ends
Burner
Tube
Blue
Flame
TO STOP HEATER
1.Tightly close propane supply valve on propane tank(s). Allow heater to burn remaining fuel in hose.
2.Shut off burner. Do this by pushing in the control knob and turning clockwise to the OFF position.
TO RESTART HEATER
1.Wait five minutes after stopping heater.
2.Restart heater by following steps under To Start Heater, page 4.
STORAGE
![]() CAUTION: Disconnect heater from propane sup- ply tank(s).
CAUTION: Disconnect heater from propane sup- ply tank(s).
1.Store propane tank(s) in safe manner. Refer to Chapter 5 of Standard for Storage and Handling of Liquefied Petroleum Gases, ANSI/NFPA 58 and/or CAN/CGA B149.2. Follow all local codes. Always store propane tanks outdoors.
2.Place plastic cover caps over brass fittings on inlet connector and hose/regulator assembly.
3.Store in a dry, clean, and safe place.
Figure 5 - Correct Flame Pattern at High Position
![]()
![]()
![]()
![]() For more information, visit www.desatech.com
For more information, visit www.desatech.com
