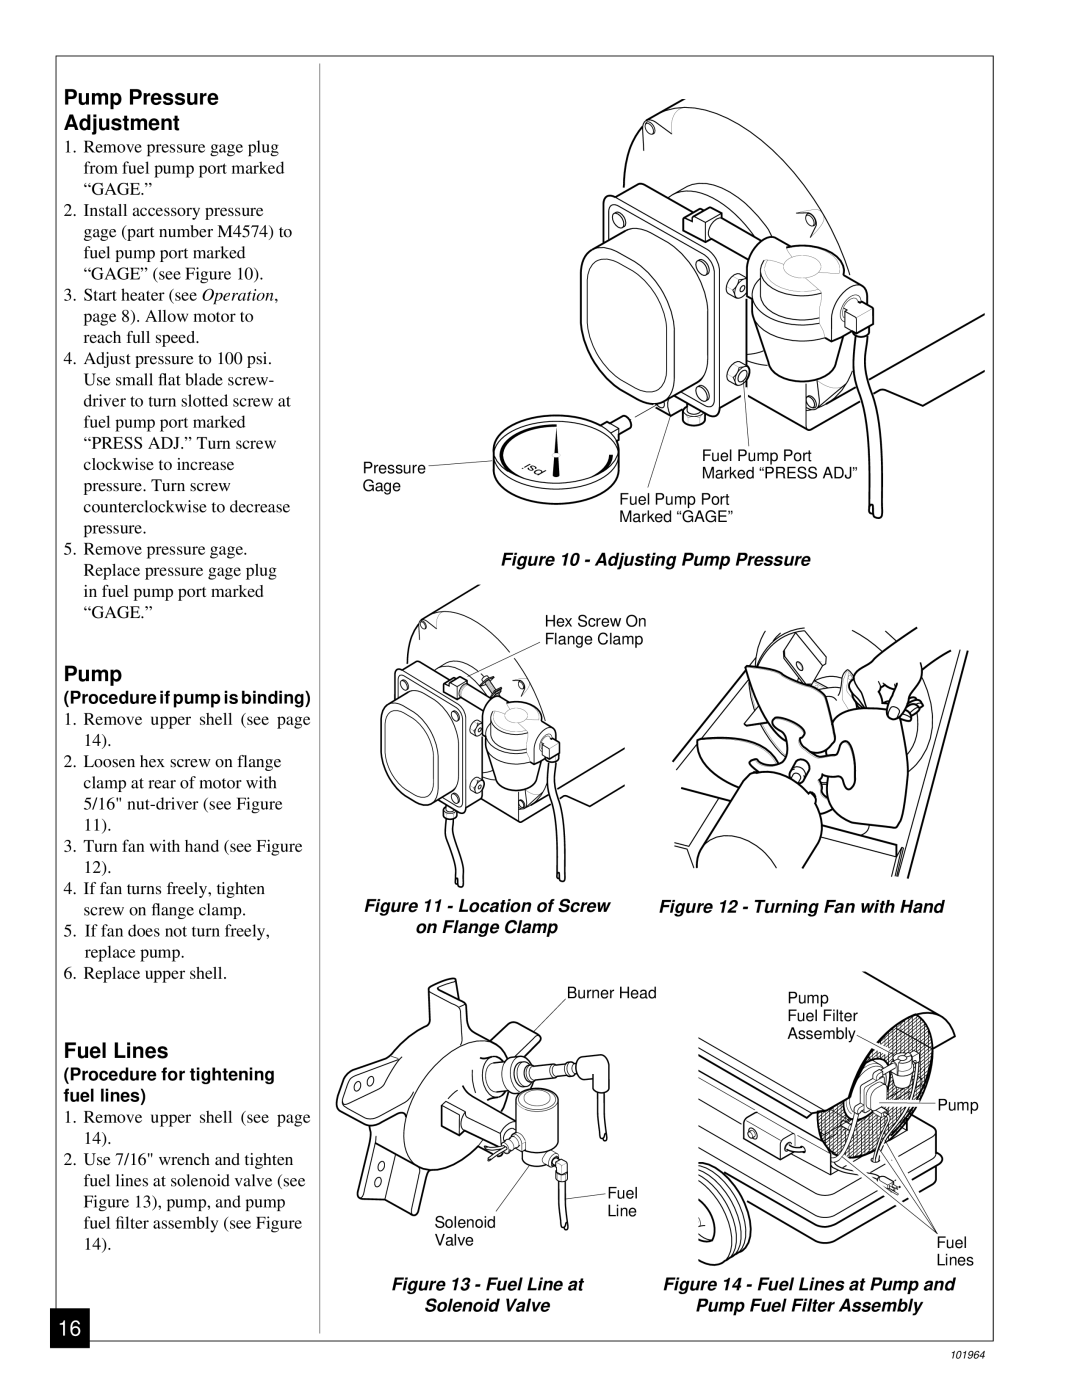
B350CE specifications
The Desa B350CE is a highly regarded model that combines functionality, efficiency, and modern features, making it an attractive choice for professionals and hobbyists alike. This device is primarily recognized for its innovative approach to comfort and sustainability, positioning itself as a versatile option in its category.One of the standout features of the Desa B350CE is its advanced heating technology. The model employs a state-of-the-art combustion system, allowing for efficient fuel consumption while delivering powerful heating output. This aspect is particularly appreciated in colder climates, where maintaining a consistent and comfortable temperature is vital. The B350CE is capable of quickly heating spaces, making it suitable for various applications, including workshops and residential settings.
The Desa B350CE also includes smart controls that enhance user experience. With an intuitive interface, it allows users to easily adjust settings and monitor performance, ensuring optimal operation. These controls support temperature regulation, enabling users to maintain their desired comfort levels with minimal effort. Furthermore, its programmable timer function adds a layer of convenience, allowing for pre-scheduled heating cycles.
Another significant characteristic of the Desa B350CE is its focus on safety. It incorporates multiple safety features such as overheat protection and automatic shut-off capabilities. These features are designed to prevent accidents and offer peace of mind, especially in busy environments where oversight is common. The robust build quality of the unit ensures longevity, further emphasizing its reliability for long-term use.
The energy efficiency of the Desa B350CE cannot be overlooked. It is designed to operate efficiently, reducing fuel consumption and lowering operational costs. As users become more environmentally conscious, this model aligns with sustainability goals by providing effective heating solutions while minimizing its carbon footprint.
In summary, the Desa B350CE stands out in the market with its powerful performance, user-friendly controls, and commitment to safety and efficiency. With its innovative features, it caters to a wide range of heating needs, making it a worthwhile investment for anyone seeking effective and reliable heating solutions. This combination of technology and practical design makes the Desa B350CE a leader in its class.