PROPANE SUPPLY
Propane gas and propane tank(s) are to be fur- nished by the user.
Use this heater only with a propane vapor
4.Check all connections for leaks. Apply mixture of liquid soap and water to gas joints. Bubbles forming show a leak that must be corrected.
5.Close propane supply valve.
withdrawal supply system. See Chapter 5 of the Standard for Storage and Handling of Liquefied Petroleum Gas, ANSI/NFPA 58 and/or CAN/CGA B149.2. Your local library or fire department will have this booklet.
The amount of propane gas ready for use from propane tanks varies. Two factors decide this amount:
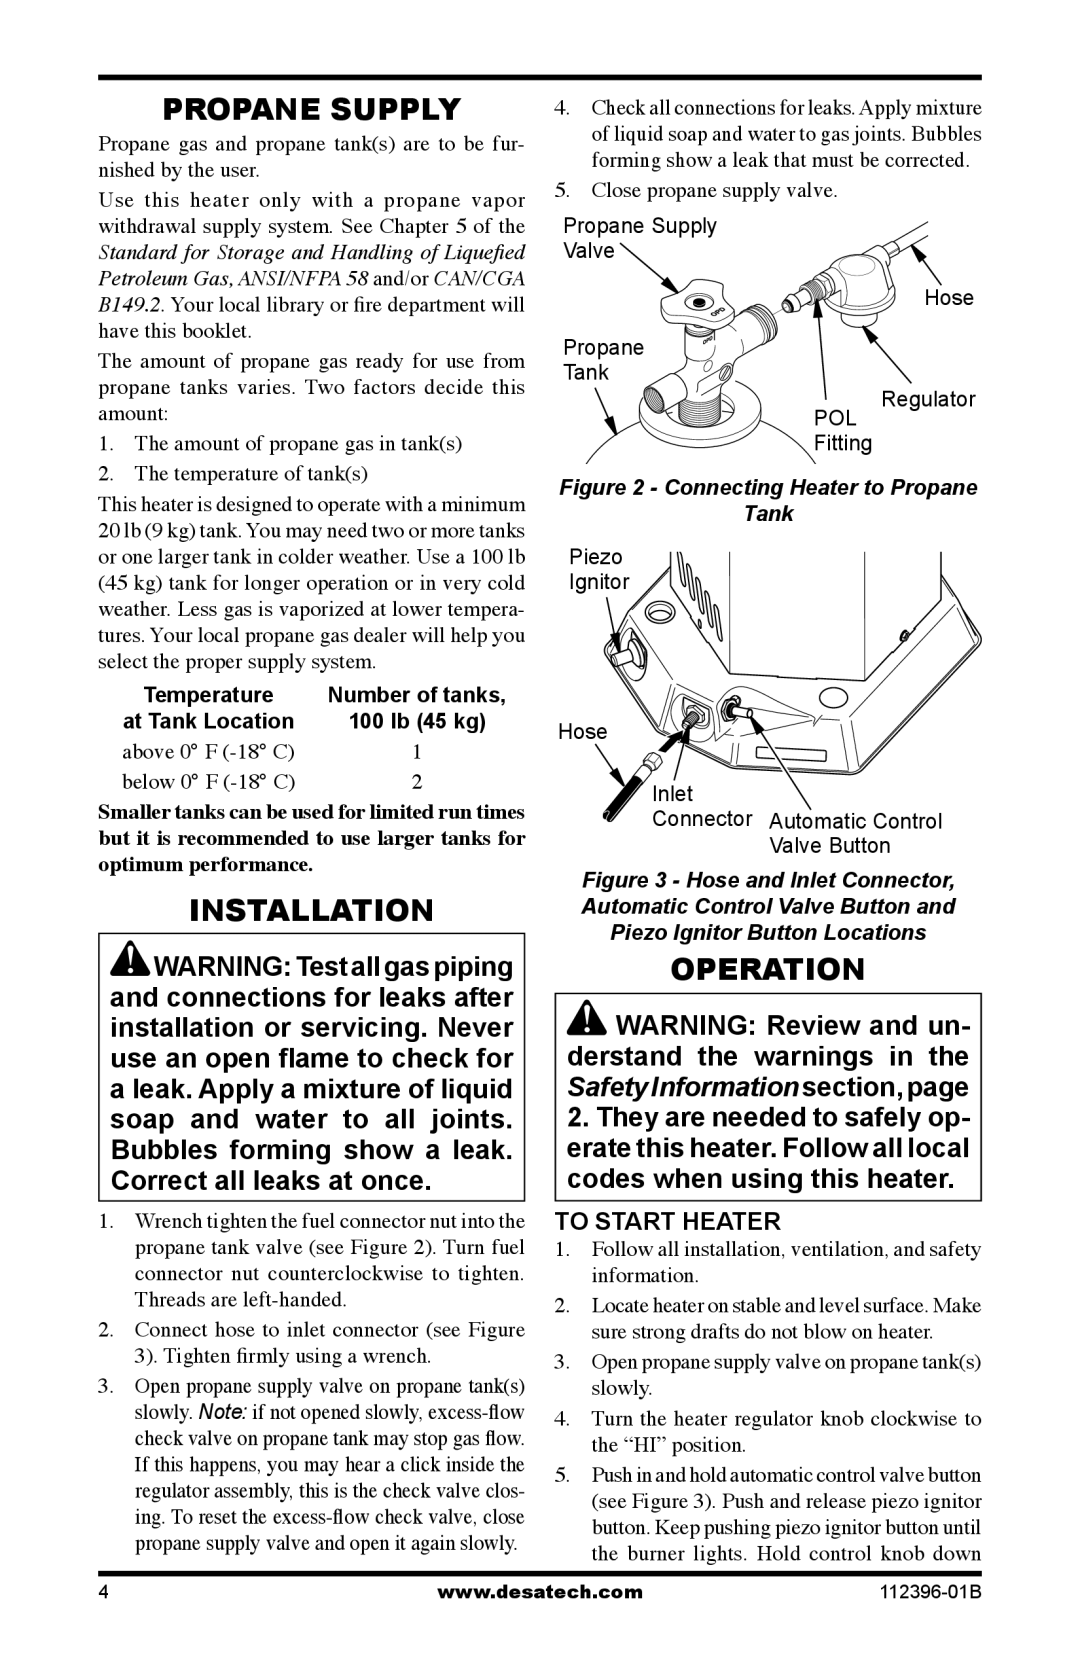
Propane Supply
Valve ![]()
Propane
Tank
POL
Hose
Regulator
1.The amount of propane gas in tank(s)
2.The temperature of tank(s)
This heater is designed to operate with a minimum |
20 lb (9 kg) tank. You may need two or more tanks |
Fitting
Figure 2 - Connecting Heater to Propane
Tank
or one larger tank in colder weather. Use a 100 lb | |
(45 kg) tank for longer operation or in very cold | |
weather. Less gas is vaporized at lower tempera- | |
tures. Your local propane gas dealer will help you | |
select the proper supply system. | |
Temperature | Number of tanks, |
at Tank Location | 100 lb (45 kg) |
above 0° F | 1 |
below 0° F | 2 |
Smaller tanks can be used for limited run times | |
but it is recommended to use larger tanks for | |
optimum performance. |
|
Piezo
Ignitor
Hose
Inlet
Connector
Automatic Control Valve Button
INSTALLATION |
|
WARNING:Testallgaspiping |
and connections for leaks after |
installation or servicing. Never |
use an open flame to check for |
a leak. Apply a mixture of liquid |
soap and water to all joints. |
Bubbles forming show a leak. |
Correct all leaks at once. |
|
1.Wrench tighten the fuel connector nut into the propane tank valve (see Figure 2). Turn fuel connector nut counterclockwise to tighten. Threads are
2.Connect hose to inlet connector (see Figure 3). Tighten firmly using a wrench.
3.Open propane supply valve on propane tank(s) slowly. Note: if not opened slowly,
Figure 3 - Hose and Inlet Connector,
Automatic Control Valve Button and
Piezo Ignitor Button Locations
OPERATION
![]() WARNING: Review and un- derstand the warnings in the Safety Information section, page
WARNING: Review and un- derstand the warnings in the Safety Information section, page
2.They are needed to safely op- erate this heater. Follow all local codes when using this heater.
TO START HEATER
1.Follow all installation, ventilation, and safety information.
2.Locate heater on stable and level surface. Make sure strong drafts do not blow on heater.
3.Open propane supply valve on propane tank(s) slowly.
4.Turn the heater regulator knob clockwise to the “HI” position.
5.Push in and hold automatic control valve button (see Figure 3). Push and release piezo ignitor button. Keep pushing piezo ignitor button until the burner lights. Hold control knob down
4 | www.desatech.com |