10
INSTALLATION
Installing Log Set (Cont.)
INSTALLATION
Continued
Model CD42M-A
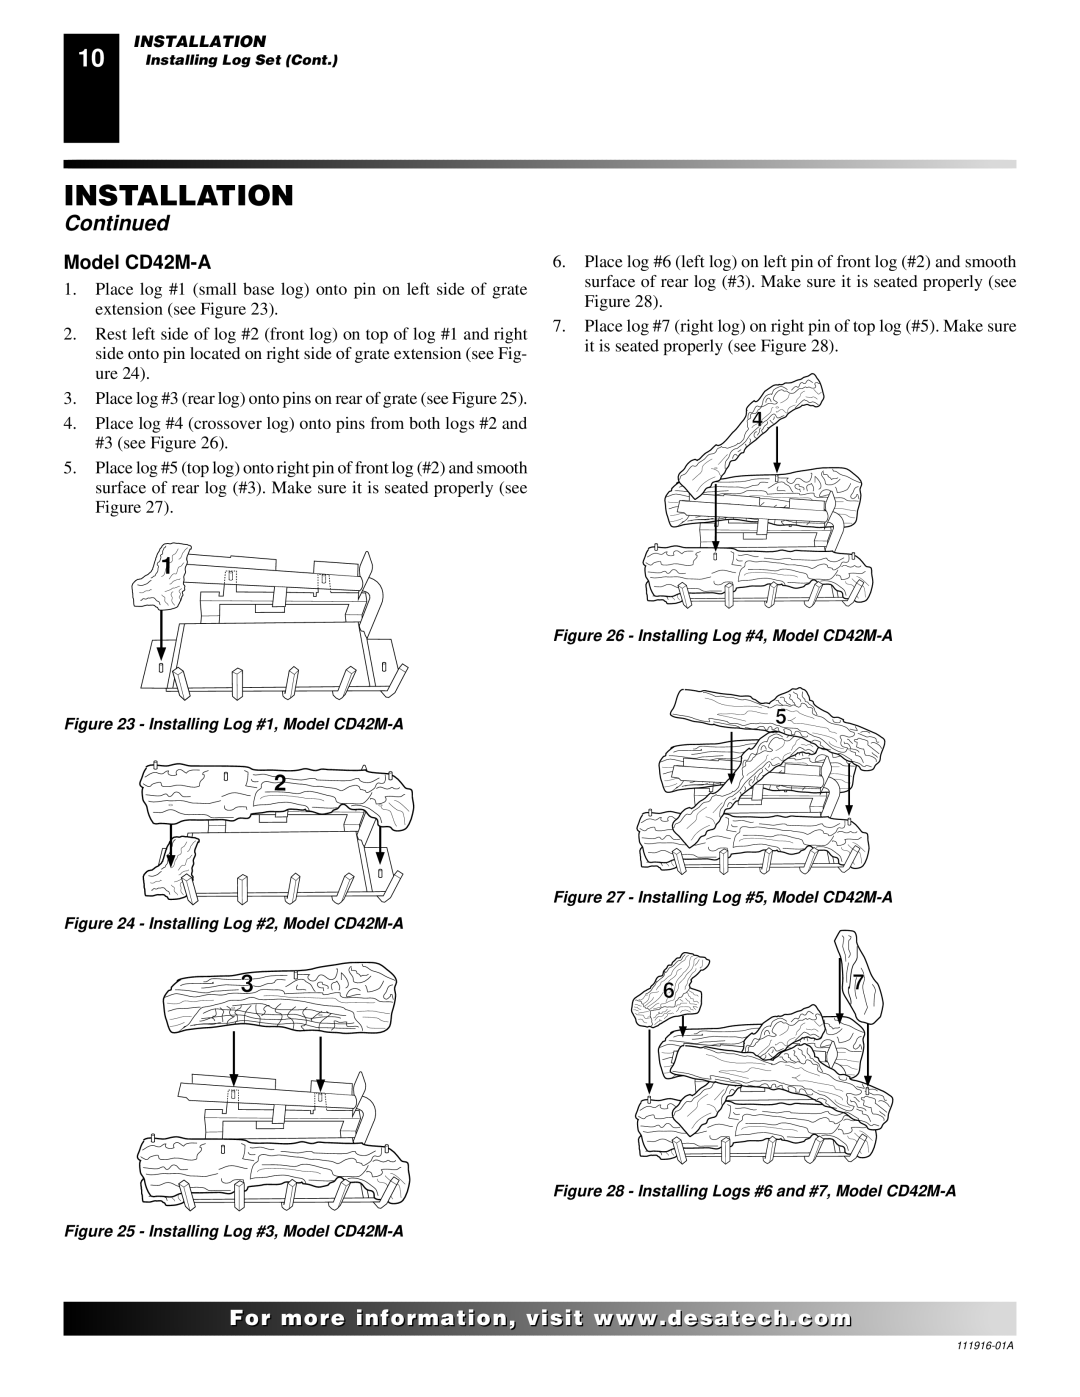
1.Place log #1 (small base log) onto pin on left side of grate extension (see Figure 23).
2.Rest left side of log #2 (front log) on top of log #1 and right side onto pin located on right side of grate extension (see Fig- ure 24).
3.Place log #3 (rear log) onto pins on rear of grate (see Figure 25).
4.Place log #4 (crossover log) onto pins from both logs #2 and #3 (see Figure 26).
5.Place log #5 (top log) onto right pin of front log (#2) and smooth surface of rear log (#3). Make sure it is seated properly (see Figure 27).
1
6.Place log #6 (left log) on left pin of front log (#2) and smooth surface of rear log (#3). Make sure it is seated properly (see Figure 28).
7.Place log #7 (right log) on right pin of top log (#5). Make sure it is seated properly (see Figure 28).
4
Figure 23 - Installing Log #1, Model CD42M-A
2
Figure 24 - Installing Log #2, Model CD42M-A
Figure 26 - Installing Log #4, Model CD42M-A
5
Figure 27 - Installing Log #5, Model CD42M-A
3
Figure 25 - Installing Log #3, Model CD42M-A
6 | 7 |
|
Figure 28 - Installing Logs #6 and #7, Model CD42M-A
![]()
![]()
![]()
![]()
![]() For
For![]()
![]()
![]()
![]()
![]()
![]()
![]()
![]()
![]()
![]()
![]()
![]()
![]() .
.![]()
![]()
![]()
![]() .com
.com![]()
![]()
![]()
![]()
![]()
