OWNER’S MANUAL
FIREPLACE INSTALLATION
Continued
WIRELESS HAND-HELD REMOTE CONTROL
Installing Battery into Receiver
1. | Open bottom louver and locate the |
| switch bracket on the left. |
2. | Unscrew the switch bracket. Lean |
| bracket forward so you are able to ac- |
| cess the back of the remote receiver. |
3. | Locate the battery clip mounted on the |
REMOVING/REPLACING GLASS DOOR
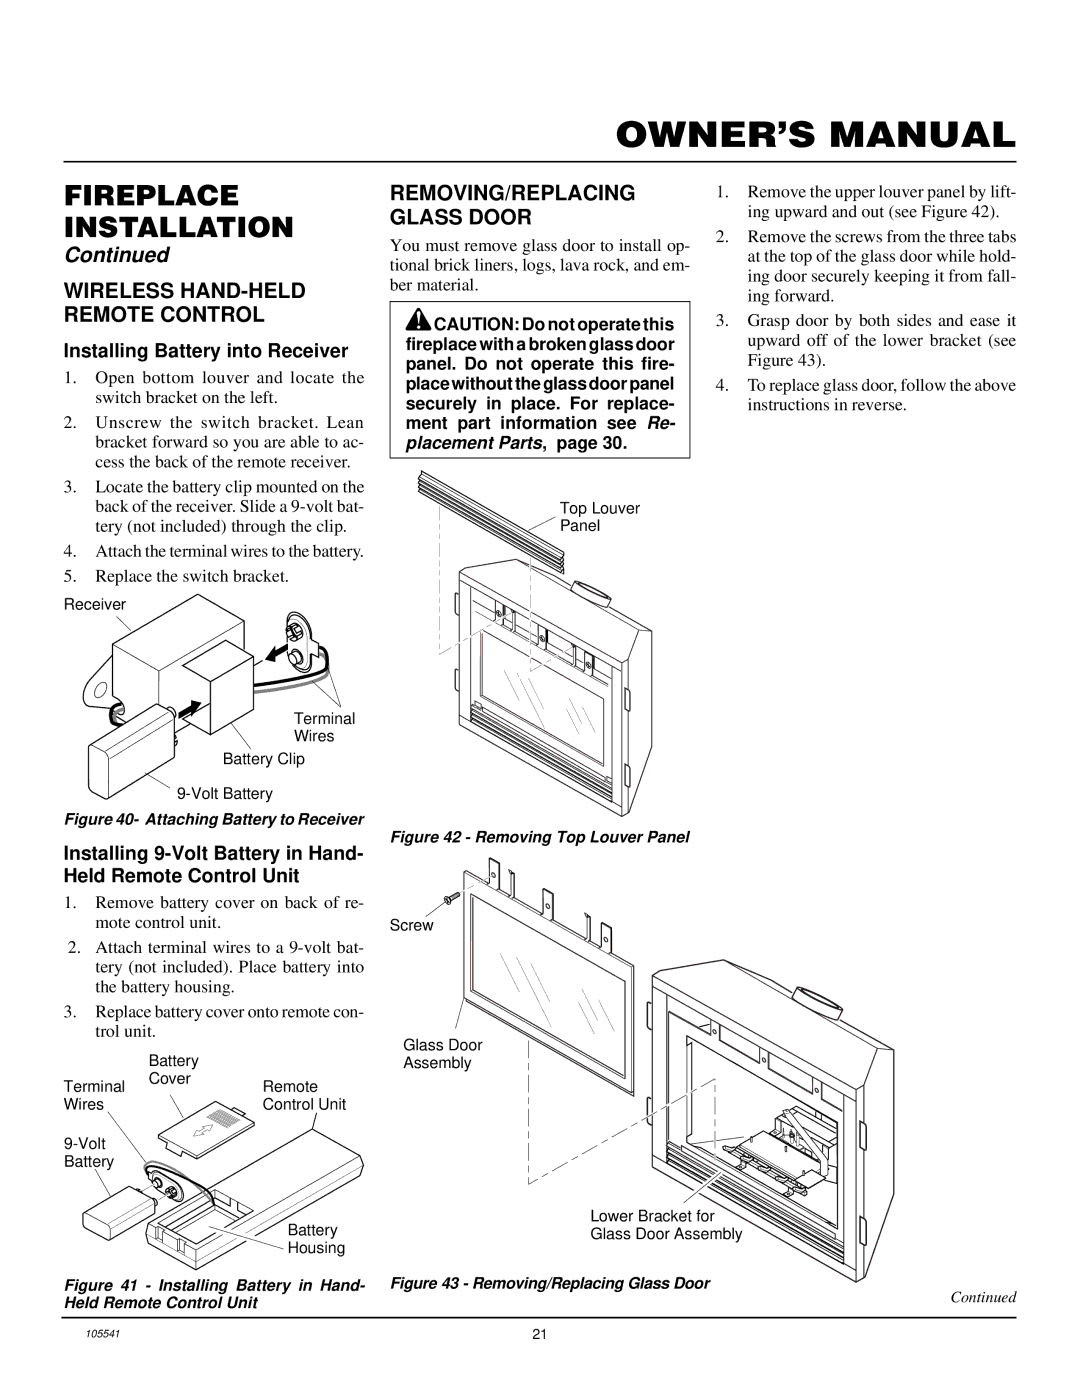
You must remove glass door to install op- tional brick liners, logs, lava rock, and em- ber material.
![]() CAUTION: Do not operate this fireplace with a broken glass door panel. Do not operate this fire- place without the glass door panel securely in place. For replace- ment part information see Re- placement Parts, page 30.
CAUTION: Do not operate this fireplace with a broken glass door panel. Do not operate this fire- place without the glass door panel securely in place. For replace- ment part information see Re- placement Parts, page 30.
1.Remove the upper louver panel by lift- ing upward and out (see Figure 42).
2.Remove the screws from the three tabs at the top of the glass door while hold- ing door securely keeping it from fall- ing forward.
3.Grasp door by both sides and ease it upward off of the lower bracket (see Figure 43).
4.To replace glass door, follow the above instructions in reverse.
| back of the receiver. Slide a |
| tery (not included) through the clip. |
4. | Attach the terminal wires to the battery. |
5. | Replace the switch bracket. |
Receiver
Terminal
Wires
Battery Clip
Figure 40- Attaching Battery to Receiver
Installing 9-Volt Battery in Hand- Held Remote Control Unit
1.Remove battery cover on back of re- mote control unit.
2.Attach terminal wires to a
3.Replace battery cover onto remote con- trol unit.
| Battery |
|
Terminal | Cover | Remote |
| ||
Wires |
| Control Unit |
|
| |
Battery |
|
|
|
| Battery |
|
| Housing |
Figure 41 - Installing Battery in Hand- Held Remote Control Unit
Top Louver
![]() Panel
Panel
Figure 42 - Removing Top Louver Panel
Screw
Glass Door
Assembly
Lower Bracket for
Glass Door Assembly
Figure 43 - Removing/Replacing Glass Door
Continued
105541 | 21 |
