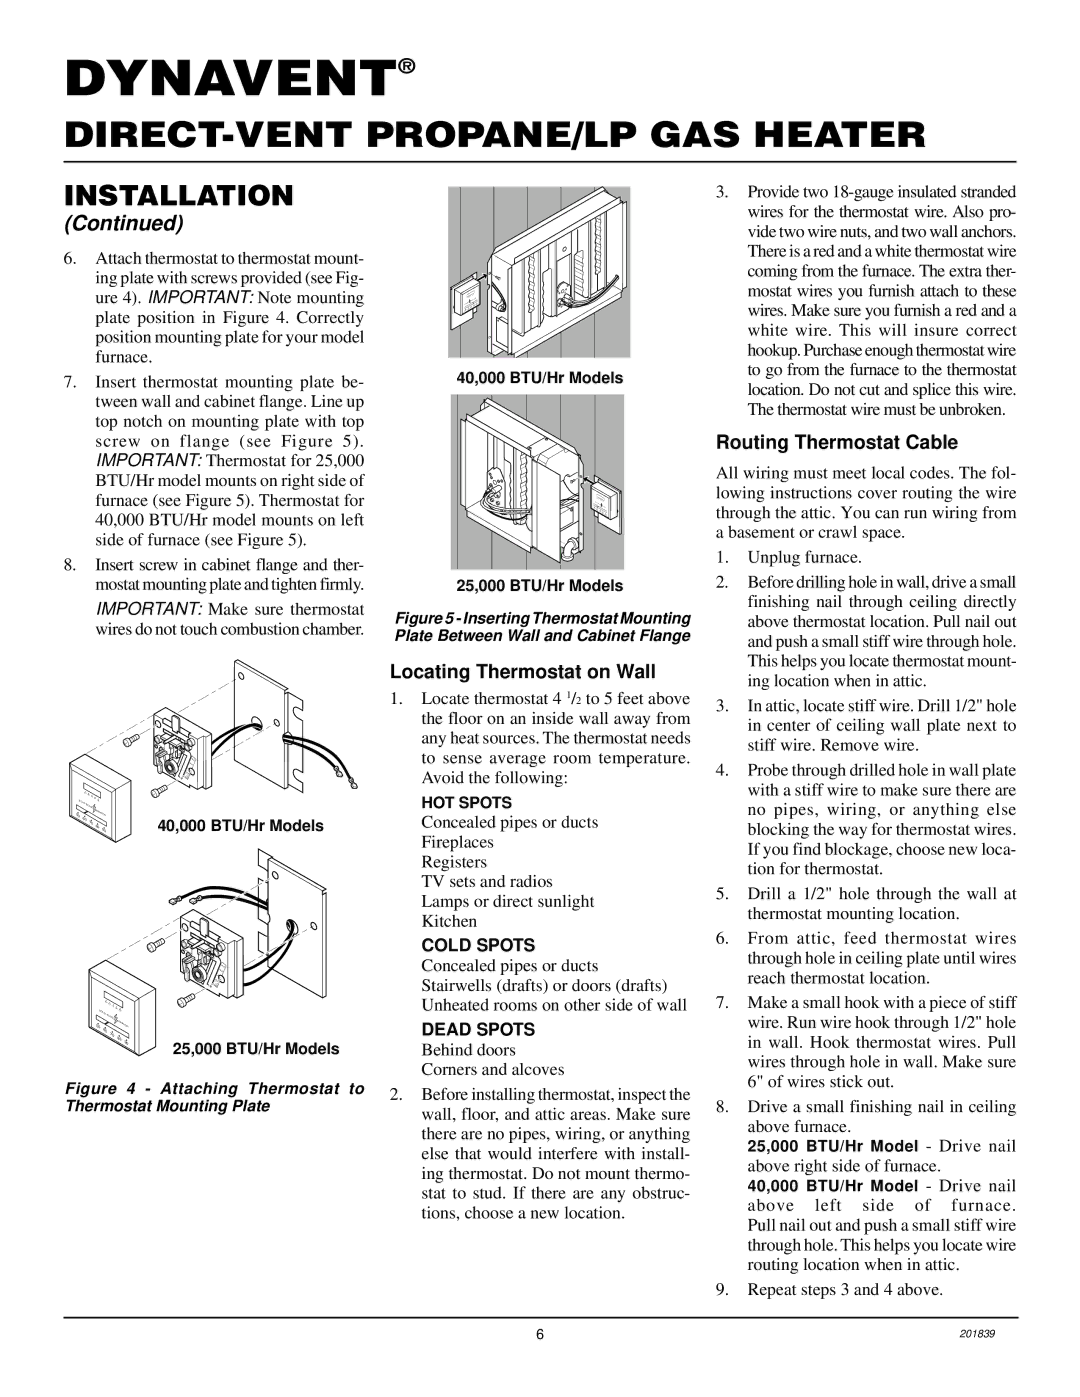
DNV40PB, DNV25PB specifications
Desa DNV25PB and DNV40PB are two advanced models in the range of DNV portable heaters renowned for their efficiency and innovative technology. These heaters are designed to provide reliable and effective heating solutions for various applications, from industrial settings to outdoor events.One of the standout features of the DNV25PB and DNV40PB models is their robust construction, making them suitable for rigorous work environments. Both models are built with high-quality materials that ensure durability and resilience even in challenging conditions. This makes them an ideal choice for industries such as construction, warehouses, and agriculture, where reliable heating is essential.
The performance of the DNV heaters is enhanced by their powerful heating capacity. The DNV25PB model can deliver an impressive output of 25 kW, while the DNV40PB model boasts a strong 40 kW output. This substantial heating capability allows them to heat large spaces quickly and efficiently, providing comfort in less time and reducing energy costs. Additionally, both models come equipped with adjustable heating settings, allowing users to tailor the output to meet their specific needs.
These heaters incorporate advanced technologies that prioritize energy efficiency and safety. They are designed with smart control systems that monitor and adjust the heater's operation, optimizing fuel consumption while delivering consistent heat. Furthermore, safety features such as automatic shut-off mechanisms and overheating protection devices are integrated into both models, ensuring safe operation even in extended use.
Portability is another significant characteristic of the DNV25PB and DNV40PB models. Their compact design, coupled with built-in handles and wheels, allows for easy transport between different sites, making them highly versatile. Users can effortlessly relocate the heaters to adapt to changing conditions or requirements, enhancing their practicality.
In summary, the Desa DNV25PB and DNV40PB portable heaters are characterized by their powerful heating capabilities, robust construction, energy efficiency, and safety features. They are well-suited for various industrial and outdoor applications, offering flexibility and reliable performance. With their innovative technology and thoughtful design, these models stand out in the market, providing effective heating solutions to meet diverse needs. Whether for temporary heating at a construction site or providing warmth for outdoor gatherings, the DNV series offers dependable performance tailored to user requirements.