OWNER’S MANUAL
OPERATING CHAIN SAW
Continued
OILING CHAIN
Always check oil level before using saw. To oil chain, press squeeze bulb on oil cap. Do not attempt to operate the oiler while cut- ting with the saw. Oil will feed onto guide bar and chain. Press squeeze bulb on oil cap at least once before each cut. Check oil level often by looking at oil sight level hole. Oil sight level hole is on left side of saw, be- tween front handle and front hand guard.
Figure 8 - Pressing Squeeze Bulb on Oil Cap to Oil Chain
CUTTING WITH THE CHAIN SAW
1.Connect saw to extension cord. Con- nect extension cord to power supply.
2.Make sure section of log to be cut is not laying on ground. This will keep chain from touching ground as it cuts through log. Touching ground with moving chain will dull chain.
3.Use both hands to grip saw. Always use left hand to grip front handle and right hand to grip rear handle. Use firm grip. Thumbs and fingers must wrap around saw handles (see Figure 9).
4.Make sure your footing is firm. Keep feet apart. Divide your weight evenly on both feet. Stand slightly to left side of saw. This keeps your body from be- ing in direct line with chain.
5.When ready to make a cut, press in switch lockout with right thumb and squeeze trigger (see Figure 9). This will turn saw on. Releasing trigger will turn saw off. Make sure saw is running at full speed before starting a cut.
6.When starting a cut, place moving chain against wood. Hold saw firmly in place to avoid possible bouncing or skating (sideways movement) of saw.
7.Guide saw using light pressure. Do not force saw. The motor will overload and can burn out.
8.Remove saw from a cut with saw run- ning at full speed. Stop saw by releas- ing trigger. Do not use the chain brake. Make sure chain has stopped before setting saw down.
9.Practice until you can maintain a steady, even cutting rate.
Front Hand
GuardSwitch
Lockout
Trigger
Figure 9 - Front Hand Guard, Switch Lock- out, and Trigger Location
TRIMMING A TREE (Pruning)
![]() WARNING: Avoid kickback. Kickback can result in severe in- jury or death. See Kickback, page 3 to avoid risk of kickback.
WARNING: Avoid kickback. Kickback can result in severe in- jury or death. See Kickback, page 3 to avoid risk of kickback.
![]() WARNING: Do not operate chain saw while
WARNING: Do not operate chain saw while
¥in a tree
¥on a ladder or any other un- stable surface
¥in any awkward position
You may lose control of saw caus- ing severe injury.
![]() WARNING: Do not cut limbs higher than your shoulders.
WARNING: Do not cut limbs higher than your shoulders.
Trimming a tree is the process of cutting limbs from a living tree. Make sure your footing is firm. Keep feet apart. Divide your weight evenly on both feet. Follow direc- tions below to trim a tree.
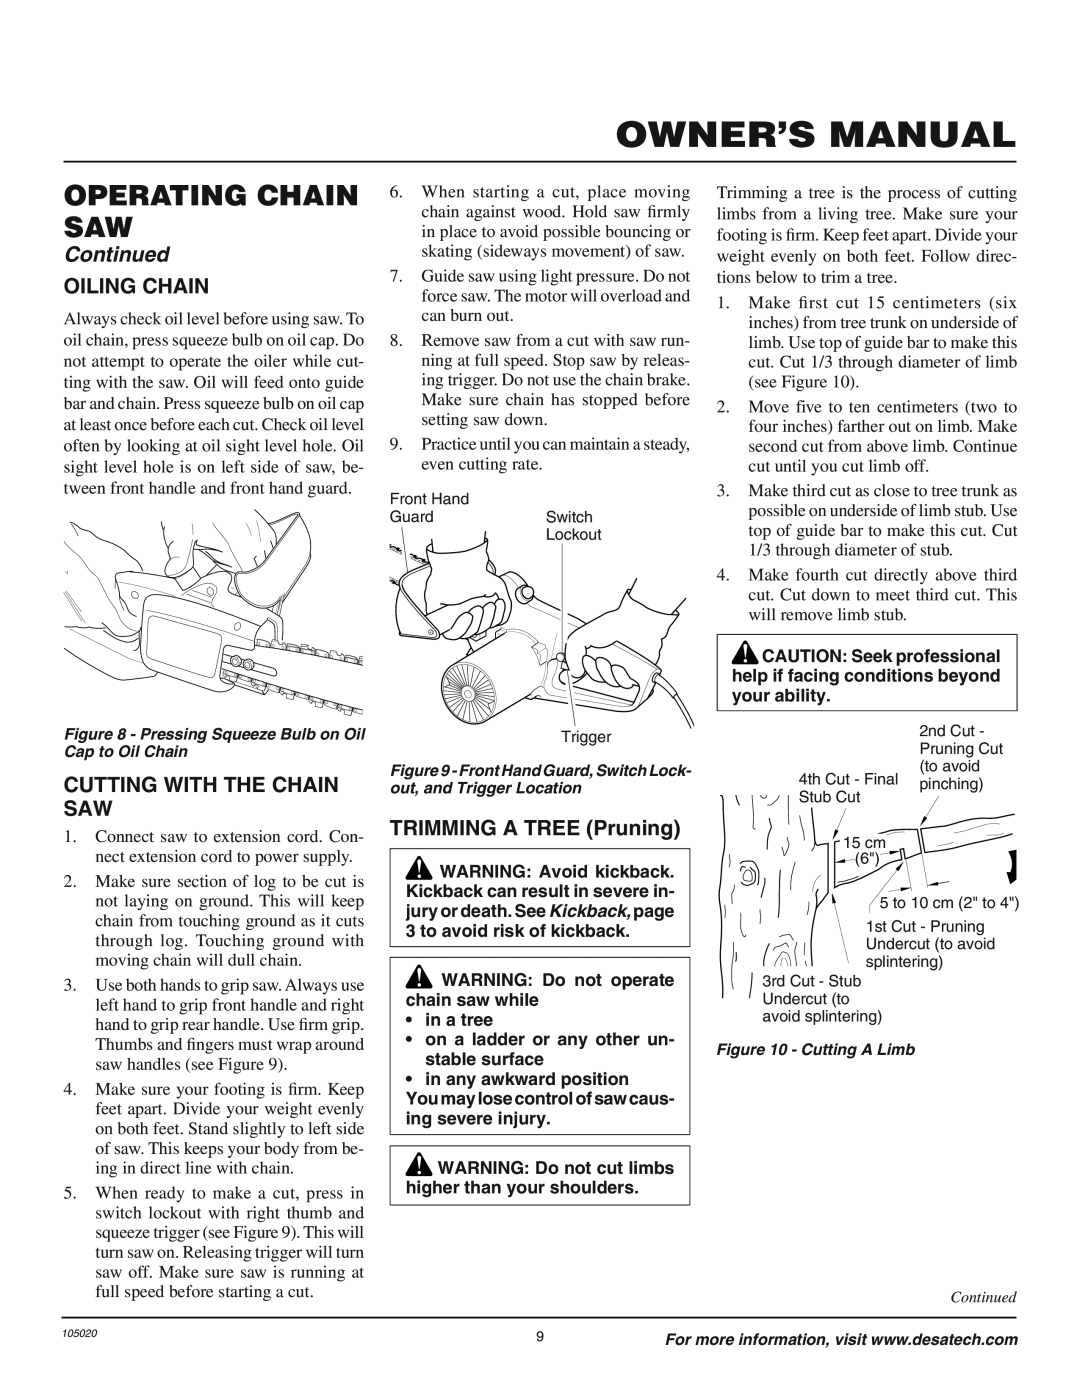
1.Make first cut 15 centimeters (six inches) from tree trunk on underside of limb. Use top of guide bar to make this cut. Cut 1/3 through diameter of limb (see Figure 10).
2.Move five to ten centimeters (two to four inches) farther out on limb. Make second cut from above limb. Continue cut until you cut limb off.
3.Make third cut as close to tree trunk as possible on underside of limb stub. Use top of guide bar to make this cut. Cut 1/3 through diameter of stub.
4.Make fourth cut directly above third cut. Cut down to meet third cut. This will remove limb stub.
![]() CAUTION: Seek professional help if facing conditions beyond your ability.
CAUTION: Seek professional help if facing conditions beyond your ability.
2nd Cut - Pruning Cut
(to avoid 4th Cut - Final pinching) Stub Cut
15 cm
(6")
5 to 10 cm (2" to 4")
1st Cut - Pruning Undercut (to avoid
![]() splintering) 3rd Cut - Stub Undercut (to
splintering) 3rd Cut - Stub Undercut (to
avoid splintering)
Figure 10 - Cutting A Limb
Continued
105020 | 9 | For more information, visit www.desatech.com |
|