INSTALLATION | |
Continued | |
Grate | Pan and Ember |
0.5" | Material |
0.5" |
|
Burner Pan | |
Figure 22 - Pan and Ember Material
Clearances
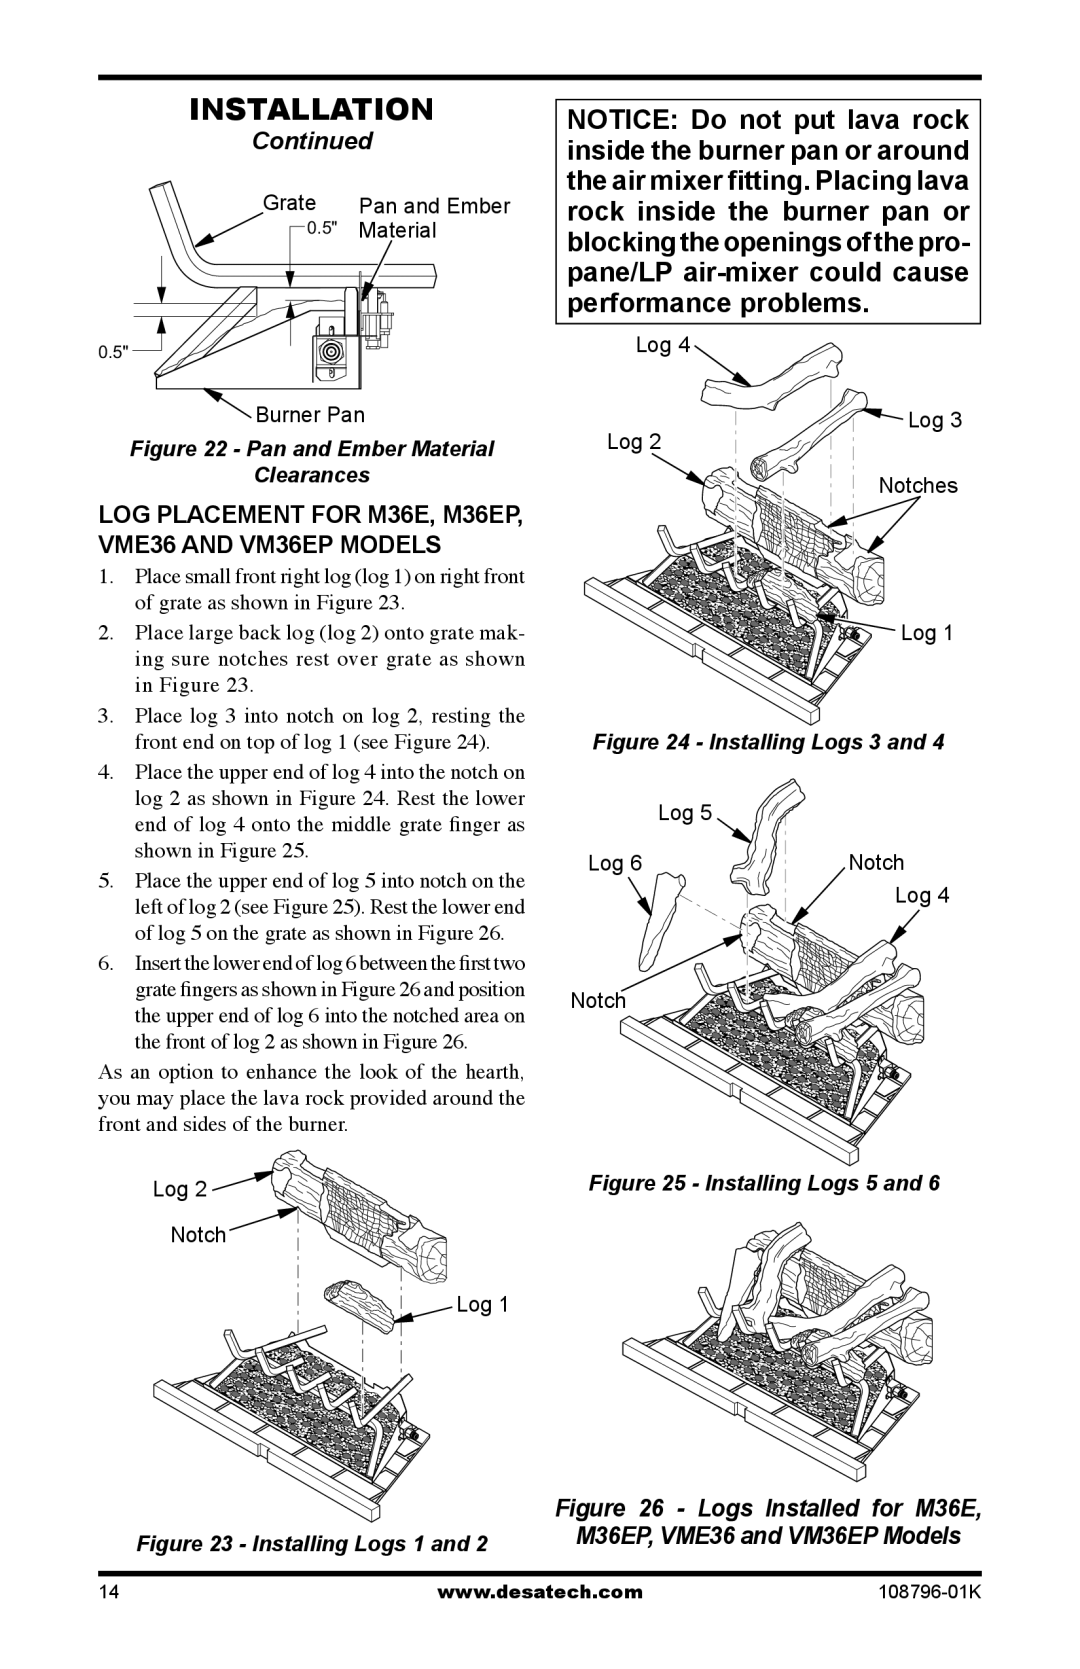
LOG PLACEMENT FOR M36E, M36EP, VME36 AND VM36EP MODELS
1.Place small front right log (log 1) on right front of grate as shown in Figure 23.
2.Place large back log (log 2) onto grate mak- ing sure notches rest over grate as shown in Figure 23.
3.Place log 3 into notch on log 2, resting the front end on top of log 1 (see Figure 24).
4.Place the upper end of log 4 into the notch on log 2 as shown in Figure 24. Rest the lower end of log 4 onto the middle grate finger as shown in Figure 25.
5.Place the upper end of log 5 into notch on the left of log 2 (see Figure 25). Rest the lower end of log 5 on the grate as shown in Figure 26.
6.Insert the lower end of log 6 between the first two grate fingers as shown in Figure 26 and position the upper end of log 6 into the notched area on the front of log 2 as shown in Figure 26.
As an option to enhance the look of the hearth, you may place the lava rock provided around the front and sides of the burner.
Log 2 
Notch
Log 1
NOTICE: Do not put lava rock inside the burner pan or around the air mixer fitting. Placing lava rock inside the burner pan or blocking the openings of the pro- pane/LP
Log 4

 Log 3 Log 2
Notches
Log 1 |
Figure 24 - Installing Logs 3 and 4 | |
| Log 5 |
Log 6 | Notch |
| Log 4 |
Notch
Figure 25 - Installing Logs 5 and 6
Figure 23 - Installing Logs 1 and 2
Figure 26 - Logs Installed for M36E, M36EP, VME36 and VM36EP Models
14 | www.desatech.com |