INSTALLATION

Continued

3.When unit is lit, check flames for random appear- ance and ember bed glowing red-orange in color (see Burner Flame Pattern, page 12). If this is not happening, either add, remove or reposition loose embers. IMPORTANT: Turn unit off and let cool before repositioning loose embers.

Figure 11 - Placement of Embers

OPERATING APPLIANCE

FOR YOUR SAFETY

READ BEFORE LIGHTING

WARNING: Keep flue open when operating unit.

WARNING: If you do not fol- low these instructions exactly, a fire or explosion may result causing property damage, per- sonal injury or loss of life.

A.This appliance has a pilot which must be lighted with a piezo ignitor. When lightning the pilot, follow these instructions exactly.

B.BEFORE LIGHTING smell all around the appliance area for gas. Be sure to smell next to the floor because some gas is heavier than air and will settle on the floor.

WHAT TO DO IF YOU SMELL GAS

Do not try to light any appliance.

Do not touch any electric switch; do not use any phone in your building.

Immediately call your gas supplier from a neighborʼs phone. Follow the gas supplierʼs instructions.

If you cannot reach your gas supplier, call the fire department.

C.Use only your hand to push in or turn gas control knob. Never use tools. If the knob will not push in or turn by hand, do not try to repair it, call a qualified technician. Force

or attempted repair may result in a fire.

D.Do not use this appliance if any part has been under water. Immediately call a qualified service technician to inspect the appliance and to replace any part of the control system and any gas control which has been under water.

LIGHTING

INSTRUCTIONS

1.STOP! Read the safety information, col- umn 1.

2.Make sure switch is in OFF position.

3.Be sure gas line shut-off valve is OPEN.

4.Press in and turn control knob clockwise to the OFF position (see Figure 12). Note: Knob cannot be turned from PILOT to OFF unless knob is pushed in slightly. DO NOT FORCE.

5.Wait five (5) minutes to clear out any gas. If you then smell gas, STOP! Follow "B" in the safety information in column 1. If you don't smell gas, go on the next step.

6.Press in and turn control knob counter-

clockwise to the PILOT position. Press in control knob for five (5) seconds (see Figure 12).

7.With control knob pressed in, press and release ignitor button. This will light pilot. If needed, keep pressing ignitor button until pilot lights. Note: If pilot does not stay lit, contact a qualified service person or gas supplier for repairs.

8.Keep control knob pressed in for 30 seconds after lighting pilot. After 30 seconds, release control knob.

If control knob does not pop out when released, contact a qualified service person or gas supplier for repairs.

Note: If pilot goes out, repeat steps 4 through 8.

9.Slightly push in and turn control knob coun-

terclockwise to the ON position.

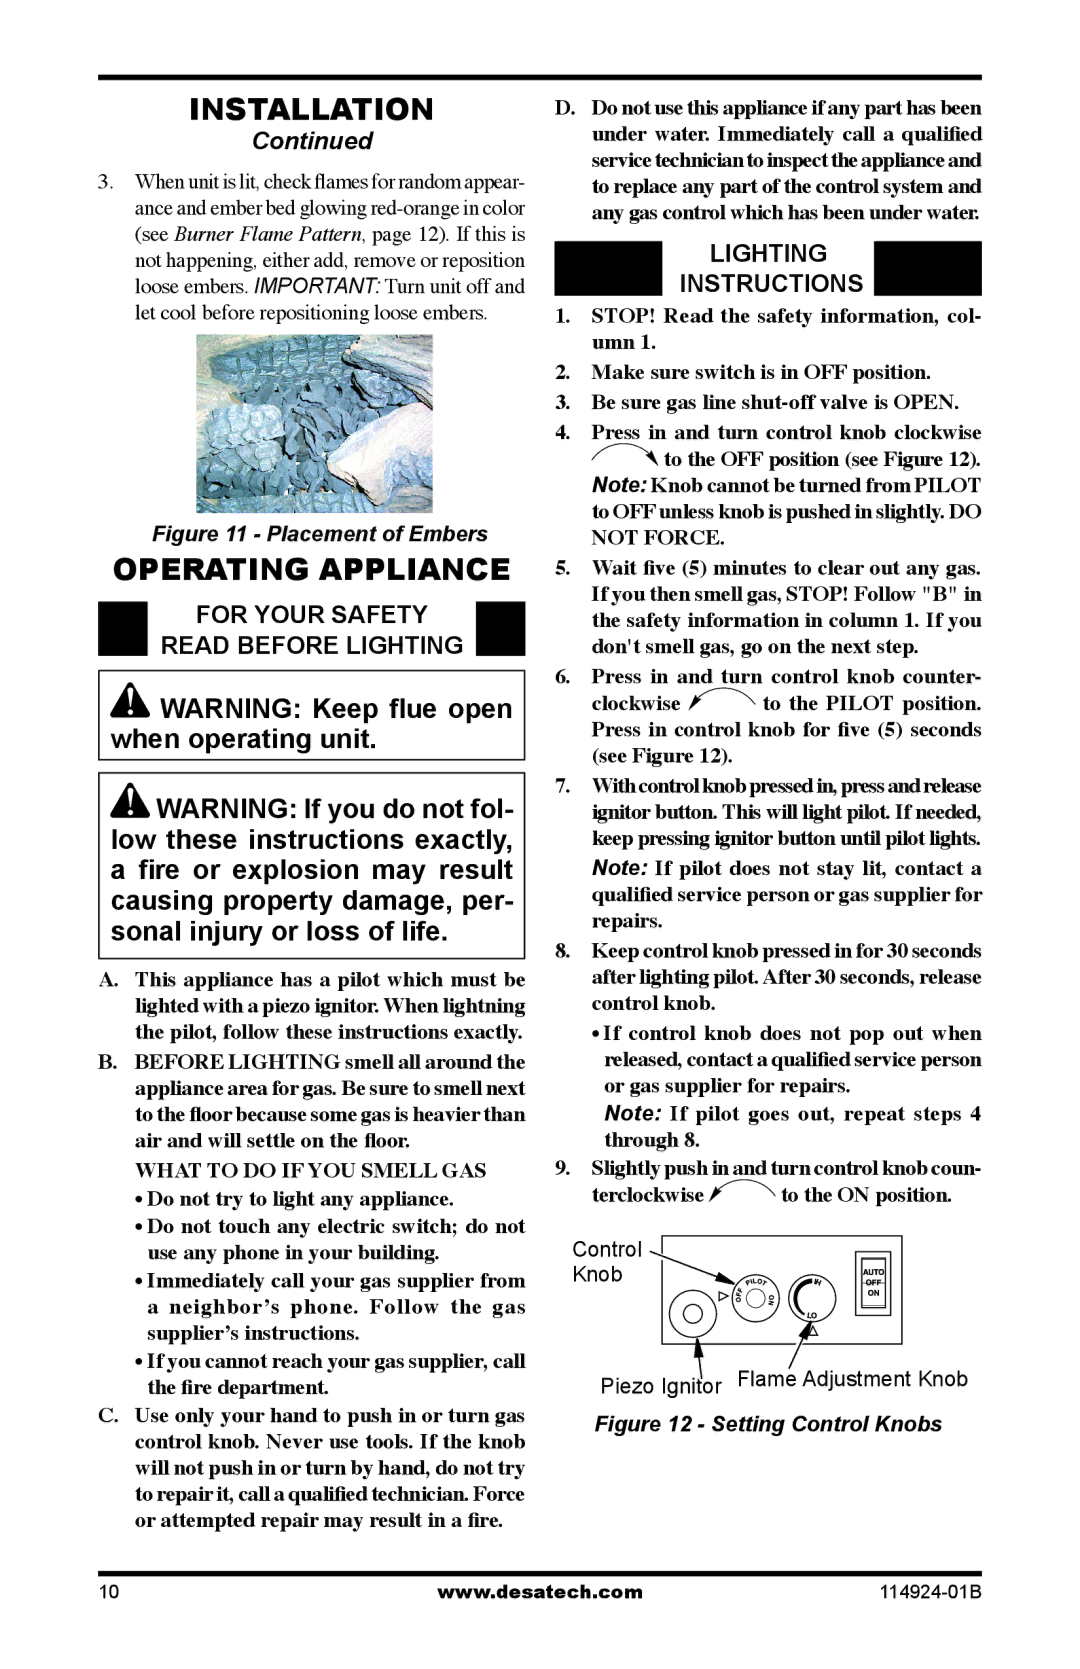
Control


Knob


Piezo Ignitor

Flame Adjustment Knob


Figure 12 - Setting Control Knobs

10

www.desatech.com

114924-01B

Page 10
Image 10
Desa MVO24VPA, MVO18VPA, MVO24VNA, MVO18VNA Operating Appliance, For Your Safety Read Before Lighting, Lighting Instructions

MVO24VPA, MVO18VNA, MVO18VPA, MVO24VNA specifications

Desa MVO18VPA, MVO24VPA, MVO18VNA, and MVO24VNA represent a line of versatile and efficient heating solutions designed for various residential and commercial applications. These models are tailored to meet diverse user requirements while providing exceptional value through advanced technologies and features.

At the core of the Desa line is the commitment to energy efficiency. The MVO series incorporates high-efficiency motors and advanced heat exchange systems that ensure optimal performance while minimizing energy consumption. This not only leads to cost savings on utility bills but also reflects a commitment to sustainability, making these models an excellent choice for eco-conscious consumers.

In terms of heating capacity, the MVO18 models offer a robust output suitable for medium-sized spaces, while the MVO24 models are designed for larger areas, providing flexibility for different applications. The ability to adjust heating levels allows users to customize their environment according to their specific needs, enhancing comfort.

The MVO series is equipped with innovative technologies that ensure consistent performance. The integration of intelligent temperature controls provides precise management of heating levels, enabling users to maintain their desired comfort without unnecessary energy expenditure. Additionally, these models feature durable construction materials that ensure longevity and reliable operation over time.

User convenience is a significant consideration in the design of the MVO series. Remote control functionality allows users to effortlessly adjust settings from a distance, adding a layer of convenience for those with busy lifestyles. Furthermore, some models are equipped with programmable timers, enabling users to set specific heating schedules that align with their daily routines.

Safety is paramount in the design of the Desa MVO series. These models come with multiple safety features, including overheat protection and automatic shut-off mechanisms, ensuring peace of mind for users.

In summary, the Desa MVO18VPA, MVO24VPA, MVO18VNA, and MVO24VNA heating models stand out for their energy efficiency, advanced heating technologies, and user-friendly features. Their adaptability makes them suitable for a range of environments, catering to the diverse needs of homeowners and businesses alike. With a focus on safety and reliability, the Desa MVO series represents an excellent investment for those seeking effective heating solutions.