
ROPANE CONSTRUCTION HEATER specifications
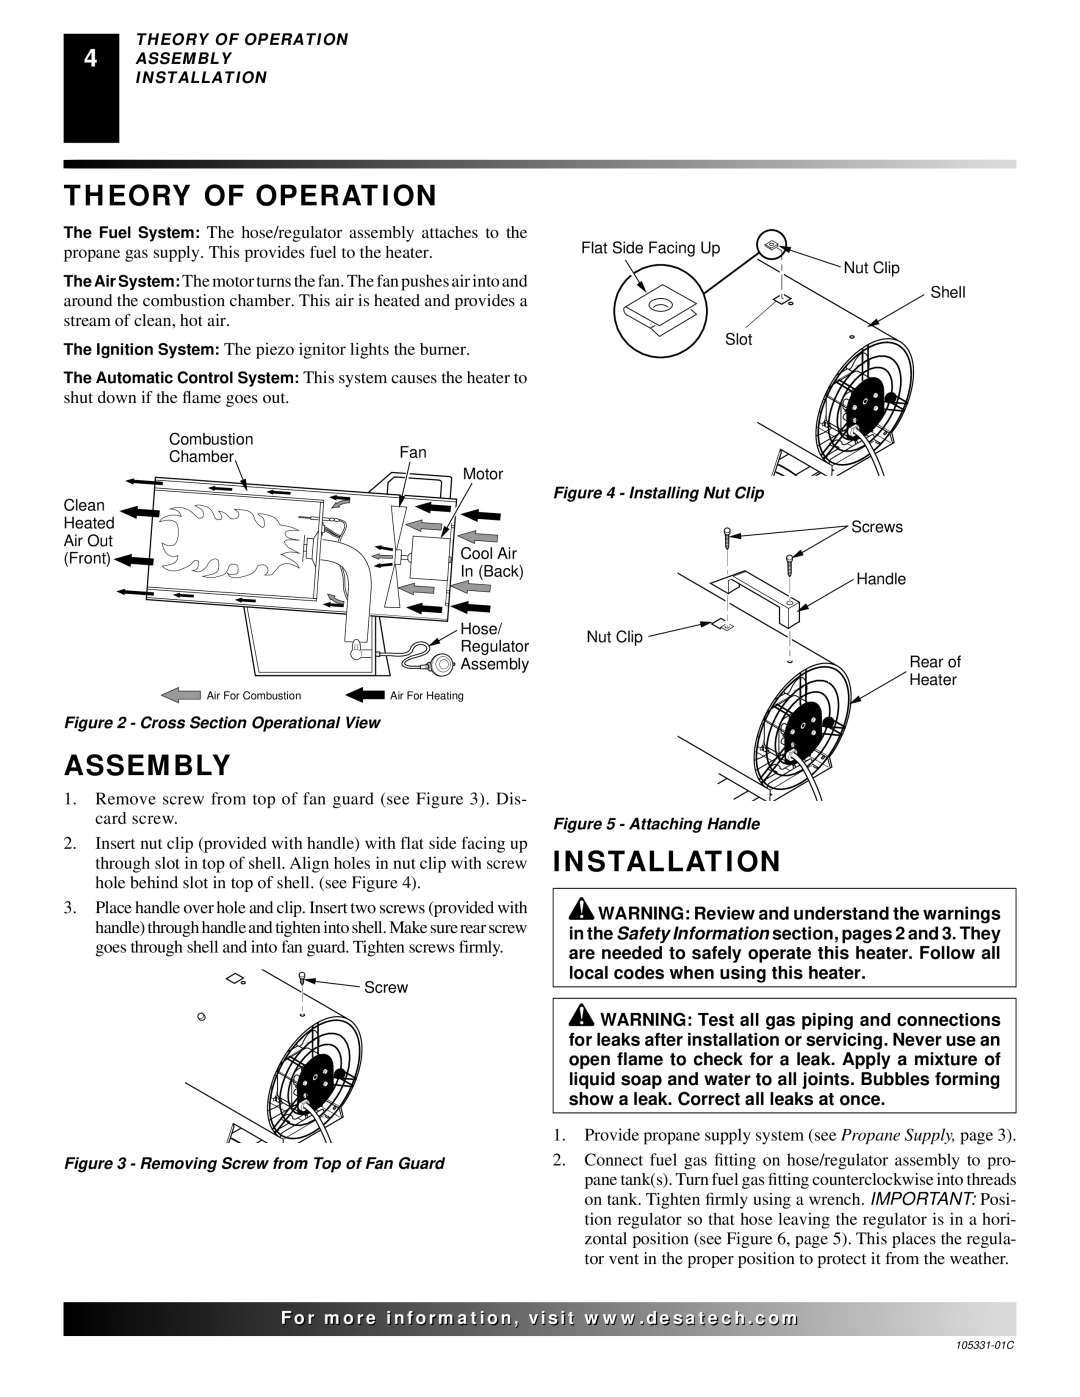
Desa Ropane Construction Heater is a powerful solution designed to provide efficient heating for construction sites, workshops, and other commercial environments. With its robust build and advanced technology, it ensures consistent warmth even in the coldest weather conditions.One of the main features of the Desa Ropane Construction Heater is its high heat output. With various models available, users can choose units that deliver up to 200,000 BTUs, making it suitable for large spaces. This high output ensures that materials set properly and that workers remain comfortable and productive, regardless of the chilly outdoor conditions.
Another notable characteristic is its portability. The heater is designed with rugged wheels and a durable casing, allowing it to be easily maneuvered from one location to another. This feature is especially beneficial for construction sites where the heating needs may change throughout the day or the project.
The heater operates on propane, leveraging the fuel's high efficiency for longer heating durations. Its ability to quickly warm up spaces ensures that downtime is minimized, which is crucial in the fast-paced world of construction. Additionally, propane is readily available and cost-effective, making this heater an economical choice for contractors.
Desa Ropane Construction Heater also features an adjustable heat control system, allowing users to set the desired temperature according to their specific needs. This flexibility is key to optimizing energy consumption and ensuring safety, as it prevents overheating in smaller spaces.
Safety is a top priority in any heating system, and the Desa Ropane heater incorporates several built-in safety features. These include automatic shut-off mechanisms that activate in case of low oxygen levels or if the unit overheats. This provides peace of mind for users while maintaining a safe working environment.
The design of the heater also includes a directional venting system, which allows for more effective heat distribution. This system ensures that areas are warmed evenly, reducing cold spots that can lead to discomfort or inefficiencies.
In summary, the Desa Ropane Construction Heater stands out with its exceptional heat output, portability, adjustable controls, and safety features. This heater is built to cater to the specific requirements of construction and commercial spaces, providing reliable, efficient heating solutions that enhance productivity and comfort. Its combination of technology and practicality makes it a preferred choice for construction professionals across various industries.