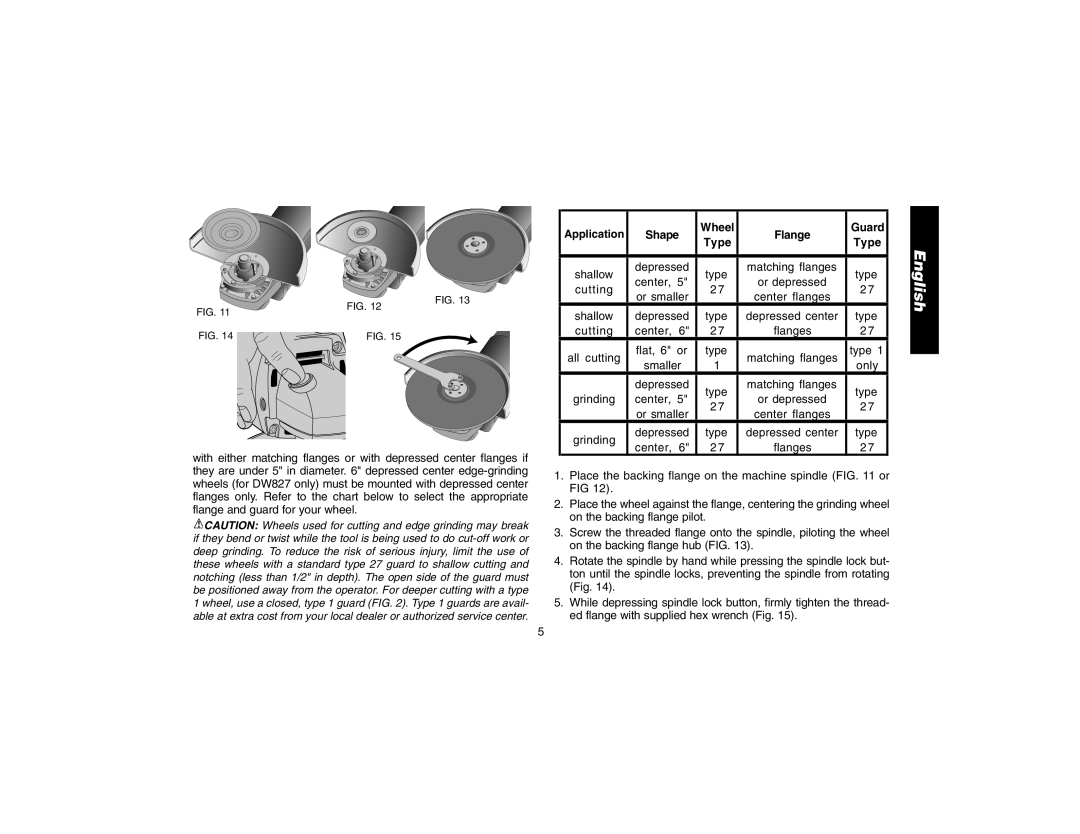
FIG. 11
FIG. 12
FIG. 13
Application | Shape | Wheel | Flange | Guard | |
Type | Type | ||||
|
|
| |||
|
|
|
|
| |
shallow | depressed | type | matching flanges | type | |
center, 5" | or depressed | ||||
cutting | 2 7 | 2 7 | |||
or smaller | center flanges | ||||
|
|
| |||
shallow | depressed | type | depressed center | type | |
cutting | center, 6" | 2 7 | flanges | 2 7 |
English
FIG. 14 | FIG. 15 |
with either matching flanges or with depressed center flanges if they are under 5" in diameter. 6" depressed center
![]() CAUTION: Wheels used for cutting and edge grinding may break if they bend or twist while the tool is being used to do
CAUTION: Wheels used for cutting and edge grinding may break if they bend or twist while the tool is being used to do
5
all cutting | flat, 6" or | type | matching flanges | type 1 | |
smaller | 1 | only | |||
|
| ||||
| depressed | type | matching flanges | type | |
grinding | center, 5" | or depressed | |||
2 7 | 2 7 | ||||
| or smaller | center flanges | |||
|
|
| |||
grinding | depressed | type | depressed center | type | |
center, 6" | 2 7 | flanges | 2 7 | ||
|
1.Place the backing flange on the machine spindle (FIG. 11 or FIG 12).
2.Place the wheel against the flange, centering the grinding wheel on the backing flange pilot.
3.Screw the threaded flange onto the spindle, piloting the wheel on the backing flange hub (FIG. 13).
4.Rotate the spindle by hand while pressing the spindle lock but- ton until the spindle locks, preventing the spindle from rotating (Fig. 14).
5.While depressing spindle lock button, firmly tighten the thread- ed flange with supplied hex wrench (Fig. 15).
