ENGLISH
as the activation of a ground fault interrupter, throwing of a circuit breaker, accidental unplugging, or power failure. If the switch is locked on when the power is connected, the tool will start unexpectedly.
To start the tool, slide the ON/OFF slider switch (g) toward the front of the tool. To stop the tool, release the ON/OFF switch.
For continuous operation, slide the switch toward the front of the tool and press the forward part of the switch inward. To stop the tool while operating in continuous mode, press the rear part of the switch and release.
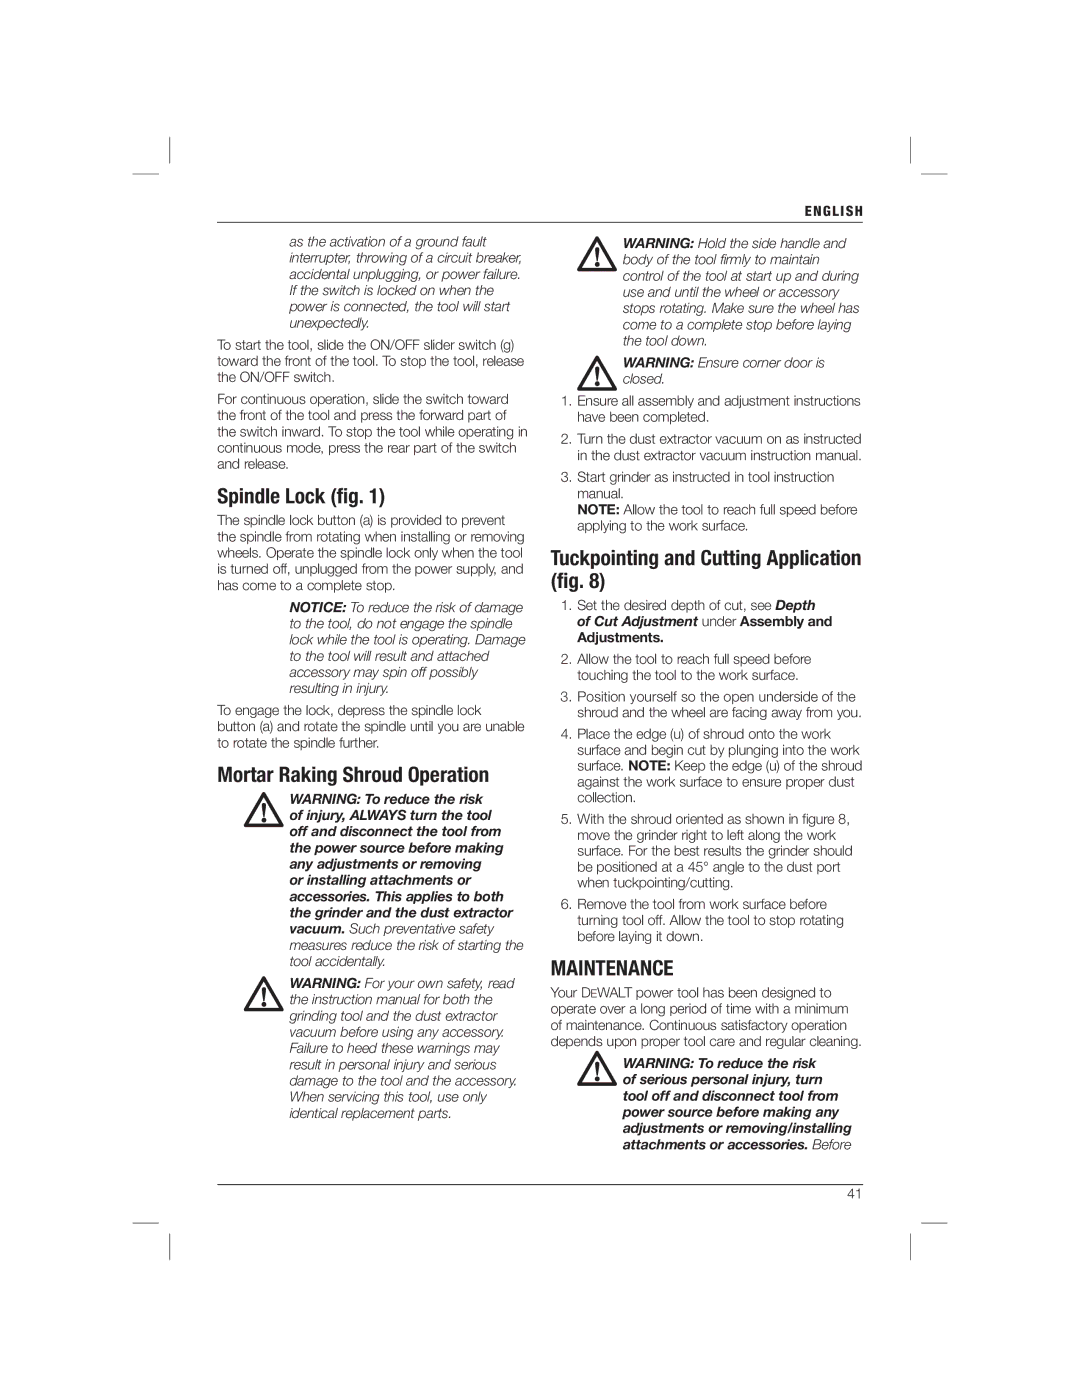
Spindle Lock (fig. 1)
The spindle lock button (a) is provided to prevent the spindle from rotating when installing or removing wheels. Operate the spindle lock only when the tool is turned off, unplugged from the power supply, and has come to a complete stop.
NOTICE: To reduce the risk of damage to the tool, do not engage the spindle lock while the tool is operating. Damage to the tool will result and attached accessory may spin off possibly resulting in injury.
To engage the lock, depress the spindle lock button (a) and rotate the spindle until you are unable to rotate the spindle further.
Mortar Raking Shroud Operation
WARNING: To reduce the risk of injury, ALWAYS turn the tool off and disconnect the tool from the power source before making any adjustments or removing or installing attachments or accessories. This applies to both the grinder and the dust extractor vacuum. Such preventative safety measures reduce the risk of starting the tool accidentally.
WARNING: For your own safety, read the instruction manual for both the grinding tool and the dust extractor vacuum before using any accessory. Failure to heed these warnings may result in personal injury and serious damage to the tool and the accessory. When servicing this tool, use only identical replacement parts.
WARNING: Hold the side handle and body of the tool firmly to maintain control of the tool at start up and during use and until the wheel or accessory stops rotating. Make sure the wheel has come to a complete stop before laying the tool down.
WARNING: Ensure corner door is closed.
1.Ensure all assembly and adjustment instructions have been completed.
2.Turn the dust extractor vacuum on as instructed in the dust extractor vacuum instruction manual.
3.Start grinder as instructed in tool instruction manual.
NOTE: Allow the tool to reach full speed before applying to the work surface.
Tuckpointing and Cutting Application (fig. 8)
1.Set the desired depth of cut, see Depth of Cut Adjustment under Assembly and
Adjustments.
2.Allow the tool to reach full speed before touching the tool to the work surface.
3.Position yourself so the open underside of the shroud and the wheel are facing away from you.
4.Place the edge (u) of shroud onto the work surface and begin cut by plunging into the work surface. NOTE: Keep the edge (u) of the shroud against the work surface to ensure proper dust collection.
5.With the shroud oriented as shown in figure 8, move the grinder right to left along the work surface. For the best results the grinder should be positioned at a 45° angle to the dust port when tuckpointing/cutting.
6.Remove the tool from work surface before turning tool off. Allow the tool to stop rotating before laying it down.
MAINTENANCE
Your DEWALT power tool has been designed to operate over a long period of time with a minimum of maintenance. Continuous satisfactory operation depends upon proper tool care and regular cleaning.
WARNING: To reduce the risk of serious personal injury, turn tool off and disconnect tool from power source before making any adjustments or removing/installing attachments or accessories. Before
41