Step One: Plan your setup
An EPC/X system can be set up in a variety of ways. Before you start your installation, be sure of the following:
Number of components. You can connect up to fourteen concentrators and Xem modules onto one EPC/X host adapter (using both lines). It is a good idea to balance the number of connections on each line.
Having 12 concentrators and modules on one line, and 2 on the other, for example, may not make the best use of line resource.
Location of components. Using the cables that come with the product, concentrators can be located up to ten feet apart. (The
If your installation calls for greater distances between concentrators, you can use twisted pair cabling in a maximum cumulative length of up to 2000 feet (600 meters) from the host adapter.
Note: The length of twisted pair cabling affects the maximum data transfer rate that can be expected over the cable. The longer the length, the lower the rate. To maintain a baud rate of 10 Mbaud, the maximum cumulative twisted pair cable length cannot exceed 30 feet (9 meters).
You can also use fiber optic cable (a special fiber optic conversion option is available from Digi) that will allow a distance of up to 1.2 miles (2000 meters) from the adapter.
For even greater distances, you can attach a synchronous modem directly to the adapter, and remotely locate concentrators and Xem modules to a second synchronous modem.
Cabling. Before beginning the installation, be sure that you have the cables that you will need for the distances between concentrators, as well as cables for the peripherals that you will be attaching to the con- centrators and Xem modules. EPC/X system concentrators and PORTS/Xem modules are available with
Power Requirements. Each
Additional information about the options available with the EPC/X system, such as specifications and cabling details, is provided on the
Step Two: Install the EPC/X PCI host adapter
Before installing the EPC/X host adapter, you should do the following:
•Wear an ESD wrist strap to ground yourself while handling the adapter. If one is not available, discharge static electricity from your body by touching an unpainted metal surface, such as the computer’s chassis, prior to handling the adapter.
•Record the adapter serial number, which will enable Digi to provide you with better service, should the need arise.
The serial number label has this general format: S/N: (S) XXX XXXXX
•Unplug power from the PC.
1.Remove the computer’s cover.
2.Locate an available PCI slot in your computer and remove the slot plate.
3.Insert the adapter into the slot and screw the endplate to the computer chassis. The endplate must be screwed into the computer chassis to remain in compliance with Part 15 of FCC rules.
4.Replace the computer’s cover.
5.Attach an
Step Three: Install concentrators and add-ons
1.Position concentrators and Xem modules (if any) at the location you have prepared according to the plan you developed in Step One.
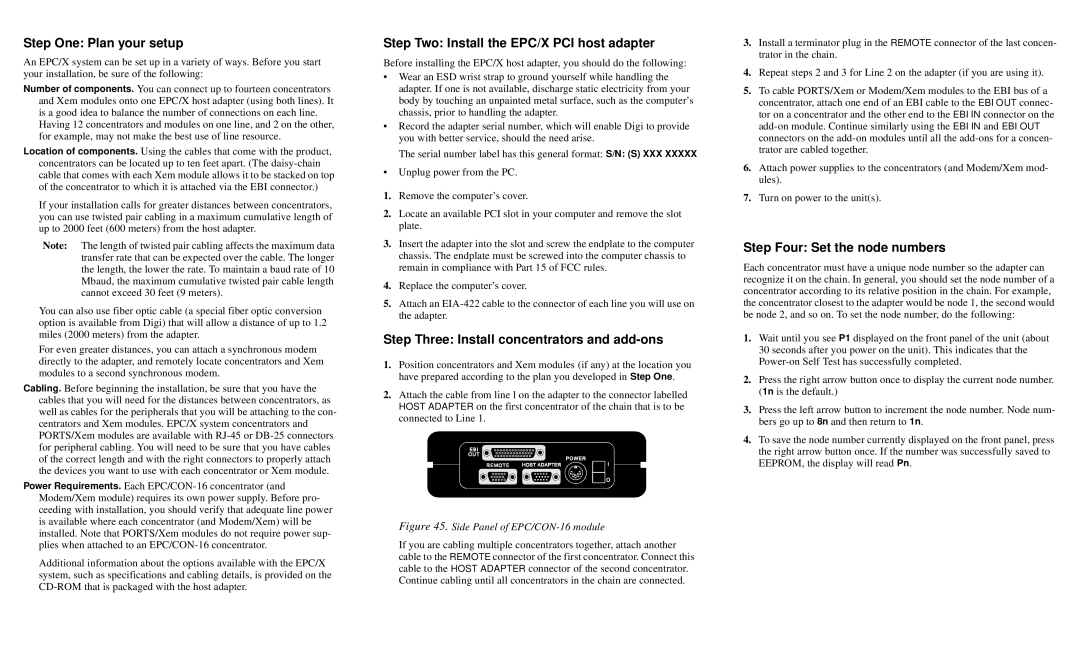
2.Attach the cable from line l on the adapter to the connector labelled HOST ADAPTER on the first concentrator of the chain that is to be connected to Line 1.
Figure 45. Side Panel of EPC/CON-16 module
If you are cabling multiple concentrators together, attach another cable to the REMOTE connector of the first concentrator. Connect this cable to the HOST ADAPTER connector of the second concentrator. Continue cabling until all concentrators in the chain are connected.
3.Install a terminator plug in the REMOTE connector of the last concen- trator in the chain.
4.Repeat steps 2 and 3 for Line 2 on the adapter (if you are using it).
5.To cable PORTS/Xem or Modem/Xem modules to the EBI bus of a concentrator, attach one end of an EBI cable to the EBI OUT connec- tor on a concentrator and the other end to the EBI IN connector on the
6.Attach power supplies to the concentrators (and Modem/Xem mod- ules).
7.Turn on power to the unit(s).
Step Four: Set the node numbers
Each concentrator must have a unique node number so the adapter can recognize it on the chain. In general, you should set the node number of a concentrator according to its relative position in the chain. For example, the concentrator closest to the adapter would be node 1, the second would be node 2, and so on. To set the node number, do the following:
1.Wait until you see P1 displayed on the front panel of the unit (about 30 seconds after you power on the unit). This indicates that the
2.Press the right arrow button once to display the current node number. (1n is the default.)
3.Press the left arrow button to increment the node number. Node num- bers go up to 8n and then return to 1n.
4.To save the node number currently displayed on the front panel, press the right arrow button once. If the number was successfully saved to EEPROM, the display will read Pn.
