MS4000 EN 3/5/03 8:46 AM Page 8
Controls and Indicators
EN Remote Control
TUNER | SOURCE | TAPE |
| ||
CD |
| AUX |
| E Q | B.BO | |
|
|
| OST |
ON•ECO |
|
| |
| VOL |
|
|
PR |
|
| NEXT |
EV |
|
|
|
RE |
|
| D |
V |
|
| |
|
|
| FW |
| VOL |
|
|
RECORD |
|
| STOP |
REPEAT•RDS |
| PTY | |
FM ST. | DISC SKIP | INTRO•CT | |
DN•PRESET•UP |
| SLEEP | |
Battery Size:
“AAA” or “UM-4” or “R03”
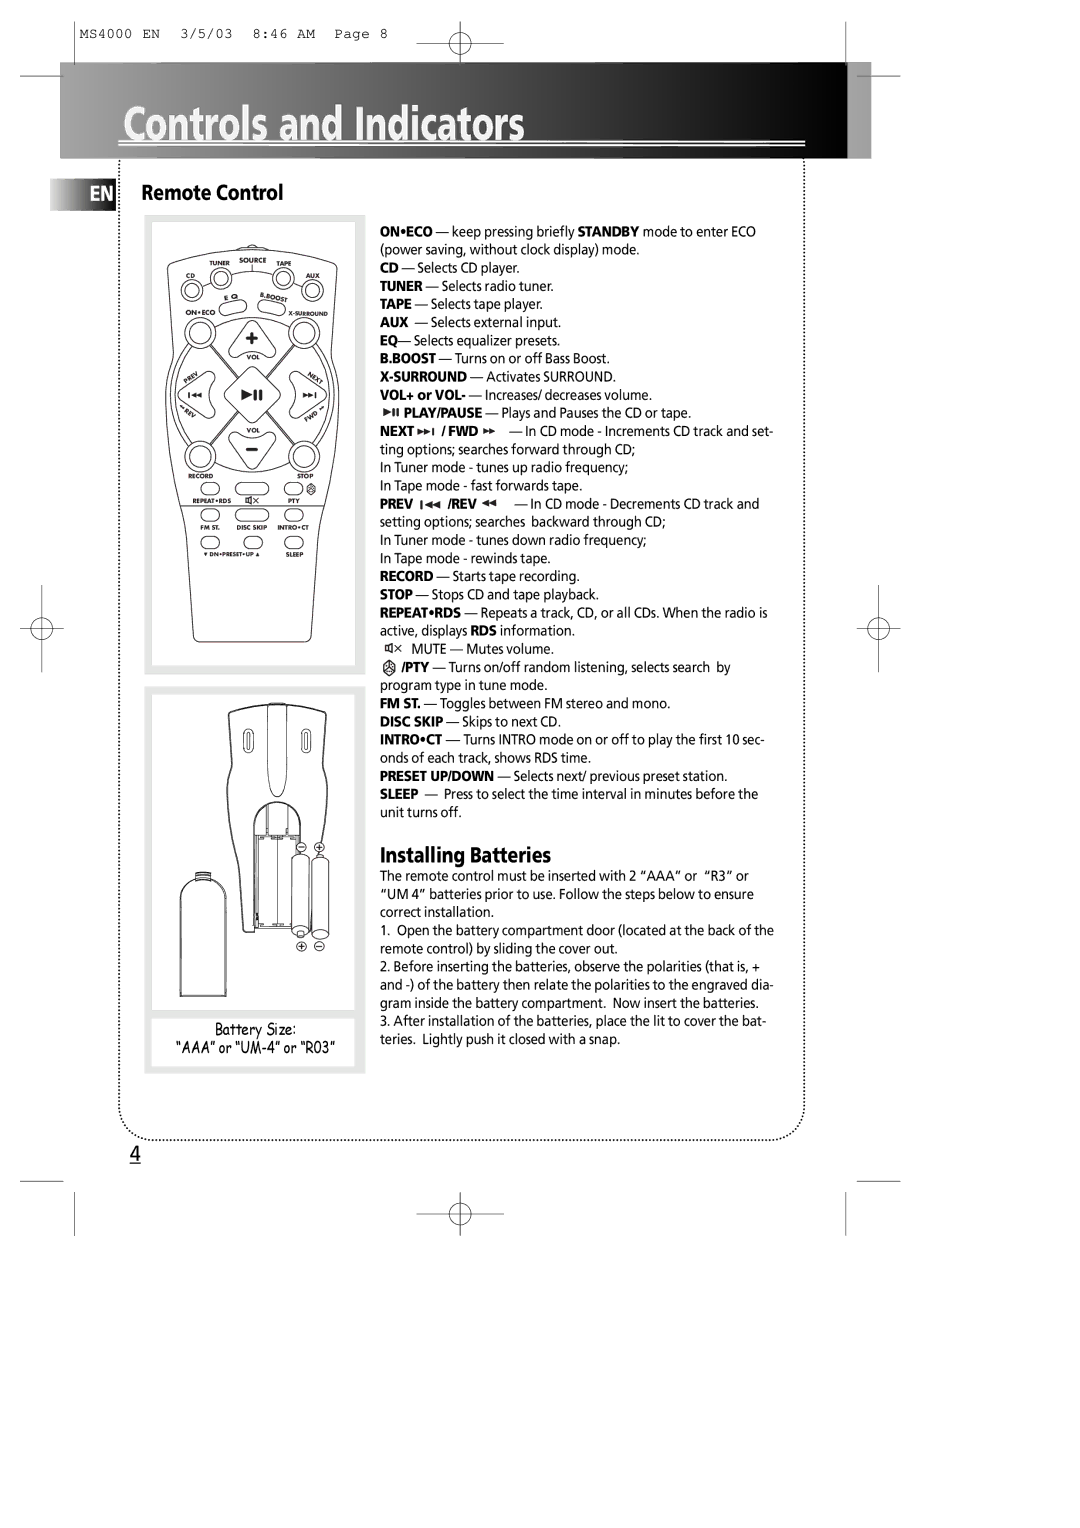
ON•ECO — keep pressing briefly STANDBY mode to enter ECO (power saving, without clock display) mode.
CD — Selects CD player. TUNER — Selects radio tuner. TAPE — Selects tape player. AUX — Selects external input. EQ— Selects equalizer presets. B.BOOST — Turns on or off Bass Boost.
VOL+ or VOL- — Increases/ decreases volume. ![]()
![]() PLAY/PAUSE — Plays and Pauses the CD or tape.
PLAY/PAUSE — Plays and Pauses the CD or tape.
NEXT | / FWD | — In CD mode - Increments CD track and set- |
ting options; searches forward through CD; | ||
In Tuner mode - tunes up radio frequency; | ||
In Tape mode - fast forwards tape. | ||
PREV | /REV | — In CD mode - Decrements CD track and |
setting options; searches backward through CD; In Tuner mode - tunes down radio frequency; In Tape mode - rewinds tape.
RECORD — Starts tape recording. STOP — Stops CD and tape playback.
REPEAT•RDS — Repeats a track, CD, or all CDs. When the radio is active, displays RDS information.
MUTE — Mutes volume.
![]() /PTY — Turns on/off random listening, selects search by program type in tune mode.
/PTY — Turns on/off random listening, selects search by program type in tune mode.
FM ST. — Toggles between FM stereo and mono. DISC SKIP — Skips to next CD.
INTRO•CT — Turns INTRO mode on or off to play the first 10 sec- onds of each track, shows RDS time.
PRESET UP/DOWN — Selects next/ previous preset station. SLEEP — Press to select the time interval in minutes before the unit turns off.
Installing Batteries
The remote control must be inserted with 2 “AAA” or “R3” or “UM 4” batteries prior to use. Follow the steps below to ensure correct installation.
1.Open the battery compartment door (located at the back of the remote control) by sliding the cover out.
2.Before inserting the batteries, observe the polarities (that is, +
and
3.After installation of the batteries, place the lit to cover the bat- teries. Lightly push it closed with a snap.
4
