Installation Instructions (Models CPL1100AD*, CGL1100AD*)
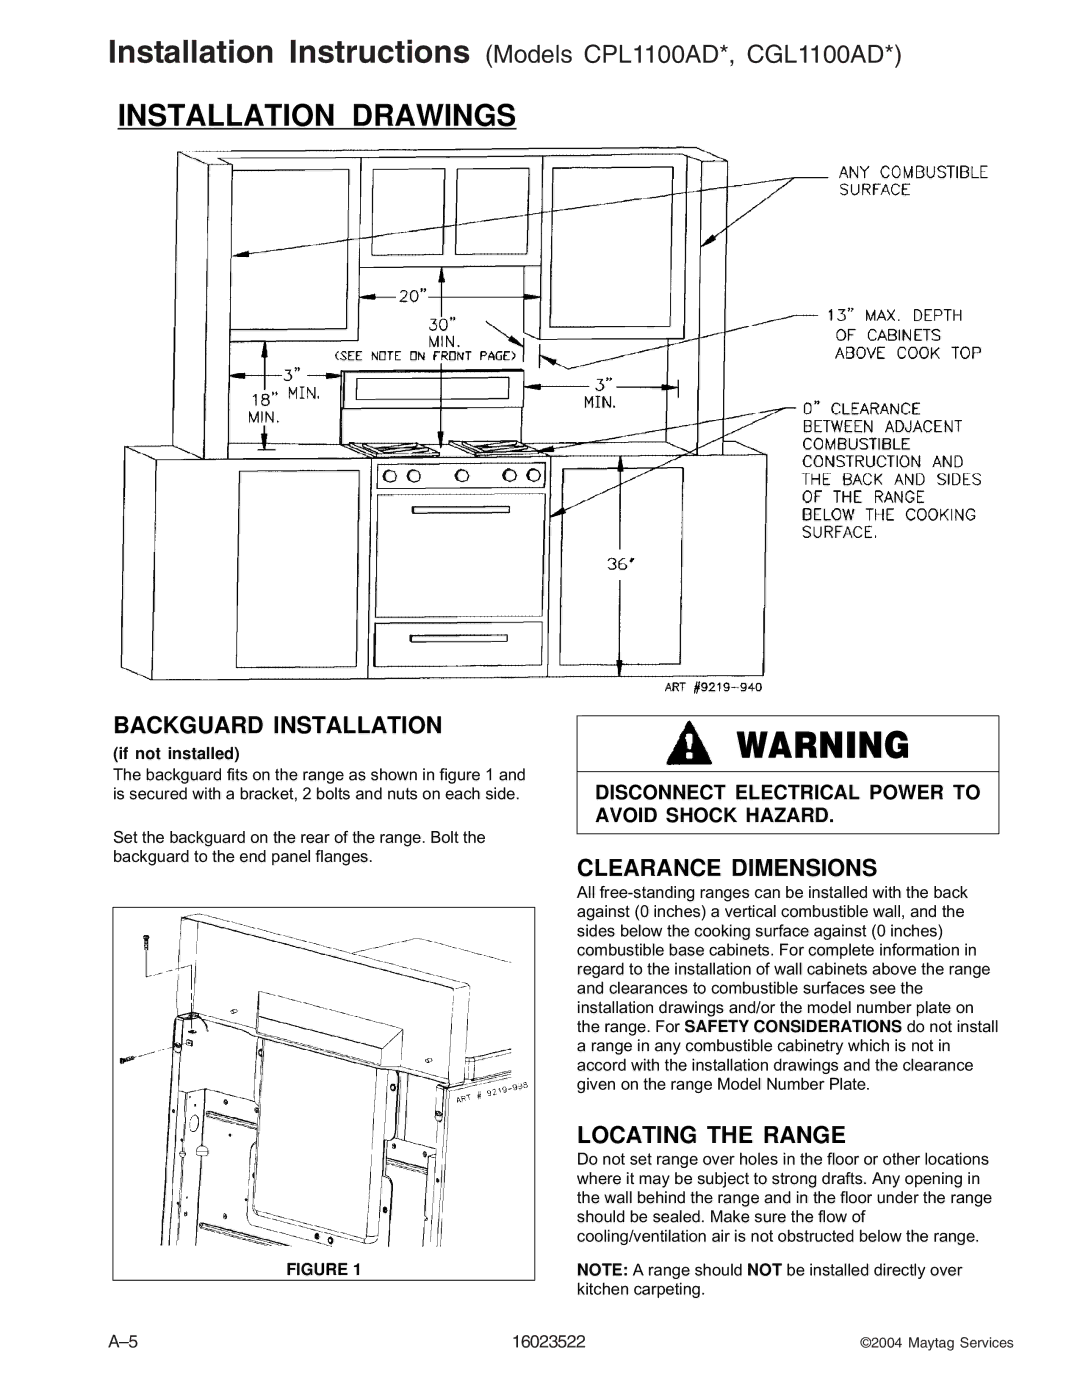
INSTALLATION DRAWINGS
BACKGUARD INSTALLATION
(if not installed)
The backguard fits on the range as shown in figure 1 and is secured with a bracket, 2 bolts and nuts on each side.
Set the backguard on the rear of the range. Bolt the backguard to the end panel flanges.
FIGURE 1
DISCONNECT ELECTRICAL POWER TO AVOID SHOCK HAZARD.
CLEARANCE DIMENSIONS
All
LOCATING THE RANGE
Do not set range over holes in the floor or other locations where it may be subject to strong drafts. Any opening in the wall behind the range and in the floor under the range should be sealed. Make sure the flow of cooling/ventilation air is not obstructed below the range.
NOTE: A range should NOT be installed directly over kitchen carpeting.
16023522 | ©2004 Maytag Services |
