Stereo Music System
Installation
Decide the installation locations for the main unit and the left and right speaker units before making the connections. Place each unit on furniture or the like or hang it from the wall.
...............................................................................................
Changing the speaker grill
In addition to the standard speaker grills (gray), the speakers for this system come with navy blue/green grills. The speaker grill is removed by just pulling it forward, so use the grill that best matches the atmosphere of the installation location.
...............................................................................................
Using placed on furniture
1.Paste two each of the accessory rubber feet on the bottom of the main unit, left speaker, and right speaker (total six rubber feet).
2.Pull out the main unit and speaker unit rear stays all the way out and install each unit tilted.
CAUTION
When using this system placed on some furniture, always install with the stays pulled all the way out. If you install these units with the stay not pulled out or only pulled out part way, they may fall over.
Stay
Aux |
| Tape |
L |
| |
|
| L |
R |
|
|
Input | Rec | R |
Play |
Rubber feet
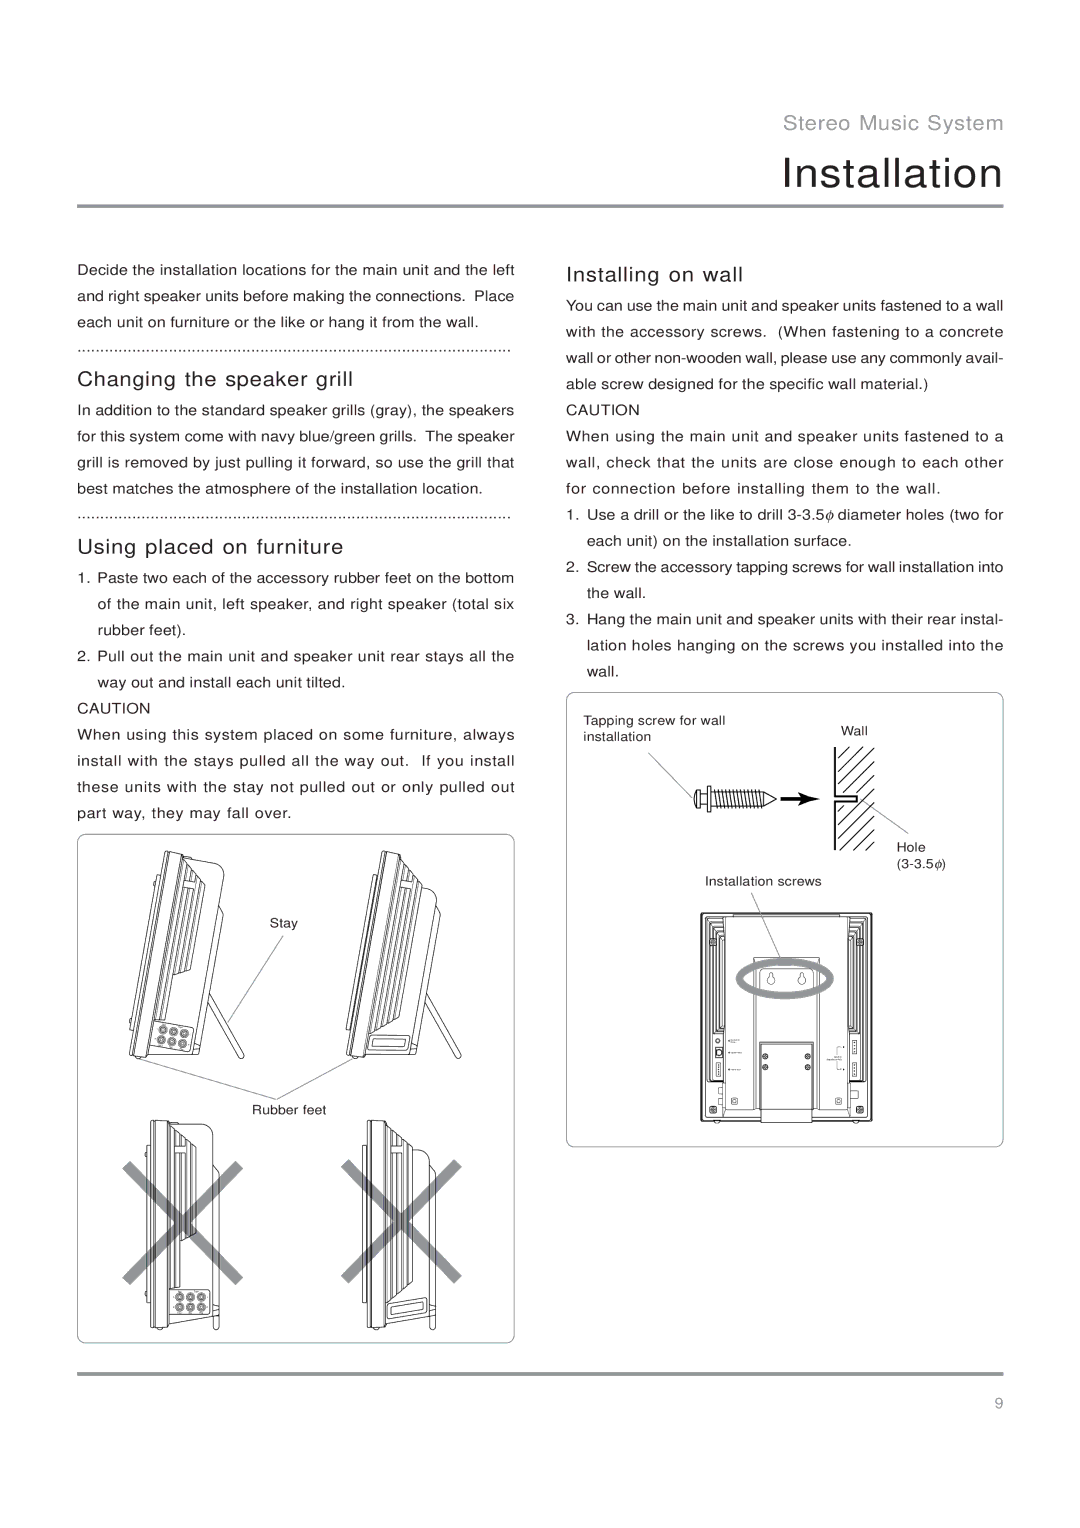
Installing on wall
You can use the main unit and speaker units fastened to a wall with the accessory screws. (When fastening to a concrete wall or other
CAUTION
When using the main unit and speaker units fastened to a wall, check that the units are close enough to each other for connection before installing them to the wall.
1.Use a drill or the like to drill
2.Screw the accessory tapping screws for wall installation into the wall.
3.Hang the main unit and speaker units with their rear instal- lation holes hanging on the screws you installed into the wall.
Tapping screw for wall | Wall | |
installation | ||
|
Hole
Installation screws
Subwoofer |
|
Output |
|
| L |
Digital Output |
|
| Speaker |
| (Impedance 4Ω) |
Power Input | R |
AuxTape
LL
RR
Input Rec Play
9