Conversion Instructions (Models AGR5712AD*, CG34800AD*, CGR3725AD*, MGR5751AD*, MGR5752AD*, PGR5720LD*)
All ranges are equipped with fixed orifices and with a convertible appliance pressure regulator. The unit model number plate states which gas it is adjusted for at the factory. To convert the unit to either Natural gas or LP gas will require the replacement of the orifice hoods, and the adjustment of the air shutters on the burners and adjustment of the appliance pressure regulator converter cap.
Inlet pressure to the appliance pressure regulator should be as follows for checking the appliance pressure regulator setting:
Reinstall cap nut to appliance pressure regulator and replace dust cover.
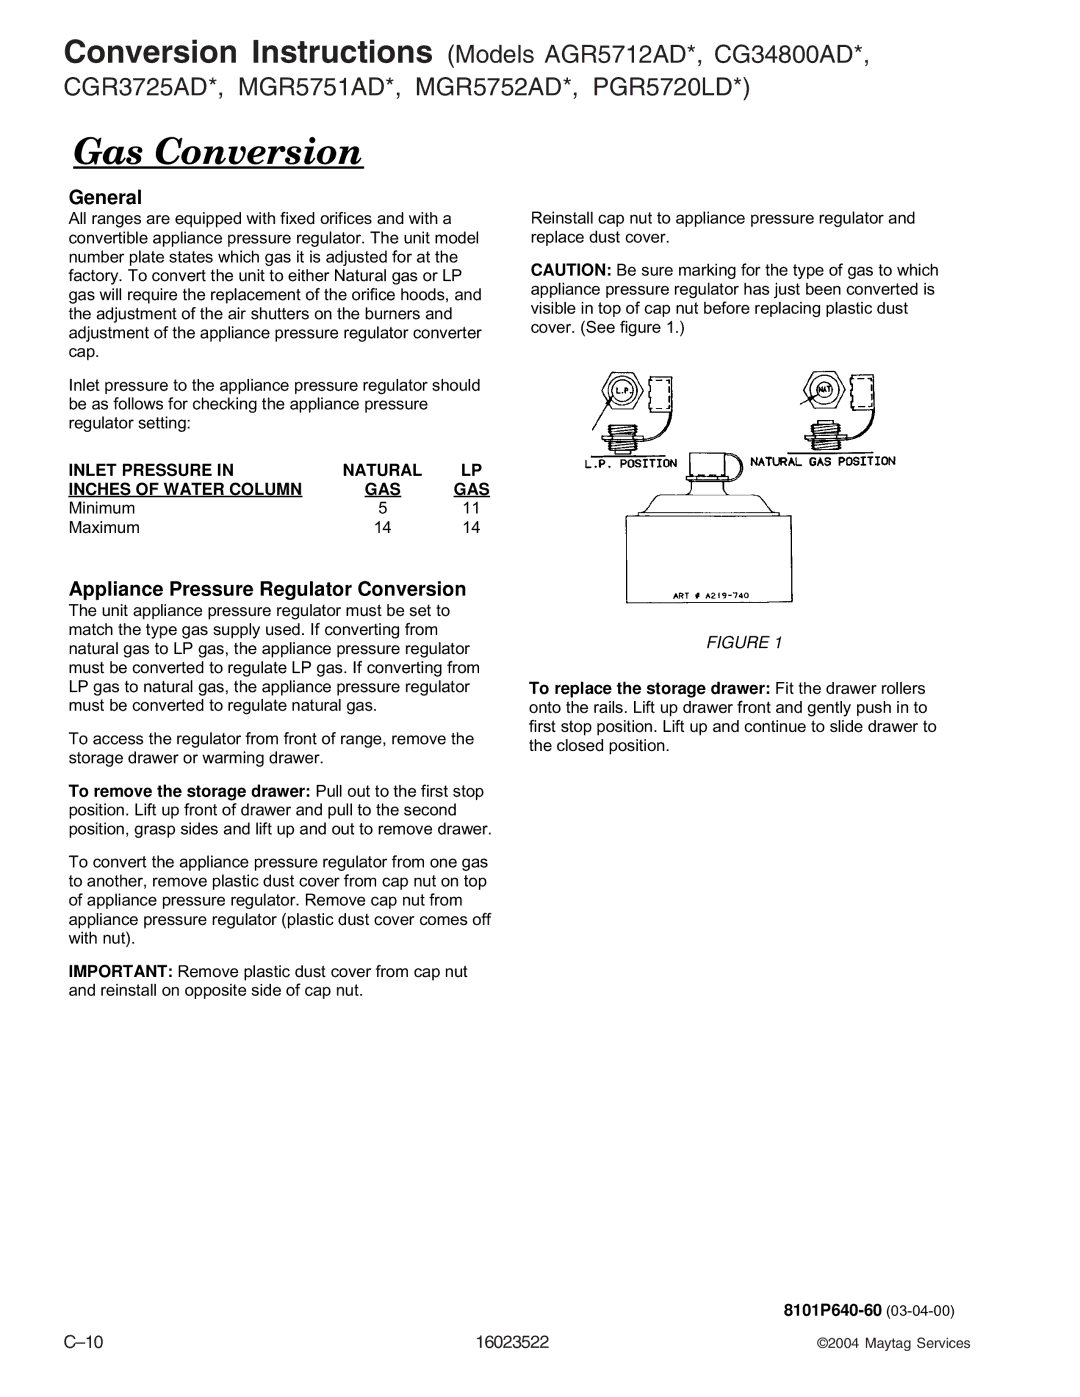
Be sure marking for the type of gas to which appliance pressure regulator has just been converted is visible in top of cap nut before replacing plastic dust cover. (See figure 1.)
Minimum | 5 | 11 |
Maximum | 14 | 14 |
The unit appliance pressure regulator must be set to match the type gas supply used. If converting from natural gas to LP gas, the appliance pressure regulator must be converted to regulate LP gas. If converting from LP gas to natural gas, the appliance pressure regulator must be converted to regulate natural gas.
To access the regulator from front of range, remove the storage drawer or warming drawer.
Pull out to the first stop
position. Lift up front of drawer and pull to the second position, grasp sides and lift up and out to remove drawer.
To convert the appliance pressure regulator from one gas to another, remove plastic dust cover from cap nut on top of appliance pressure regulator. Remove cap nut from appliance pressure regulator (plastic dust cover comes off with nut).
Remove plastic dust cover from cap nut
and reinstall on opposite side of cap nut.
Fit the drawer rollers onto the rails. Lift up drawer front and gently push in to first stop position. Lift up and continue to slide drawer to the closed position.
(03-04-00)
16023522 | ©2004 Maytag Services |