unit. Lift the digital frame unit up, turn it over, and lay it down in another area. The frame should be left on the protected surface. Note the location of the hole in the matte.

3.Lift the removed frame from the surface. Replace this frame with the new frame, making sure the orientation of the hole in the new frame is the same as it was on the removed frame.

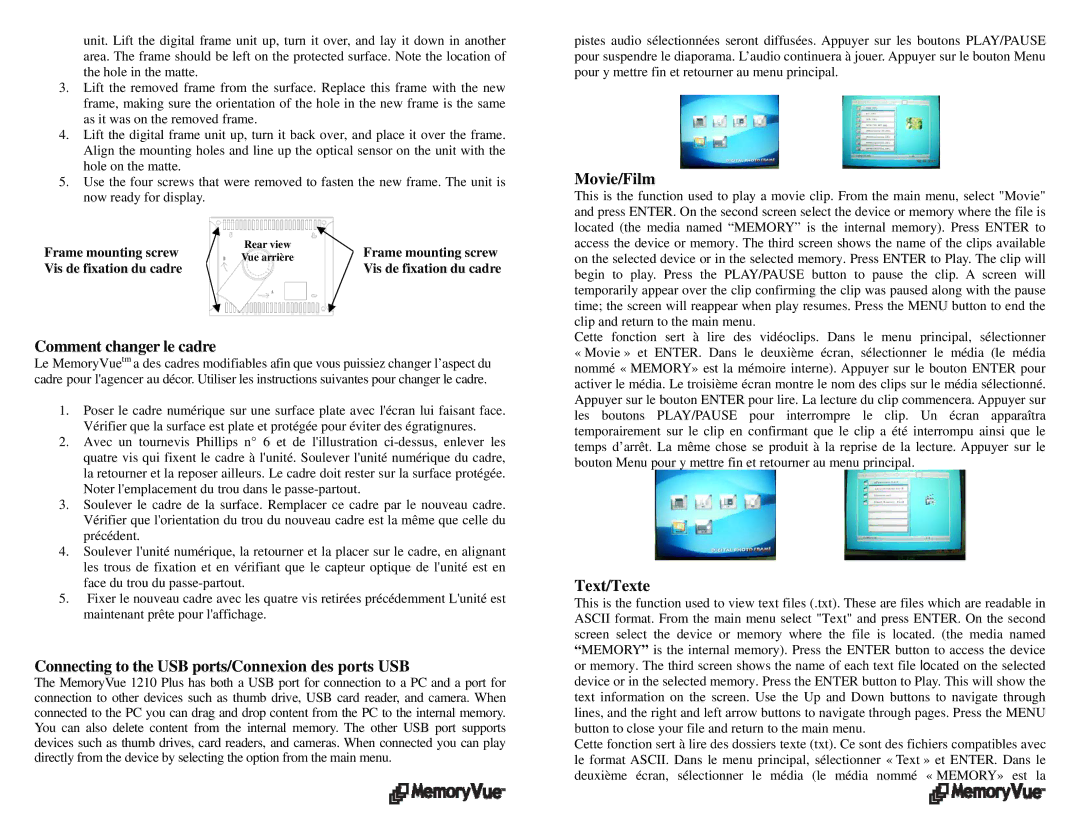
4.Lift the digital frame unit up, turn it back over, and place it over the frame. Align the mounting holes and line up the optical sensor on the unit with the hole on the matte.

5.Use the four screws that were removed to fasten the new frame. The unit is now ready for display.

Frame mounting screw

Rear view

Frame mounting screw

Vue arrière

Vis de fixation du cadre


Vis de fixation du cadre


Comment changer le cadre

Le MemoryVuetm a des cadres modifiables afin que vous puissiez changer l’aspect du cadre pour l'agencer au décor. Utiliser les instructions suivantes pour changer le cadre.

1.Poser le cadre numérique sur une surface plate avec l'écran lui faisant face. Vérifier que la surface est plate et protégée pour éviter des égratignures.

2.Avec un tournevis Phillips n° 6 et de l'illustration ci-dessus, enlever les quatre vis qui fixent le cadre à l'unité. Soulever l'unité numérique du cadre, la retourner et la reposer ailleurs. Le cadre doit rester sur la surface protégée. Noter l'emplacement du trou dans le passe-partout.

3.Soulever le cadre de la surface. Remplacer ce cadre par le nouveau cadre. Vérifier que l'orientation du trou du nouveau cadre est la même que celle du précédent.

4.Soulever l'unité numérique, la retourner et la placer sur le cadre, en alignant les trous de fixation et en vérifiant que le capteur optique de l'unité est en face du trou du passe-partout.

5.Fixer le nouveau cadre avec les quatre vis retirées précédemment L'unité est maintenant prête pour l'affichage.

Connecting to the USB ports/Connexion des ports USB

The MemoryVue 1210 Plus has both a USB port for connection to a PC and a port for connection to other devices such as thumb drive, USB card reader, and camera. When connected to the PC you can drag and drop content from the PC to the internal memory. You can also delete content from the internal memory. The other USB port supports devices such as thumb drives, card readers, and cameras. When connected you can play directly from the device by selecting the option from the main menu.

pistes audio sélectionnées seront diffusées. Appuyer sur les boutons PLAY/PAUSE pour suspendre le diaporama. L’audio continuera à jouer. Appuyer sur le bouton Menu pour y mettre fin et retourner au menu principal.

Movie/Film

This is the function used to play a movie clip. From the main menu, select "Movie" and press ENTER. On the second screen select the device or memory where the file is located (the media named “MEMORY” is the internal memory). Press ENTER to access the device or memory. The third screen shows the name of the clips available on the selected device or in the selected memory. Press ENTER to Play. The clip will begin to play. Press the PLAY/PAUSE button to pause the clip. A screen will temporarily appear over the clip confirming the clip was paused along with the pause time; the screen will reappear when play resumes. Press the MENU button to end the clip and return to the main menu.

Cette fonction sert à lire des vidéoclips. Dans le menu principal, sélectionner

«Movie » et ENTER. Dans le deuxième écran, sélectionner le média (le média nommé « MEMORY» est la mémoire interne). Appuyer sur le bouton ENTER pour activer le média. Le troisième écran montre le nom des clips sur le média sélectionné. Appuyer sur le bouton ENTER pour lire. La lecture du clip commencera. Appuyer sur les boutons PLAY/PAUSE pour interrompre le clip. Un écran apparaîtra temporairement sur le clip en confirmant que le clip a été interrompu ainsi que le temps d’arrêt. La même chose se produit à la reprise de la lecture. Appuyer sur le bouton Menu pour y mettre fin et retourner au menu principal.

Text/Texte

This is the function used to view text files (.txt). These are files which are readable in ASCII format. From the main menu select "Text" and press ENTER. On the second screen select the device or memory where the file is located. (the media named MEMORYis the internal memory). Press the ENTER button to access the device or memory. The third screen shows the name of each text file located on the selected device or in the selected memory. Press the ENTER button to Play. This will show the text information on the screen. Use the Up and Down buttons to navigate through lines, and the right and left arrow buttons to navigate through pages. Press the MENU button to close your file and return to the main menu.

Cette fonction sert à lire des dossiers texte (txt). Ce sont des fichiers compatibles avec le format ASCII. Dans le menu principal, sélectionner « Text » et ENTER. Dans le deuxième écran, sélectionner le média (le média nommé « MEMORY» est la

Page 4
Image 4
Digital Spectrum 1210 Plus manual Comment changer le cadre, Connecting to the USB ports/Connexion des ports USB, Movie/Film

1210 Plus specifications

The Digital Spectrum 1210 Plus is an advanced device designed for users who demand high performance and versatility in their digital spectrum analyzer. This sophisticated piece of equipment integrates state-of-the-art technology with user-friendly features, making it an essential tool for engineers, researchers, and technicians in various fields such as telecommunications, aerospace, and electronics.

One of the standout features of the Digital Spectrum 1210 Plus is its ability to analyze a wide frequency range, typically extending from a few kilohertz up to several gigahertz. This broad range allows users to capture and analyze signals across different applications, making it an invaluable tool for troubleshooting and signal integrity assessments.

The device is equipped with a high-resolution display that provides clear and detailed visual representations of the frequency spectrum. Users can easily identify, analyze, and interpret signals with the help of advanced visualization tools, including spectrum, waterfall, and vector diagrams. This intuitive interface ensures that even users with limited experience can operate the device effectively.

Another key characteristic of the Digital Spectrum 1210 Plus is its real-time processing capabilities. The device can process and display spectrum data in real time, enabling users to monitor signals as they occur. This is particularly important for applications requiring immediate feedback, such as live signal monitoring in complex environments.

The Digital Spectrum 1210 Plus also features several connectivity options, including USB, Ethernet, and Wi-Fi. This allows users to easily transfer data, control the device remotely, and integrate it into existing systems. Additionally, it supports various software tools for analysis and reporting, enhancing productivity and facilitating data sharing among teams.

Durability and portability are also significant advantages of the Digital Spectrum 1210 Plus. The compact design and robust build make it suitable for fieldwork, while the lightweight structure ensures easy transport. Battery operation provides additional flexibility, allowing for remote usage in challenging environments without the need for continuous AC power.

In summary, the Digital Spectrum 1210 Plus is a highly capable digital spectrum analyzer that combines advanced technology with user-centric features. Its broad frequency range, real-time processing, high-resolution display, and extensive connectivity options make it an essential instrument for professionals in various industries. Whether for troubleshooting, research, or signal analysis, the Digital Spectrum 1210 Plus guarantees precision, efficiency, and ease of use in any application.