
A404, A502 specifications
Directed Audio, a pioneer in the car audio industry, has garnered attention with its innovative models like the A502 and A404. These two amplifiers showcase a blend of power, clarity, and advanced technology, aimed at enhancing the in-car audio experience for enthusiasts and casual listeners alike.The Directed Audio A502 is a two-channel amplifier that delivers impressive performance with 50 watts RMS per channel at 4 ohms, offering a punchy sound without sacrificing fidelity. It features a high and low-pass crossover, allowing users to tailor their audio output to their specific setup, whether they're driving high-frequency speakers or deep bass subwoofers. The A502 is built with a sleek aluminum chassis that not only provides durability but also enhances the heat dissipation, ensuring reliable performance during extended use. The amplifier's compact size makes it an excellent choice for various vehicle installations, fitting effortlessly in tight spaces without compromising on sound quality.
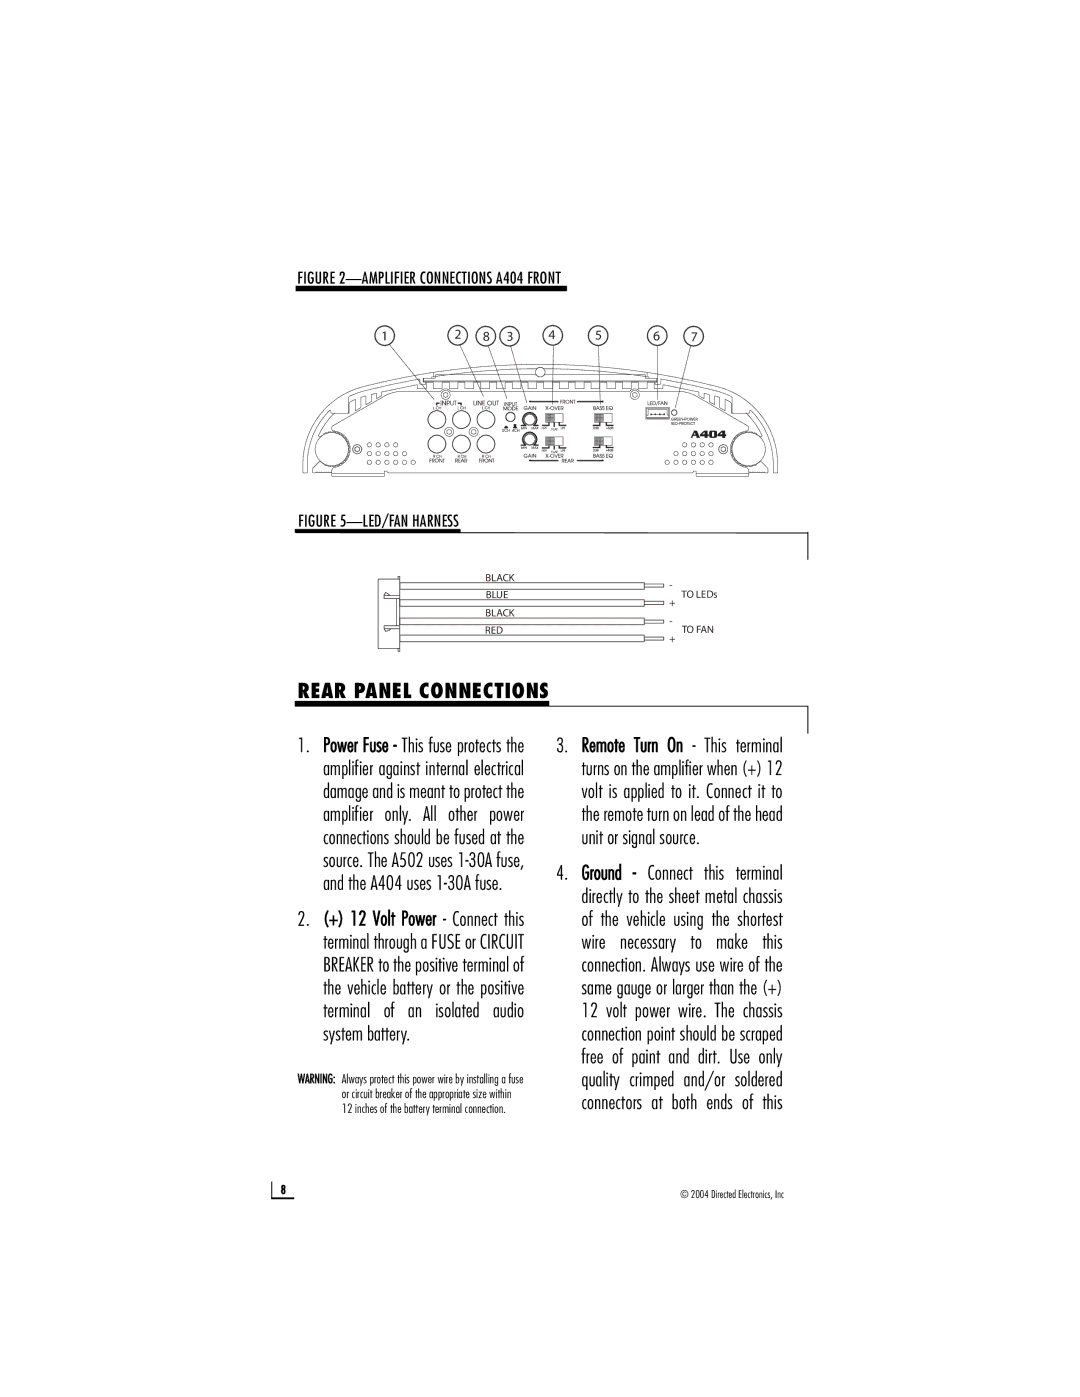
On the other hand, the Directed Audio A404 is a four-channel amplifier designed for those looking to elevate their audio system further. It boasts 50 watts RMS per channel at 4 ohms and can be bridged to power subwoofers with 100 watts RMS at 4 ohms. This versatility makes the A404 a perfect match for full-range speakers and subwoofer combinations, enabling users to build a comprehensive audio system tailored to their listening preferences. Similar to the A502, the A404 includes selectable high and low-pass filters, expanding its adaptability.
Both models leverage Class D amplification technology, ensuring efficient power usage that results in less heat generation compared to traditional Class A/B amplifiers. This efficiency not only enhances performance but also contributes to a longer lifespan for both the amplifier and the audio components connected to it. Moreover, Directed Audio amplifiers come equipped with short circuit and thermal protection circuitry, safeguarding against potential damages during operation.
In terms of design, both amplifiers reflect a modern aesthetic with their clean lines and a minimalist profile. Their easy-to-read terminals and layout simplify installation, making them accessible for DIY enthusiasts. With a reputation built on quality and performance, Directed Audio A502 and A404 stand out in the competitive landscape of car audio, catering to diverse needs while delivering exceptional sound quality that transforms any driving experience into a remarkable audio journey.