LED LIGHTBAR INSTALLATION
2005 model Directed Audio Amplifiers have been designed with a custom heat sink that accomodates two (optional - not supplied) LED lightbars. Use the following proce- dure for installation in Directed Audio Amplifiers.
1.Remove the LED tubes, find the connection points to the LED tubes and the plug which connects to the amplifier.
2.Slide each LED tube assembly into your Directed Audio Amplifier heat sink. Ensure the wire harness is on the same end of the amplifier where the plug connects to the amplifier (signal input end). Orient the LED tube assembly so that the LEDs are facing out for optium lighting effect.
3.Connect the
NOTE 1: The other RED and BLACK wire can be connected to an optional fan. The fan must not draw more than 200mA. If the optional fan is not being used, the ends of these wires must be insulated to prevent shorting and subsequent damage to the amplifier.
NOTE 2: The other RED and BLACK wire can also be used to drive the second tube to increase the lighting intensity. Simply cut the existing harness to separate one of the two tubes from the
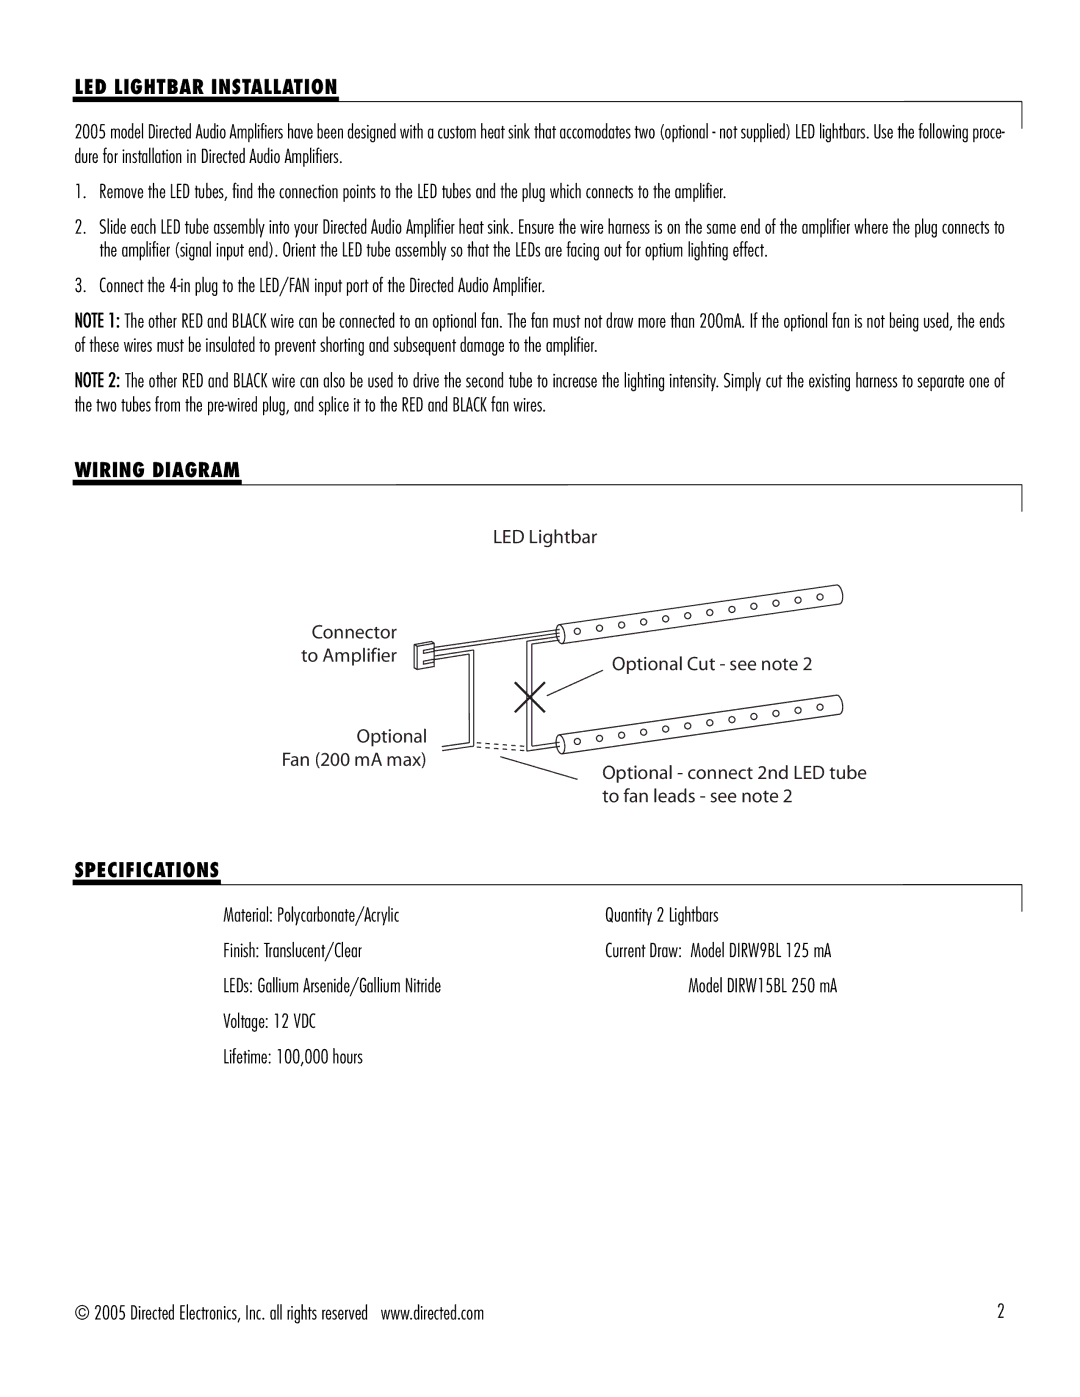
WIRING DIAGRAM
LED Lightbar
Connector |
|
to Amplifier | Optional Cut - see note 2 |
|
Optional
Fan (200 mA max)
SPECIFICATIONS
Optional - connect 2nd LED tube to fan leads - see note 2
Material: Polycarbonate/Acrylic | Quantity 2 Lightbars |
Finish: Translucent/Clear | Current Draw: Model DIRW9BL 125 mA |
LEDs: Gallium Arsenide/Gallium Nitride | Model DIRW15BL 250 mA |
Voltage: 12 VDC |
|
Lifetime: 100,000 hours |
|
© 2005 Directed Electronics, Inc. all rights reserved www.directed.com | 2 |