assembly instructions
1.Remove contents from box: 8 large frame screws and bolts, 4 seat screws, 4 backrest screws, 2 arm frames, a footrest frame, and a seat frame.
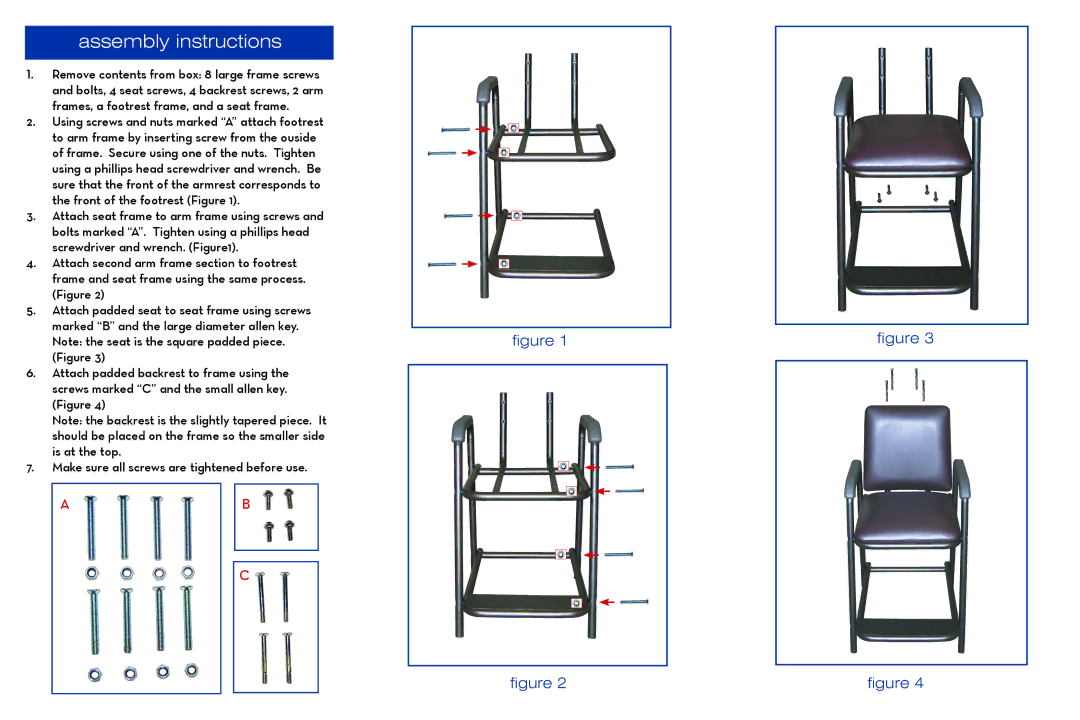
2.Using screws and nuts marked “A” attach footrest
to arm frame by inserting screw from the ouside of frame. Secure using one of the nuts. Tighten using a phillips head screwdriver and wrench. Be sure that the front of the armrest corresponds to the front of the footrest (Figure 1).
3. Attach seat frame to arm frame using screws and bolts marked “A”. Tighten using a phillips head screwdriver and wrench. (Figure1).
4. Attach second arm frame section to footrest frame and seat frame using the same process. (Figure 2)
5.Attach padded seat to seat frame using screws
marked “B” and the large diameter allen key. |
|
|
| |
|
| figure 3 | ||
figure 1 | ||||
Note: the seat is the square padded piece. | ||||
(Figure 3) |
|
|
| |
|
|
| ||
6.Attach padded backrest to frame using the screws marked “C” and the small allen key. (Figure 4)
Note: the backrest is the slightly tapered piece. It should be placed on the frame so the smaller side is at the top.
7. Make sure all screws are tightened before use.
A
B
C
figure 2 | figure 4 |