RS-232C Communication
When the projector connects to the computer by
For details of
Connection
Turn off the projector and the computer.
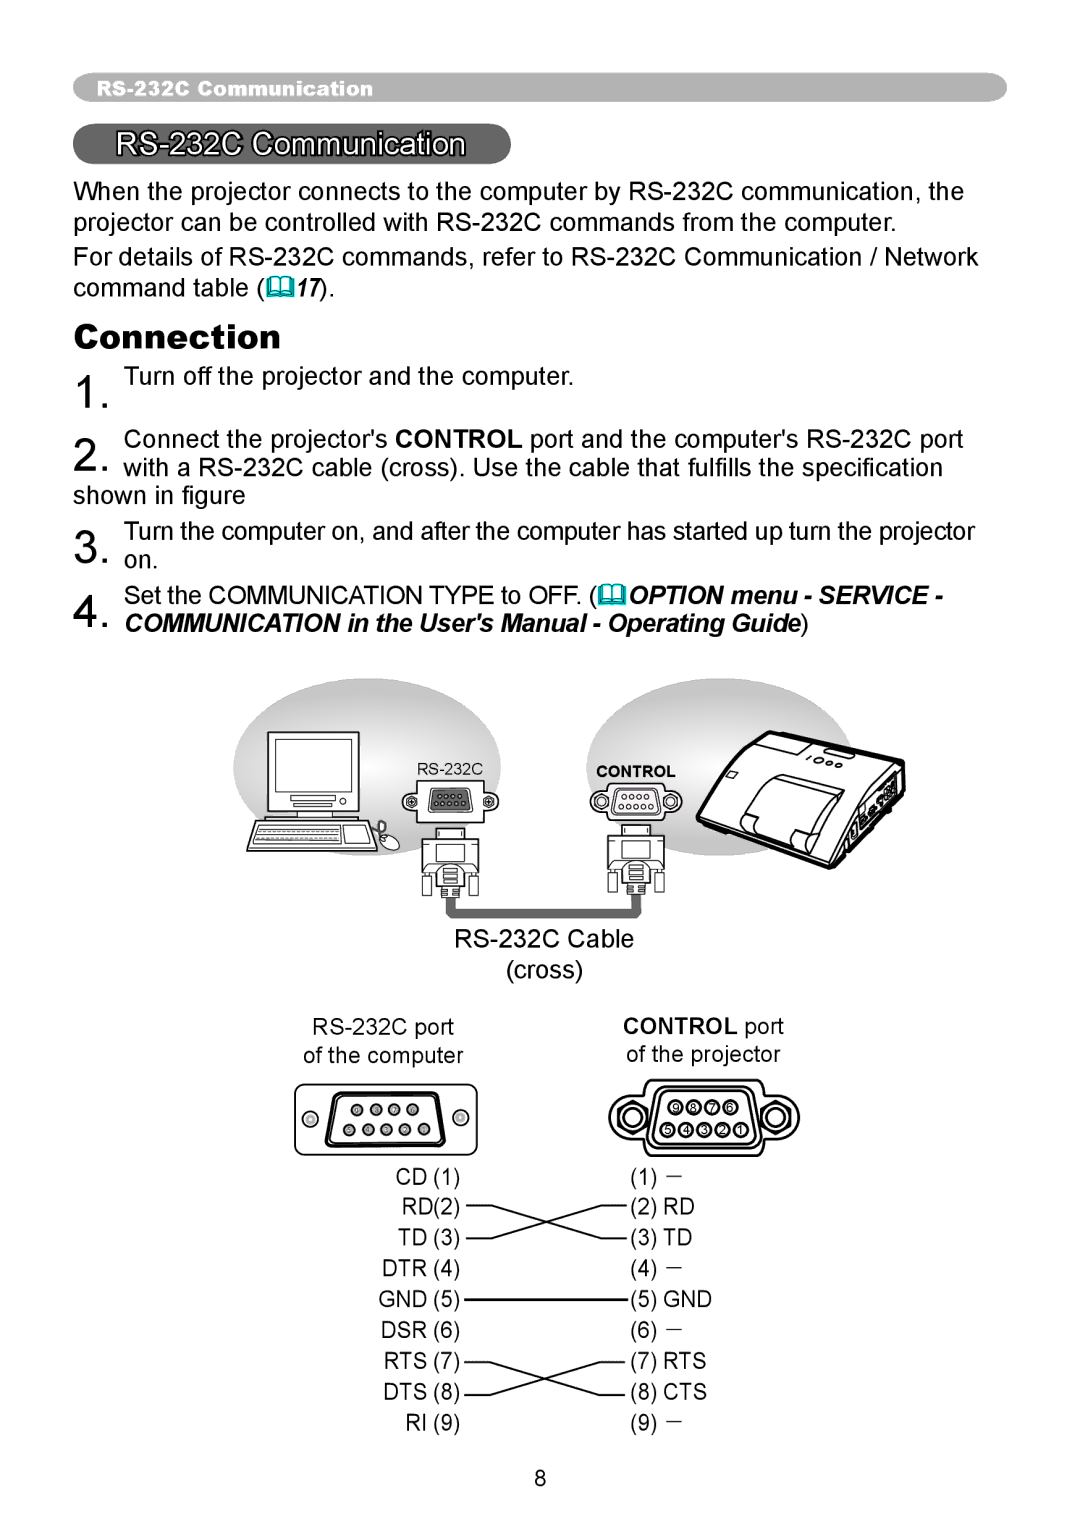
Connect the projector's CONTROL port and the computer's
shown in fi gure
3. Turnon. the computer on, and after the computer has started up turn the projector
4. Set the COMMUNICATION TYPE to OFF. (&OPTION menu - SERVICE - COMMUNICATION in the User's Manual - Operating Guide)
(cross)
CONTROL port | ||||||||||
of the computer | of the projector | |||||||||
9 | 8 | 7 |
| 6 |
| 9 | 8 | 7 |
| 6 |
5 | 4 | 3 | 2 | 1 |
| 5 | 4 | 3 | 2 | 1 |
|
| CD (1) | (1) | - |
|
|
| |||
|
|
| RD(2) | (2) | RD |
|
|
| ||
|
|
| TD (3) | (3) TD |
|
|
| |||
|
| DTR (4) | (4) | - |
|
|
| |||
| GND (5) | (5) GND |
|
| ||||||
|
| DSR (6) | (6) | - |
|
|
| |||
|
| RTS (7) | (7) | RTS |
|
| ||||
|
| DTS (8) | (8) | CTS |
|
| ||||
|
|
| RI (9) | (9) | - |
|
|
| ||
8
