5. Getting Started With PhotoImpression 3.0
uConnect your camera and your PC with the supplied USB cable.
uClick Start→Select Programs→ArcSoft PhotoImpression 3.0
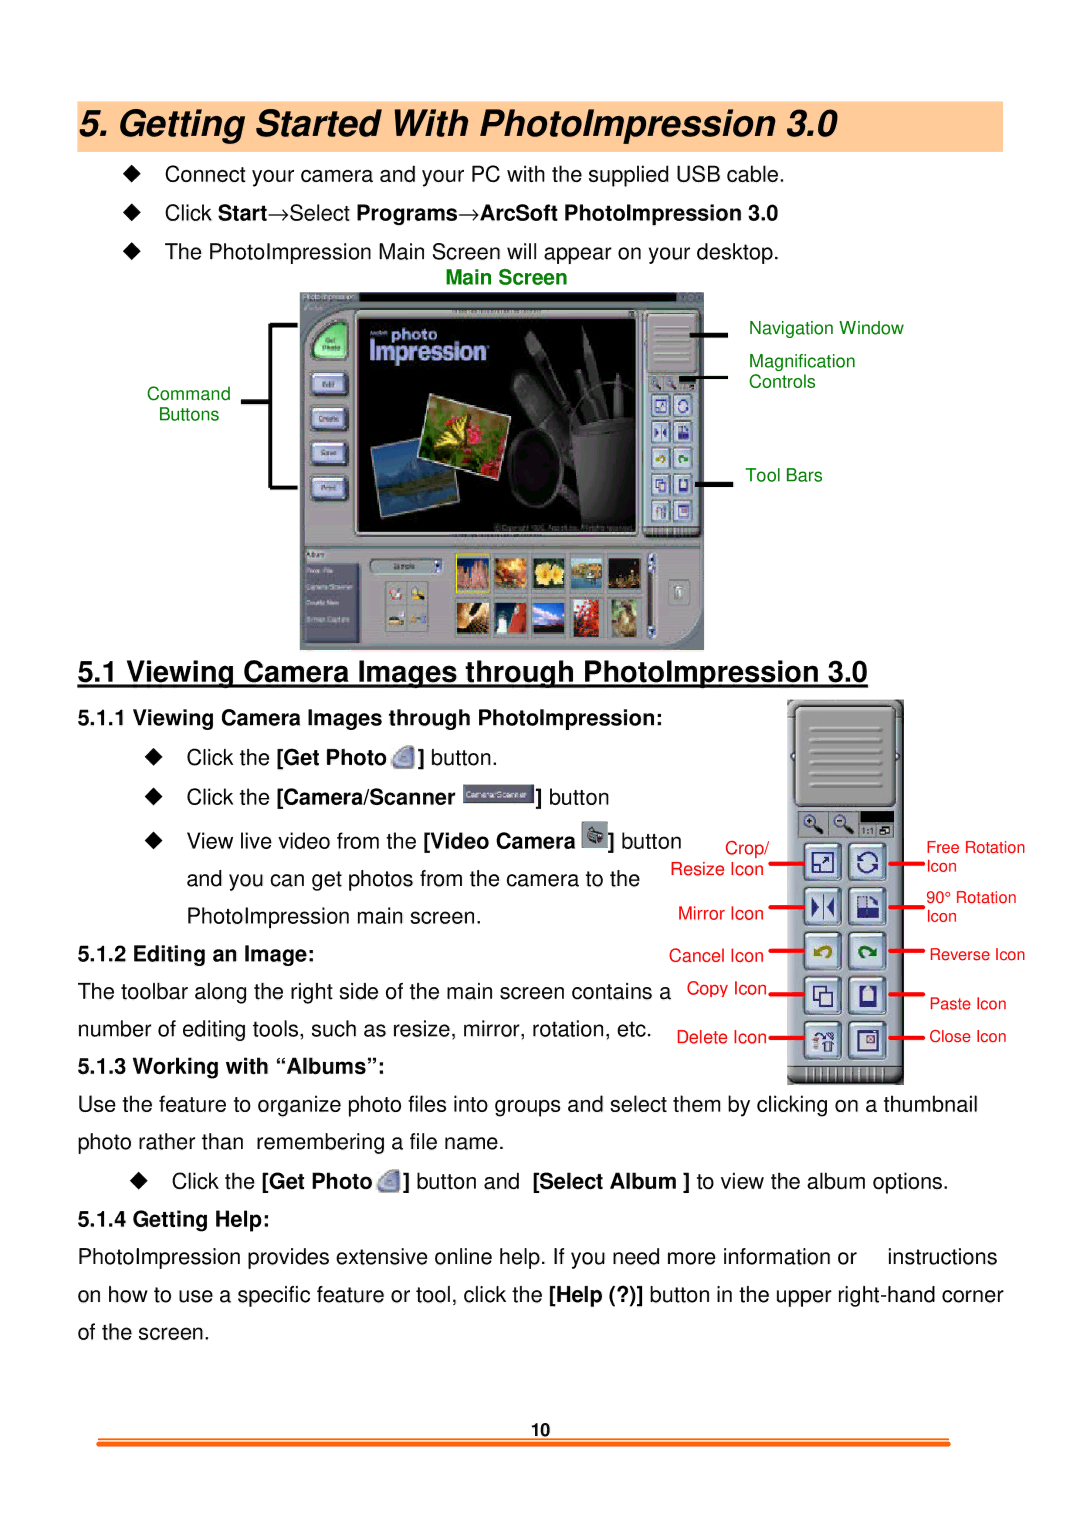
uThe PhotoImpression Main Screen will appear on your desktop.
Main Screen
Command
Buttons
Navigation Window
Magnification
Controls
Tool Bars
5.1 Viewing Camera Images through PhotoImpression 3.0
5.1.1Viewing Camera Images through PhotoImpression: u Click the [Get Photo![]() ] button.
] button.
u Click the [Camera/Scanner  ] button
uView live video from the [Video Camera ![]() ] button Crop/ and you can get photos from the camera to the Resize Icon
] button Crop/ and you can get photos from the camera to the Resize Icon
PhotoImpression main screen. | Mirror Icon |
5.1.2 Editing an Image: | Cancel Icon |
The toolbar along the right side of the main screen contains a Copy Icon number of editing tools, such as resize, mirror, rotation, etc. Delete Icon
5.1.3 Working with “Albums”:
Free Rotation Icon
90° Rotation Icon
Reverse Icon
Paste Icon
Close Icon
Use the feature to organize photo files into groups and select them by clicking on a thumbnail photo rather than remembering a file name.
uClick the [Get Photo![]() ] button and [Select Album ] to view the album options.
] button and [Select Album ] to view the album options.
5.1.4Getting Help:
PhotoImpression provides extensive online help. If you need more information or instructions on how to use a specific feature or tool, click the [Help (?)] button in the upper
10