Page 2
Installing and Powering the Recorder in Your Jet
First, read the Seagull Pro Flight System user manual for overall Seagull installation information.
The Recorder can be powered from your Jet’s receiver battery pack, via the included Y cables, or from its own battery, plugged into one of the Pro system’s servo connectors.
The AMT Netherlands ECU Interface REQUIRES a 4.8v battery pack. The other ECU Interfaces should operate correctly on either a 4.8v or 6v pack. See the Seagull Pro Flight System user manual for more information on powering the recorder.
Connecting the Jet ECU Cable
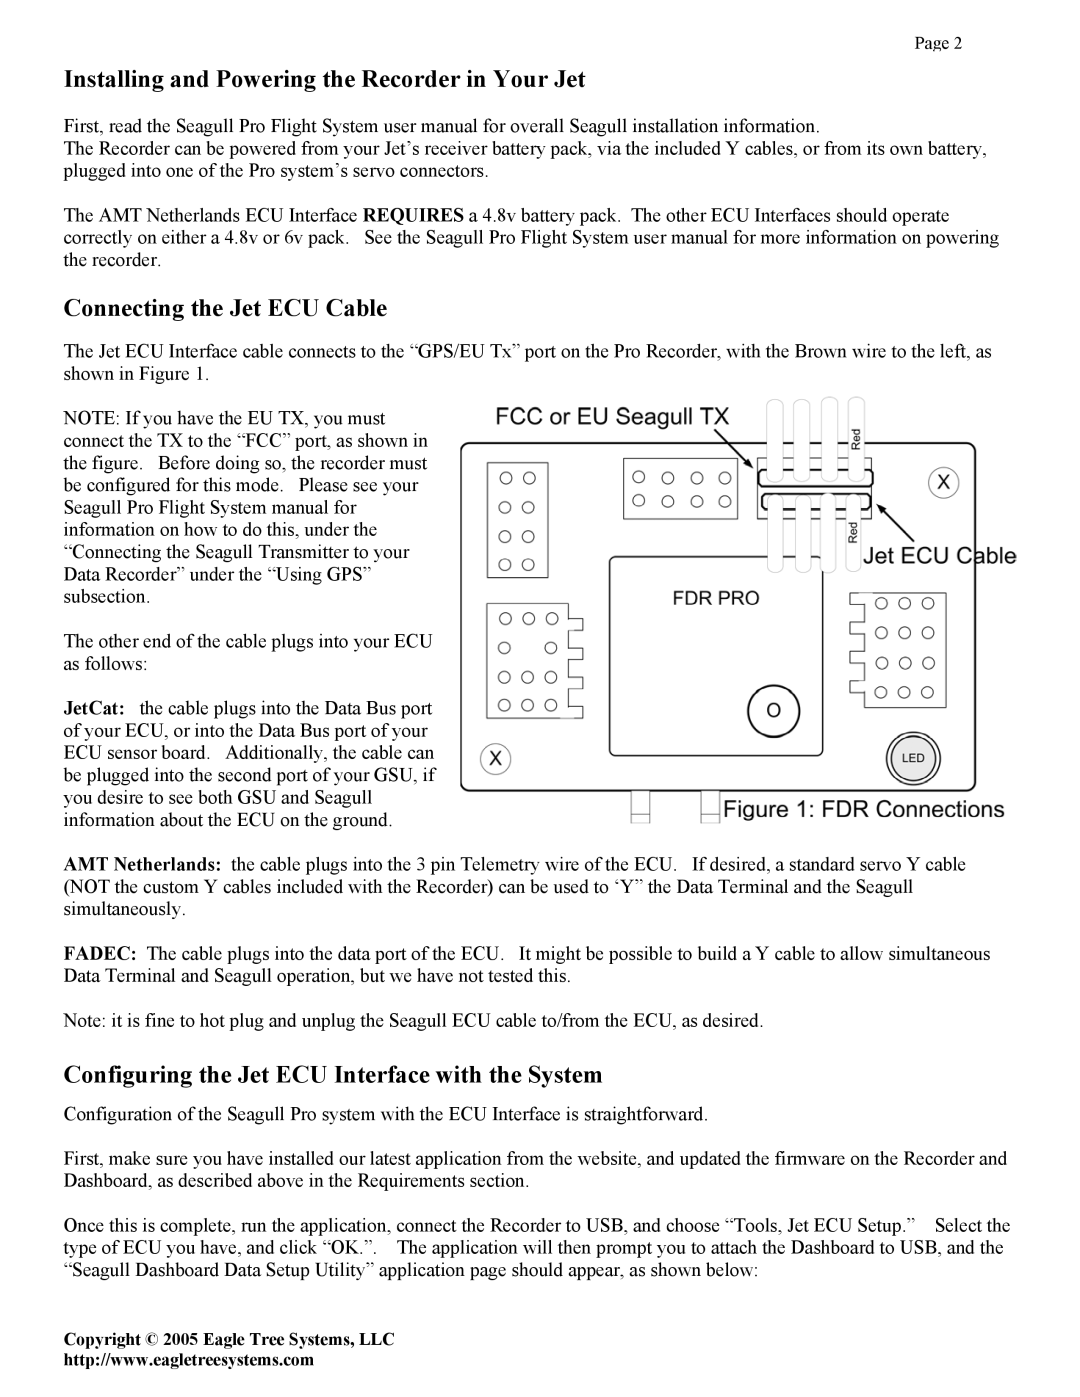
The Jet ECU Interface cable connects to the “GPS/EU Tx” port on the Pro Recorder, with the Brown wire to the left, as shown in Figure 1.
NOTE: If you have the EU TX, you must connect the TX to the “FCC” port, as shown in the figure. Before doing so, the recorder must be configured for this mode. Please see your Seagull Pro Flight System manual for information on how to do this, under the “Connecting the Seagull Transmitter to your Data Recorder” under the “Using GPS” subsection.
The other end of the cable plugs into your ECU as follows:
JetCat: the cable plugs into the Data Bus port of your ECU, or into the Data Bus port of your ECU sensor board. Additionally, the cable can be plugged into the second port of your GSU, if you desire to see both GSU and Seagull information about the ECU on the ground.
AMT Netherlands: the cable plugs into the 3 pin Telemetry wire of the ECU. If desired, a standard servo Y cable (NOT the custom Y cables included with the Recorder) can be used to ‘Y” the Data Terminal and the Seagull simultaneously.
FADEC: The cable plugs into the data port of the ECU. It might be possible to build a Y cable to allow simultaneous Data Terminal and Seagull operation, but we have not tested this.
Note: it is fine to hot plug and unplug the Seagull ECU cable to/from the ECU, as desired.
Configuring the Jet ECU Interface with the System
Configuration of the Seagull Pro system with the ECU Interface is straightforward.
First, make sure you have installed our latest application from the website, and updated the firmware on the Recorder and Dashboard, as described above in the Requirements section.
Once this is complete, run the application, connect the Recorder to USB, and choose “Tools, Jet ECU Setup.” Select the type of ECU you have, and click “OK.”. The application will then prompt you to attach the Dashboard to USB, and the “Seagull Dashboard Data Setup Utility” application page should appear, as shown below:
Copyright © 2005 Eagle Tree Systems, LLC
http://www.eagletreesystems.com