CASTORS (MODEL SC150 AND SC165 OPTIONAL)

The castors are packed separately. Turn the boiler upside down and insert the 3 castors. These should be pushed in hard until they stop. Once installed these remain in place permanently.

FILLING

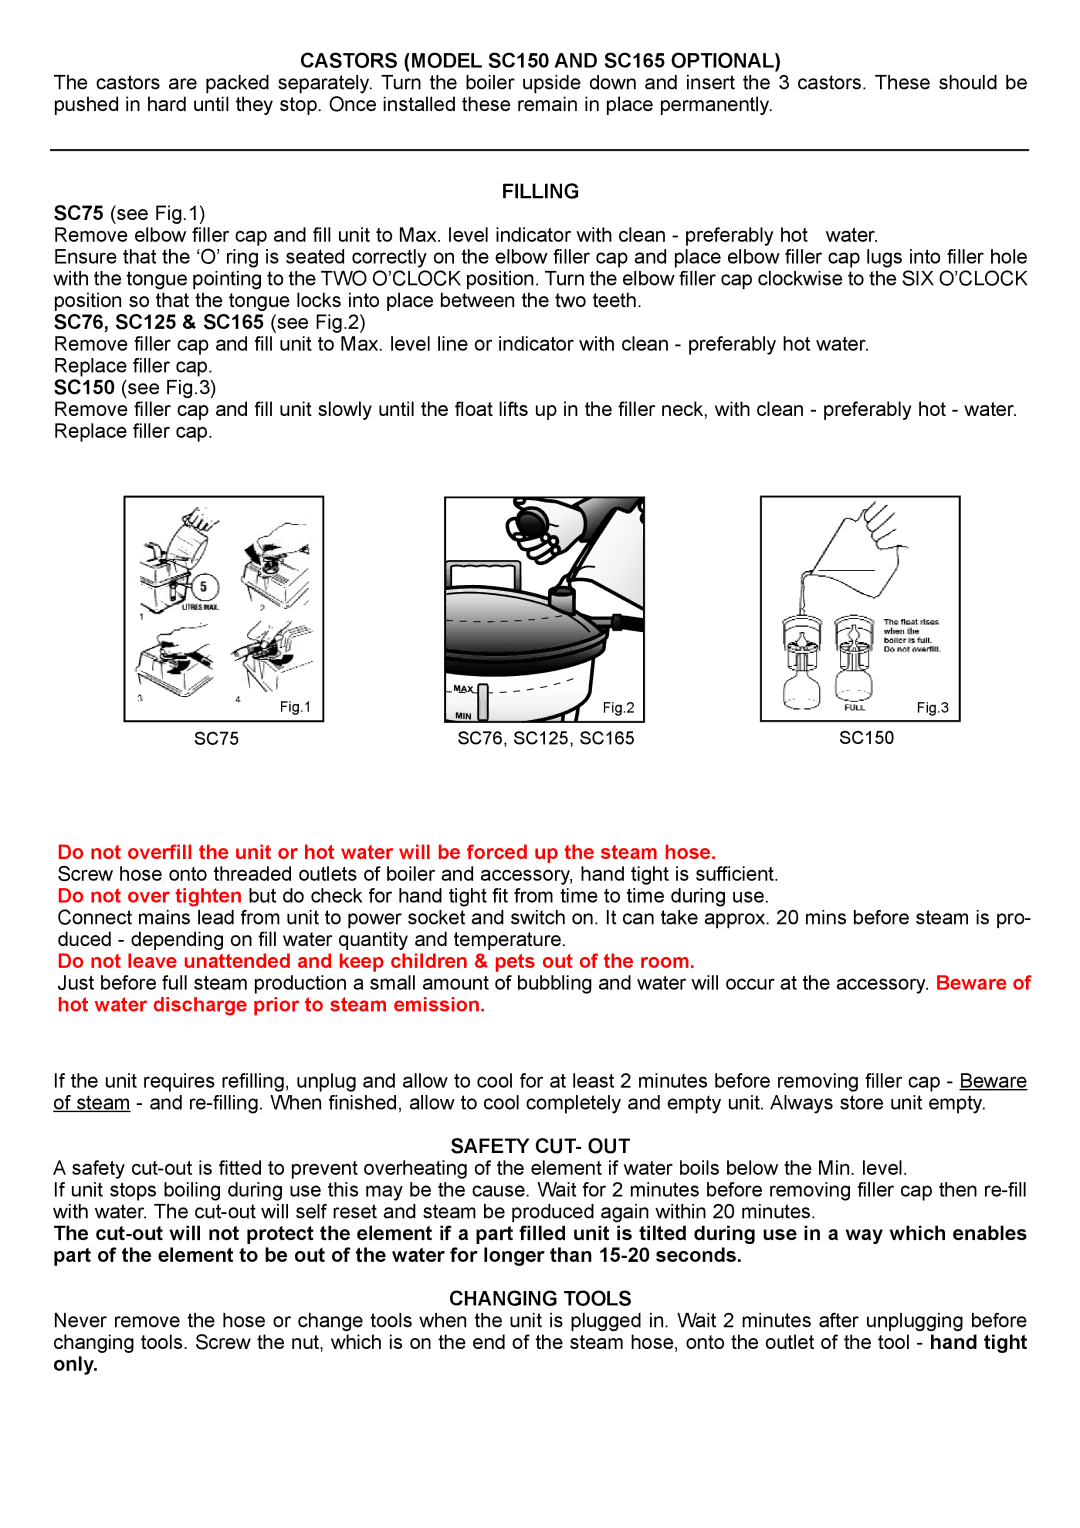
SC75 (see Fig.1)

Remove elbow filler cap and fill unit to Max. level indicator with clean - preferably hot water.

Ensure that the ‘O’ ring is seated correctly on the elbow filler cap and place elbow filler cap lugs into filler hole with the tongue pointing to the TWO O’CLOCK position. Turn the elbow filler cap clockwise to the SIX O’CLOCK position so that the tongue locks into place between the two teeth.

SC76, SC125 & SC165 (see Fig.2)

Remove filler cap and fill unit to Max. level line or indicator with clean - preferably hot water. Replace filler cap.

SC150 (see Fig.3)

Remove filler cap and fill unit slowly until the float lifts up in the filler neck, with clean - preferably hot - water. Replace filler cap.

Fig.1

SC75

Fig.2

SC76, SC125, SC165

Fig.3

SC150

Do not overfill the unit or hot water will be forced up the steam hose. Screw hose onto threaded outlets of boiler and accessory, hand tight is sufficient. Do not over tighten but do check for hand tight fit from time to time during use.

Connect mains lead from unit to power socket and switch on. It can take approx. 20 mins before steam is pro- duced - depending on fill water quantity and temperature.

Do not leave unattended and keep children & pets out of the room.

Just before full steam production a small amount of bubbling and water will occur at the accessory. Beware of hot water discharge prior to steam emission.

If the unit requires refilling, unplug and allow to cool for at least 2 minutes before removing filler cap - Beware of steam - and re-filling. When finished, allow to cool completely and empty unit. Always store unit empty.

SAFETY CUT- OUT

A safety cut-out is fitted to prevent overheating of the element if water boils below the Min. level.

If unit stops boiling during use this may be the cause. Wait for 2 minutes before removing filler cap then re-fill with water. The cut-out will self reset and steam be produced again within 20 minutes.

The cut-out will not protect the element if a part filled unit is tilted during use in a way which enables part of the element to be out of the water for longer than 15-20 seconds.

CHANGING TOOLS

Never remove the hose or change tools when the unit is plugged in. Wait 2 minutes after unplugging before changing tools. Screw the nut, which is on the end of the steam hose, onto the outlet of the tool - hand tight only.

Page 4
Image 4
Earlex SC75 Castors Model SC150 and SC165 Optional, Filling, SC76, SC125 & SC165 see, Safety CUT- OUT, Changing Tools

SC75, SC76, SC125, SC165, SC150 specifications

The Earlex range of spray guns, including the SC150, SC165, SC125, SC76, and SC75, are designed to provide high-quality finishing solutions for both professional and DIY users. Each model features advanced technologies tailored to facilitate a smooth painting or staining process, ensuring excellent results across various applications.

The Earlex SC150 is known for its high efficiency when it comes to spraying larger surfaces. With a powerful 650W motor, it offers adjustable pressure settings that allow users to adapt the spray output to different materials, making it suitable for everything from thin stains to thicker paints. Its lightweight and ergonomic design ensure minimal fatigue during extended usage.

The SC165 model enhances the user's experience by integrating a 900W motor that delivers a more robust spray pattern. This model features an easy-to-clean design and a built-in turbo fan that helps reduce overspray, which is particularly beneficial for detailed work. With its extensive range of nozzle sizes, users can switch between finishes quickly to achieve precise results.

Designed for versatility, the SC125 model caters to both heavy-duty projects and smaller tasks. It features a unique variable spray control that allows users to fine-tune their spray pattern for various applications. The SC125 is well-regarded for its quick setup and easy maintenance, making it a favorite among both amateurs and seasoned professionals alike.

Moving towards more compact solutions, the SC76 is favored for its portability. With a 650W motor and a lightweight body, it is ideal for those who need a quality finish without the hassle of heavy equipment. The SC76 is equipped with a simple nozzle adjustment mechanism, enabling users to customize their spray width with ease. Its compact size makes it perfect for smaller workshops or home projects.

Finally, the SC75 model closes the range with an emphasis on user-friendliness. It features a straightforward design that allows even beginners to achieve professional results. With its adjustable airflow and easy-to-grip handle, the SC75 provides comfort and control, making it a great entry-level option for aspiring DIY enthusiasts.

Overall, the Earlex SC series combines powerful motors, adjustable settings, and versatile features to provide users with a comprehensive solution for all their spray finishing needs. From professional applications to home projects, these models are designed to deliver impressive results with precision and ease.