
LC-X1UL, LC-X1UA specifications
The Eiki LC-X1UA is a powerful and versatile LCD projector designed for both professional and educational environments. Known for its exceptional image quality and robust performance, it caters to a wide range of applications including presentations, video conferencing, and classroom lectures. The projector integrates advanced technologies to deliver a seamless visual experience, making it a valuable asset for any setting.One of the standout features of the Eiki LC-X1UA is its impressive brightness rating of up to 5500 lumens. This high brightness allows it to project vibrant images even in well-lit rooms, ensuring that content is clearly visible to all viewers. The projector utilizes a native XGA (1024 x 768) resolution, which is well-suited for standard video formats and provides sharp, detailed images for presentations and graphics.
The Eiki LC-X1UA employs 3LCD technology, a key factor in producing accurate and vivid colors. This system effectively balances the white and color brightness, resulting in images that are true-to-life and engaging. Whether displaying images, videos, or documents, users can expect consistent color fidelity that enhances the overall viewing experience.
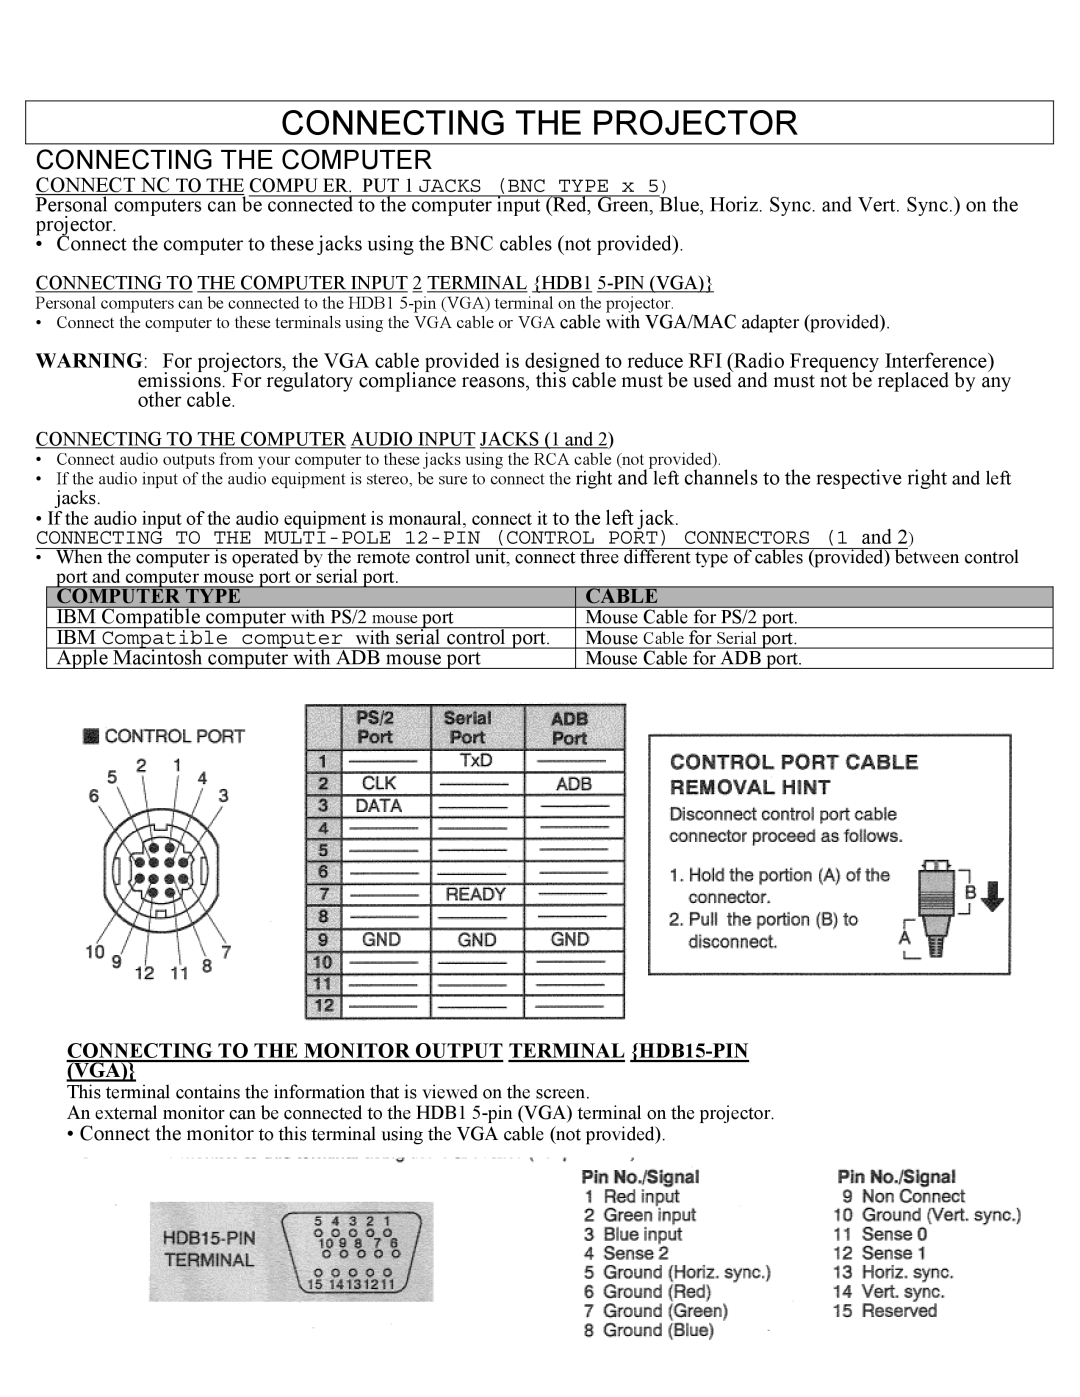
In terms of connectivity, the projector is equipped with a variety of input options, including HDMI, VGA, and USB, allowing for easy integration with laptops, media players, and other devices. The inclusion of built-in audio capabilities ensures that sound is adequately projected alongside visuals, enhancing presentations and video playback without the need for external speakers.
The Eiki LC-X1UA also features an energy-efficient design, which helps reduce power consumption and extends the lifespan of the lamp. Users will appreciate the lower maintenance costs associated with this model, as it supports long lamp life, further enhancing its cost-effectiveness.
Flexibility is another key characteristic of the Eiki LC-X1UA, as it supports a range of throw distances. This capability allows users to adjust the projector's position based on the room's layout, ensuring optimal image size and quality regardless of the space.
Overall, the Eiki LC-X1UA is a reliable and feature-rich projector ideal for various environments. With its robust brightness, advanced color technology, diverse connectivity options, and energy efficiency, it stands out as an excellent choice for those seeking high-quality projection solutions.