Electro-Voice EVID Cut the Hole Figure, Install C-Ringand/or Tile Rails Figure, Cut ceiling hole

Models: EVID

1 20
Download 20 pages 62.03 Kb
Page 7
Image 7
Step 1: Cut the Hole (Figure 6)

Installation and Wiring

Step 1: Cut the Hole (Figure 6)

For suspended tile or sheetrock ceilings, cut out the hole either by tracing the cardboard template or with a circular cutter set to the appropriate cutout size. If the wire has been pre-installed, pull the wiring through the cutout hole.

Figure 6: Cut ceiling hole

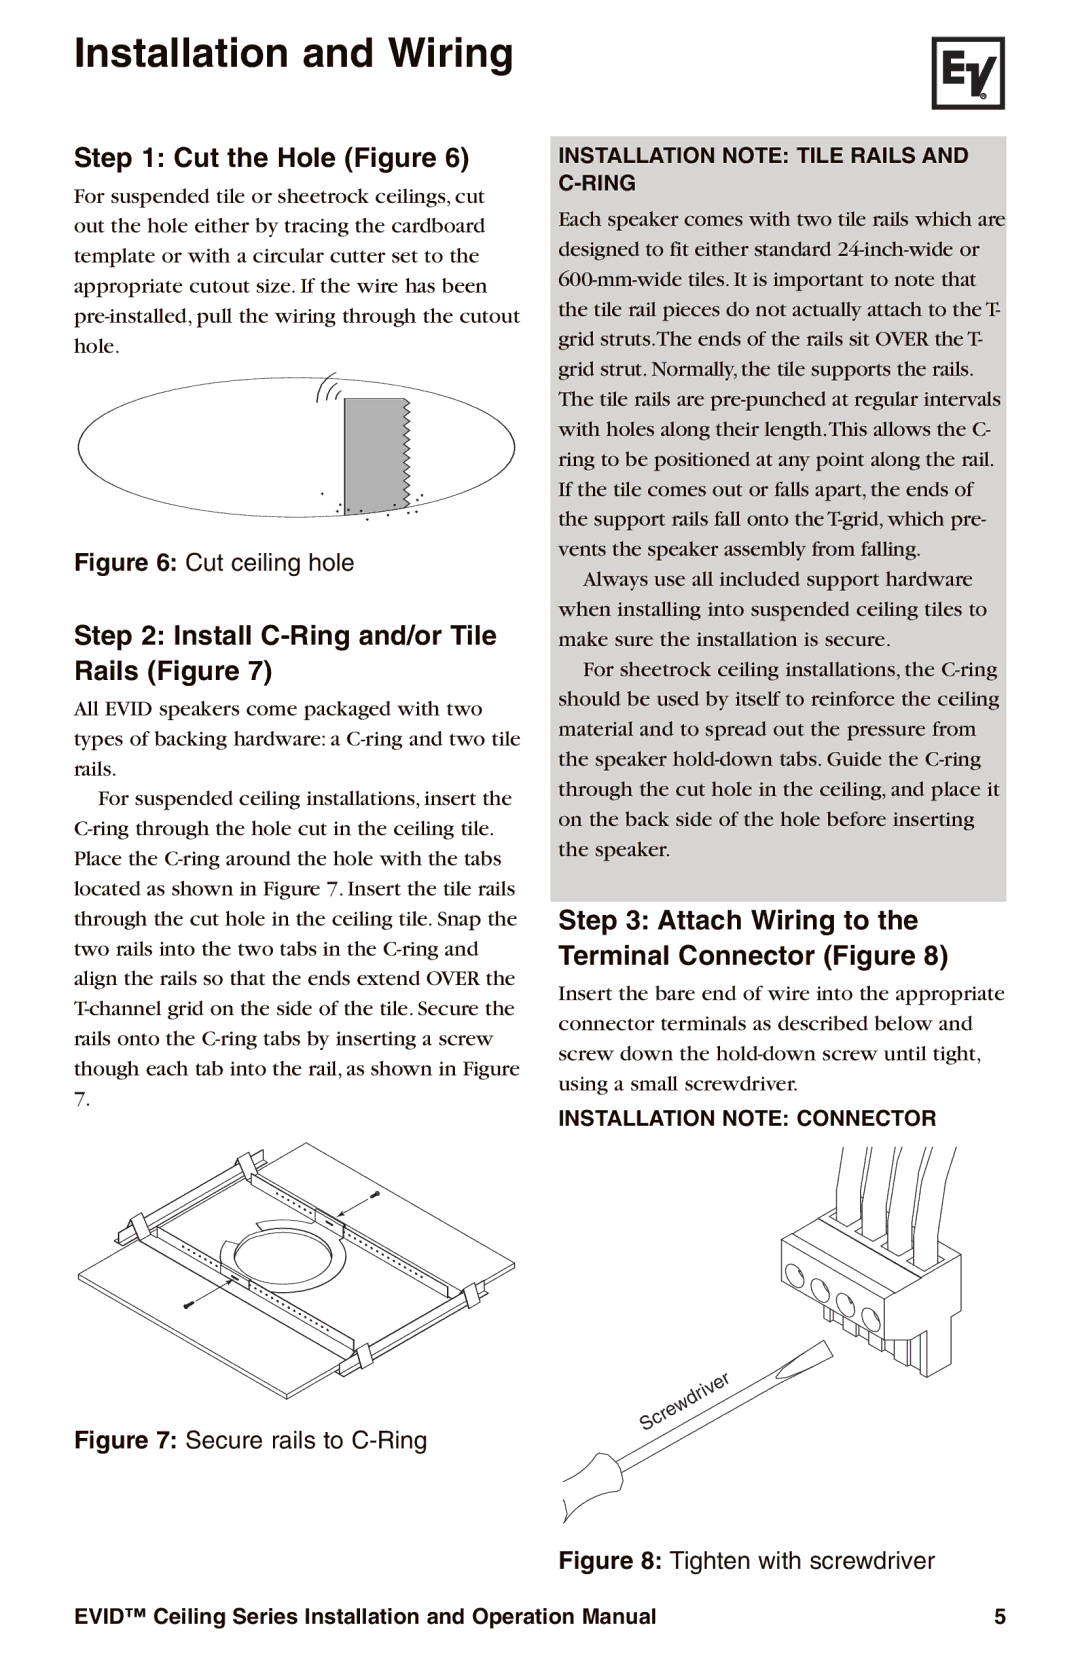
Step 2: Install C-Ring and/or Tile Rails (Figure 7)

All EVID speakers come packaged with two types of backing hardware: a C-ring and two tile rails.

For suspended ceiling installations, insert the C-ring through the hole cut in the ceiling tile. Place the C-ring around the hole with the tabs located as shown in Figure 7. Insert the tile rails through the cut hole in the ceiling tile. Snap the two rails into the two tabs in the C-ring and align the rails so that the ends extend OVER the T-channel grid on the side of the tile. Secure the rails onto the C-ring tabs by inserting a screw though each tab into the rail, as shown in Figure 7.

Figure 7: Secure rails to C-Ring

INSTALLATION NOTE: TILE RAILS AND C-RING

Each speaker comes with two tile rails which are designed to fit either standard 24-inch-wide or 600-mm-wide tiles. It is important to note that the tile rail pieces do not actually attach to the T- grid struts.The ends of the rails sit OVER the T- grid strut. Normally, the tile supports the rails. The tile rails are pre-punched at regular intervals with holes along their length.This allows the C- ring to be positioned at any point along the rail. If the tile comes out or falls apart, the ends of the support rails fall onto the T-grid, which pre- vents the speaker assembly from falling.

Always use all included support hardware when installing into suspended ceiling tiles to make sure the installation is secure.

For sheetrock ceiling installations, the C-ring should be used by itself to reinforce the ceiling material and to spread out the pressure from the speaker hold-down tabs. Guide the C-ring through the cut hole in the ceiling, and place it on the back side of the hole before inserting the speaker.

Step 3: Attach Wiring to the Terminal Connector (Figure 8)

Insert the bare end of wire into the appropriate connector terminals as described below and screw down the hold-down screw until tight, using a small screwdriver.

INSTALLATION NOTE: CONNECTOR

Figure 8: Tighten with screwdriver

EVID™ Ceiling Series Installation and Operation Manual

5

Page 7
Image 7
Electro-Voice EVID Cut the Hole Figure, Install C-Ringand/or Tile Rails Figure, Cut ceiling hole, Secure rails to C-Ring