Item B

Item D (x2)

Item D

(x2)

Item B

Item E

Item E

Item C

(x4)

Item C

(x4)

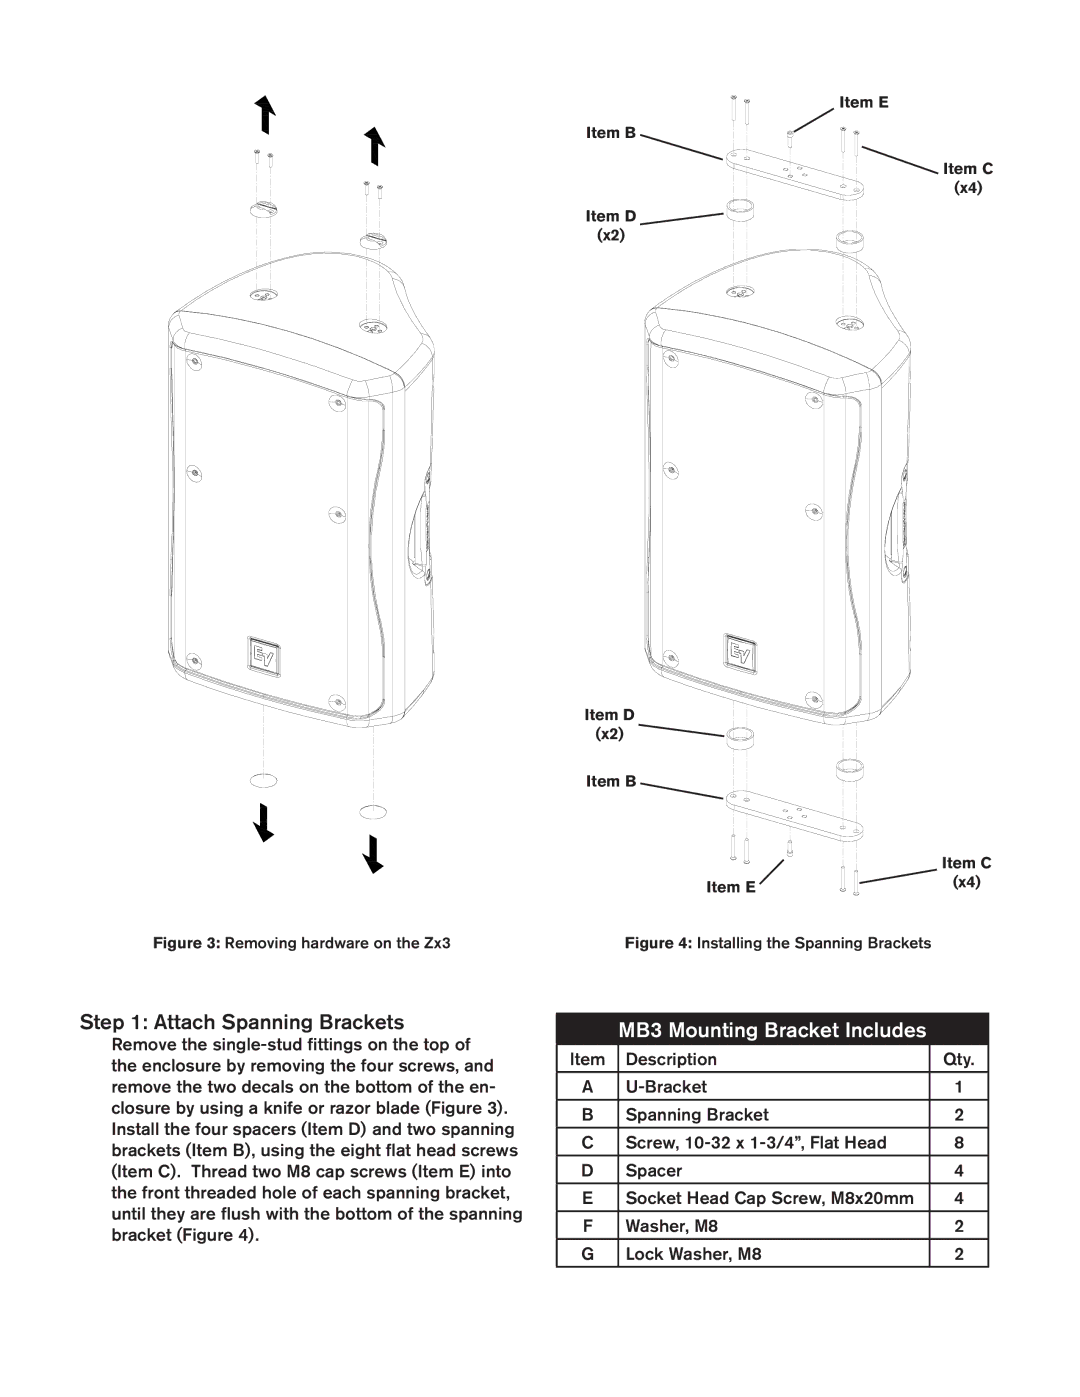
Figure 3: Removing hardware on the Zx3

Figure 4: Installing the Spanning Brackets

Step 1: Attach Spanning Brackets

Remove the single-stud fittings on the top of the enclosure by removing the four screws, and remove the two decals on the bottom of the en- closure by using a knife or razor blade (Figure 3). Install the four spacers (Item D) and two spanning brackets (Item B), using the eight flat head screws (Item C). Thread two M8 cap screws (Item E) into the front threaded hole of each spanning bracket, until they are flush with the bottom of the spanning bracket (Figure 4).

MB3 Mounting Bracket Includes

Item

Description

Qty.


A

U-Bracket

1


B

Spanning Bracket

2


C

Screw, 10-32 x 1-3/4”, Flat Head

8


D

Spacer

4


E

Socket Head Cap Screw, M8x20mm

4


F

Washer, M8

2


G

Lock Washer, M8

2


Page 2
Image 2
Electro-Voice installation instructions Attach Spanning Brackets, MB3 Mounting Bracket Includes