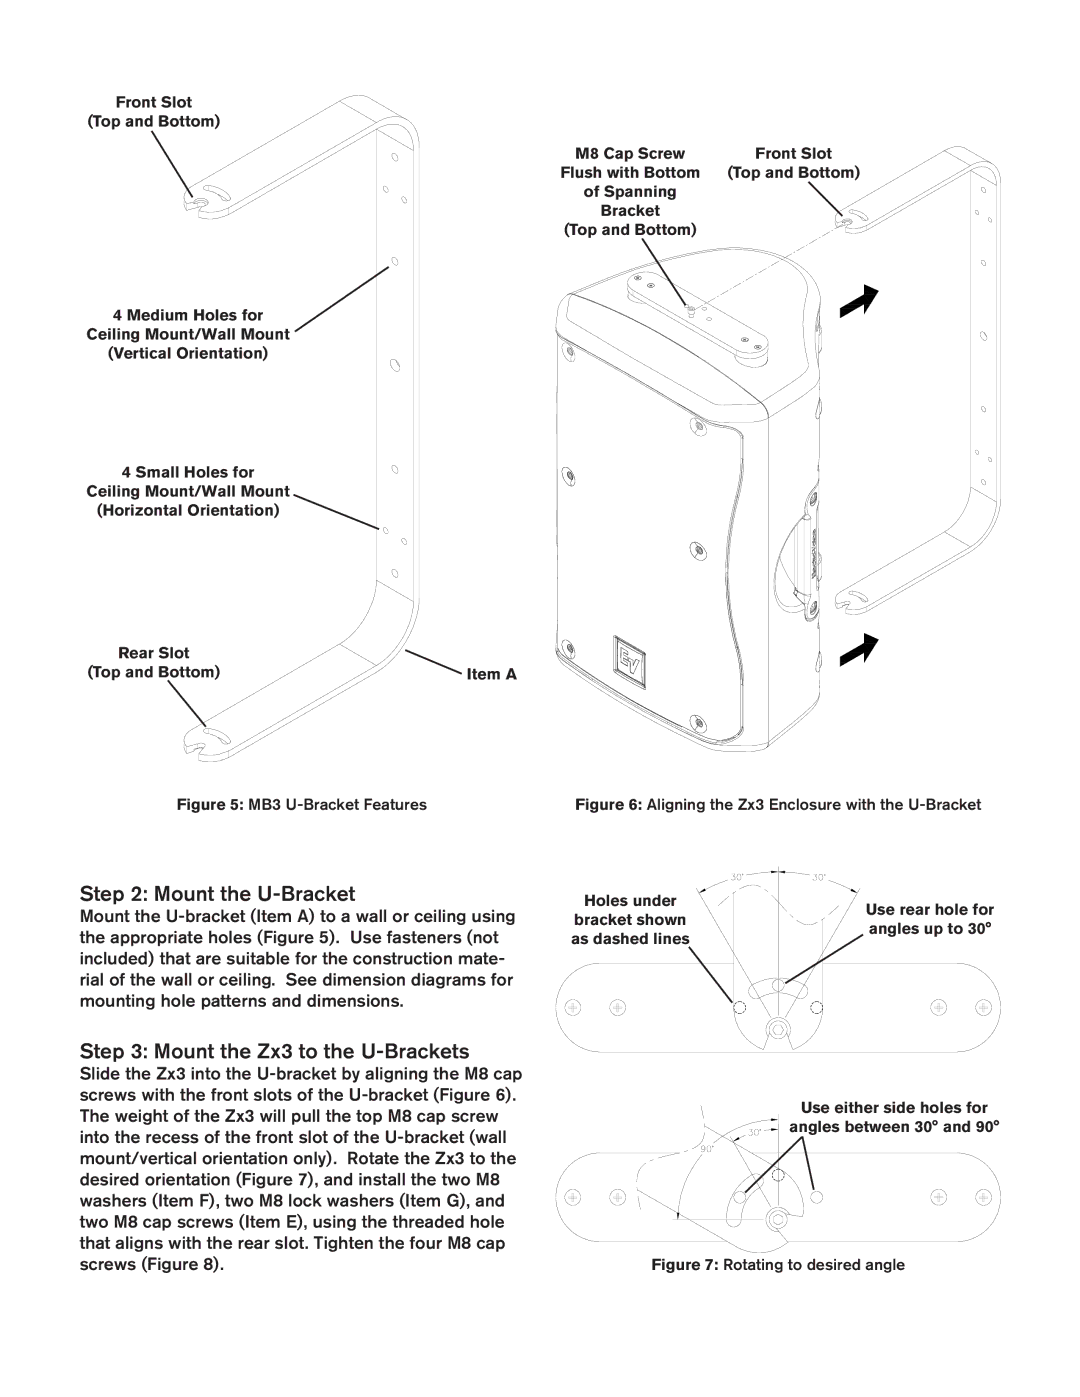
Step 2: Mount the U-Bracket
Mount the U-bracket (Item A) to a wall or ceiling using
the appropriate holes (Figure 5). Use fasteners (not
included) that are suitable for the construction mate-
rial of the wall or ceiling. See dimension diagrams for
mounting hole patterns and dimensions.
Step 3: Mount the Zx3 to the U-Brackets
Slide the Zx3 into the U-bracket by aligning the M8 cap
screws with the front slots of the U-bracket (Figure 6).
The weight of the Zx3 will pull the top M8 cap screw
into the recess of the front slot of the U-bracket (wall
mount/vertical orientation only). Rotate the Zx3 to the
desired orientation (Figure 7), and install the two M8
washers (Item F), two M8 lock washers (Item G), and
two M8 cap screws (Item E), using the threaded hole
that aligns with the rear slot. Tighten the four M8 cap
screws (Figure 8).
Item A
4 Medium Holes for
Ceiling Mount/Wall Mount
(Vertical Orientation)
4 Small Holes for
Ceiling Mount/Wall Mount
(Horizontal Orientation)
Rear Slot
(Top and Bottom)
Front Slot
(Top and Bottom)
Figure 5: MB3 U-Bracket Features Figure 6: Aligning the Zx3 Enclosure with the U-Bracket
Figure 7: Rotating to desired angle
M8 Cap Screw
Flush with Bottom
of Spanning
Bracket
(Top and Bottom)
Front Slot
(Top and Bottom)
Use rear hole for
angles up to 30°
Use either side holes for
angles between 30° and 90°
Holes under
bracket shown
as dashed lines