
55LXa specifications
The Electrolux 55LXa is a versatile and innovative kitchen appliance that enhances food preservation and cooking efficiency. Designed with user convenience in mind, this model showcases a blend of advanced technology and practical features, making it a desirable choice for modern households.One of the standout characteristics of the Electrolux 55LXa is its impressive 55-liter capacity. This generous space accommodates a wide variety of food items, ensuring that users can store everything from fresh produce to larger meal preparations without compromising on organization. The sleek and stylish design integrates seamlessly into any kitchen decor, making it both functional and aesthetically pleasing.
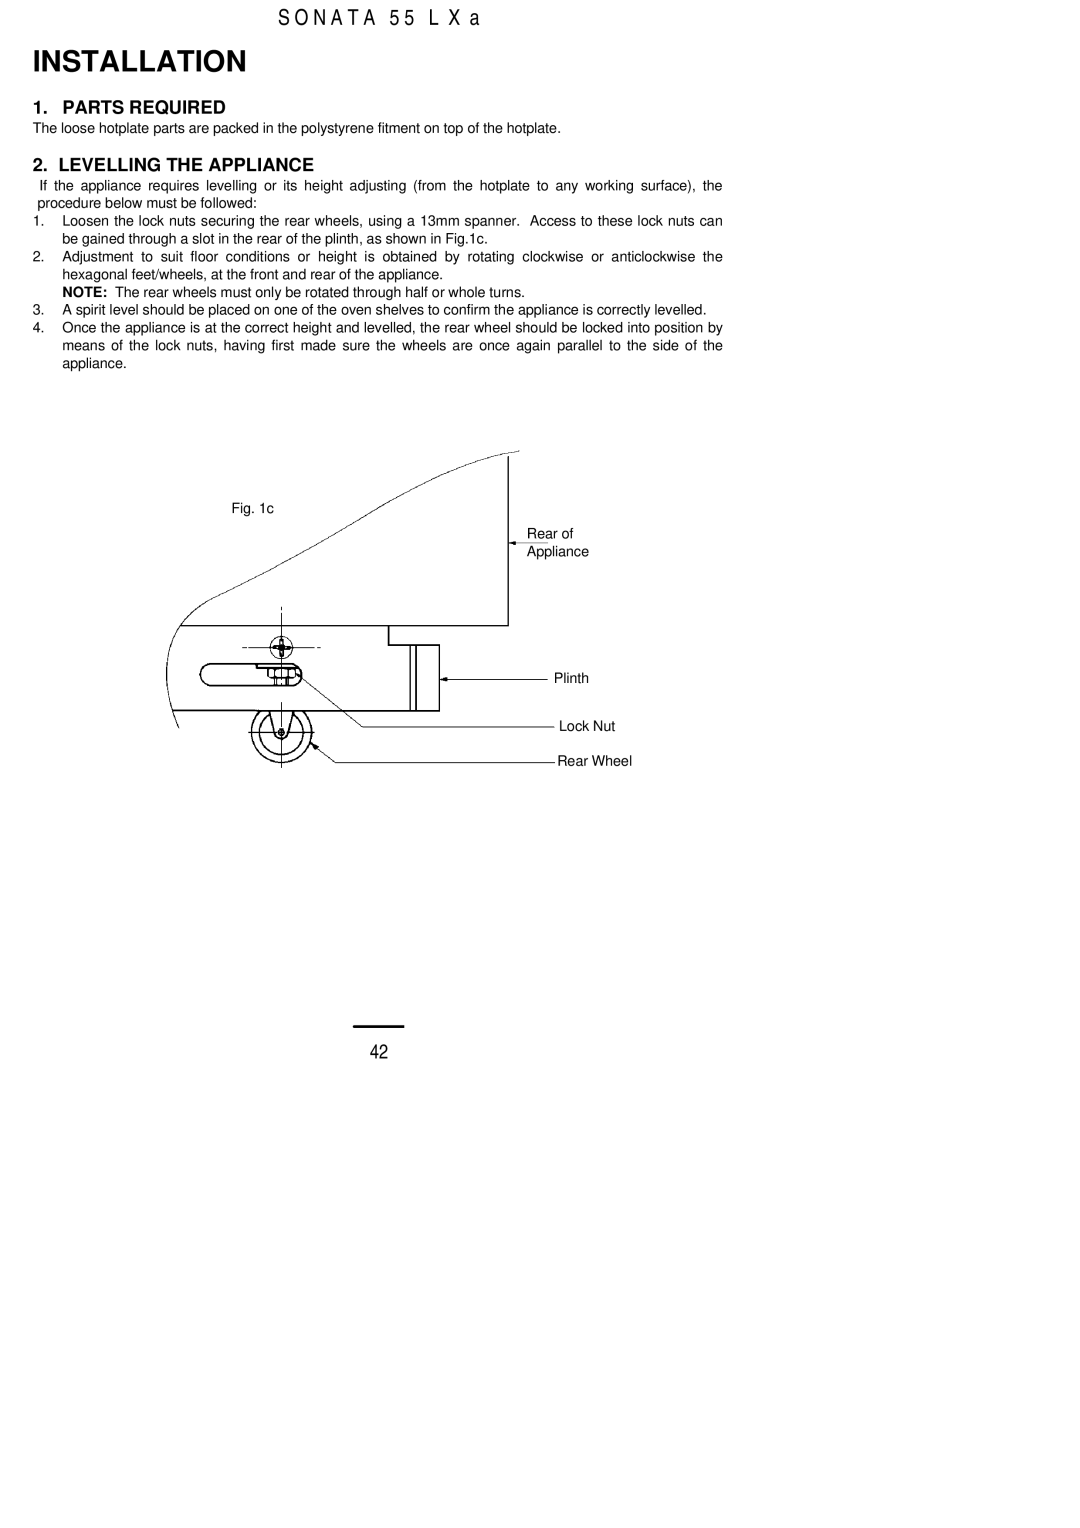
The appliance is equipped with advanced cooling technology that maintains optimal temperature levels to keep food fresh for longer periods. The cooling system utilizes a multi-air flow feature, which ensures even distribution of cold air throughout the interior. This eliminates hot spots and maintains consistent temperatures, preserving the quality and taste of stored foods.
In addition to its cooling capabilities, the Electrolux 55LXa includes a highly efficient No Frost feature, which prevents the buildup of ice and frost. This not only saves users the hassle of manual defrosting but also improves energy efficiency by maintaining optimal operational performance.
The Electrolux 55LXa also prioritizes smart functionality with its intuitive touch control panel. This user-friendly interface allows users to easily set and monitor temperatures, choose specific modes, and receive notifications about performance. The energy-efficient LED lighting inside the appliance illuminates the interior, making it easy to locate items without opening the door unnecessarily.
Another notable feature is the adjustable shelving system, which provides flexibility when arranging food items of different sizes. This customization enhances space utilization, allowing users to maximize storage capabilities while keeping everything easily accessible.
In summary, the Electrolux 55LXa exemplifies a perfect combination of functionality, efficiency, and style. With its spacious interior, advanced cooling technology, user-friendly controls, and smart features, this appliance is designed to meet the demands of contemporary kitchens. It stands as a reliable solution for food storage and preservation, beneficial for individuals and families alike. Whether you are an avid home cook or someone who values organized living spaces, the Electrolux 55LXa is a smart investment in culinary convenience and efficiency.