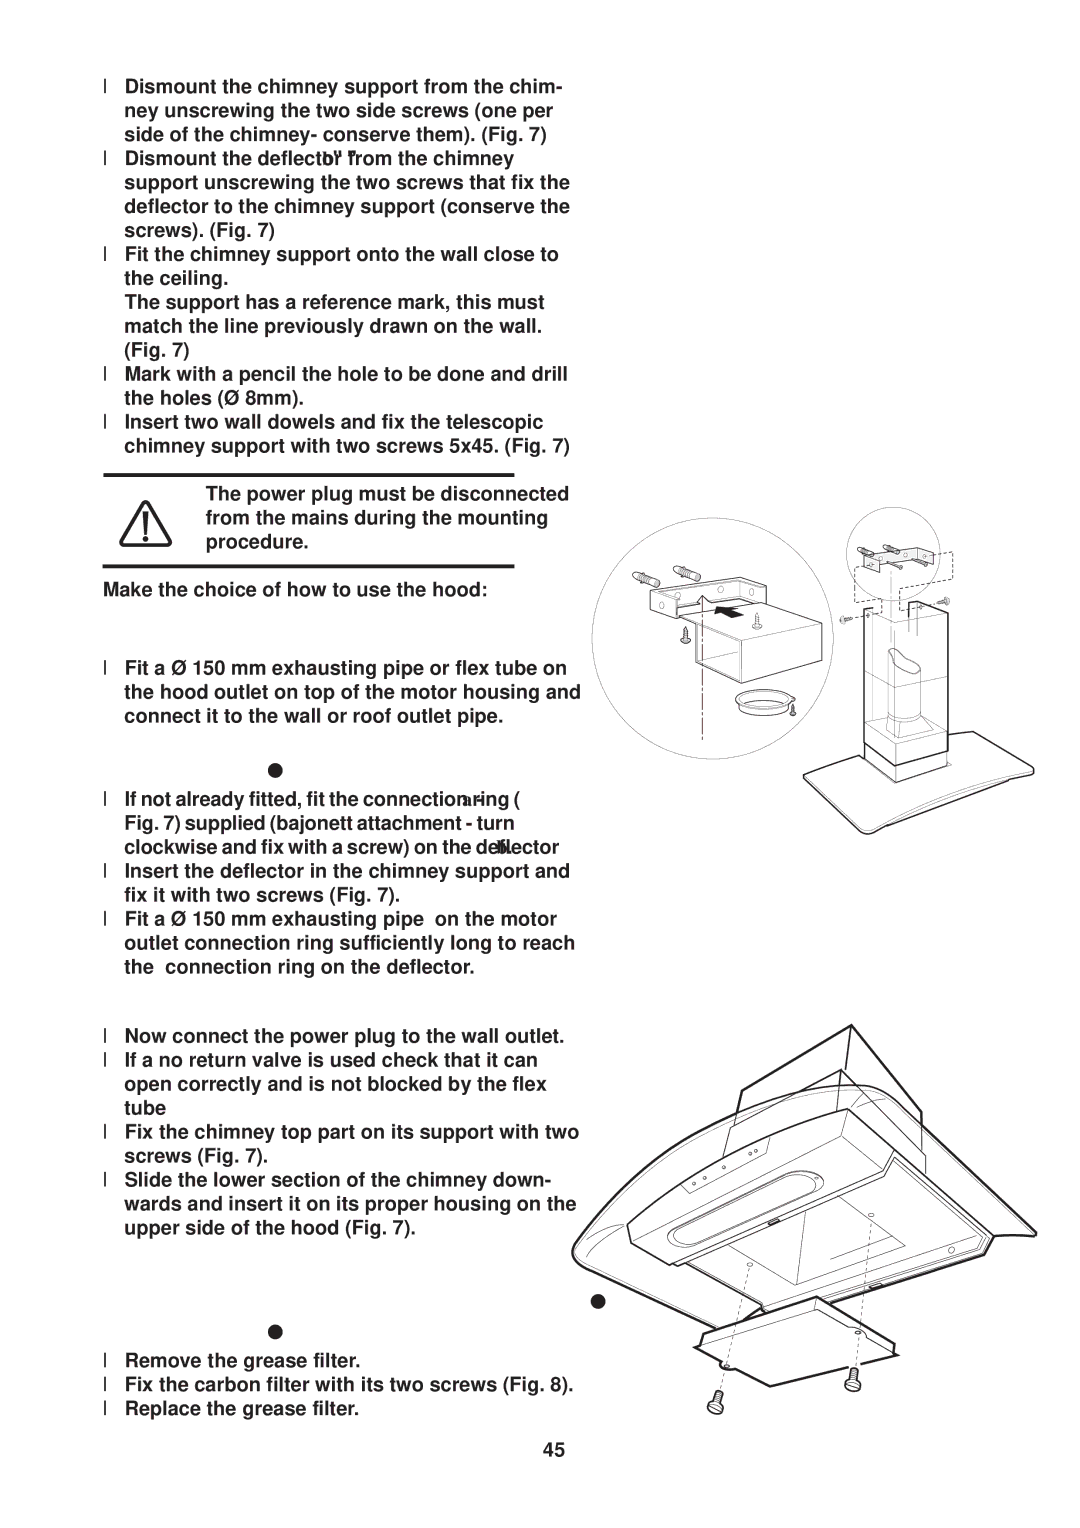
lDismount the chimney support from the chim- ney unscrewing the two side screws (one per side of the chimney- conserve them). (Fig. 7)
lDismount the deflector "b" from the chimney support unscrewing the two screws that fix the deflector to the chimney support (conserve the screws). (Fig. 7)
lFit the chimney support onto the wall close to the ceiling.
The support has a reference mark, this must match the line previously drawn on the wall. (Fig. 7)
lMark with a pencil the hole to be done and drill the holes (Ø 8mm).
lInsert two wall dowels and fix the telescopic chimney support with two screws 5x45. (Fig. 7)
The power plug must be disconnected from the mains during the mounting procedure.
Make the choice of how to use the hood:
Exhausting version
lFit a Ø 150 mm exhausting pipe or flex tube on the hood outlet on top of the motor housing and connect it to the wall or roof outlet pipe.
Recirculating version
lIf not already fitted, fit the connection ring (a - Fig. 7) supplied (bajonett attachment - turn clockwise and fix with a screw) on the deflector b.
lInsert the deflector in the chimney support and fix it with two screws (Fig. 7).
lFit a Ø 150 mm exhausting pipe on the motor outlet connection ring sufficiently long to reach the connection ring on the deflector.
For both versions:
lNow connect the power plug to the wall outlet.
lIf a no return valve is used check that it can open correctly and is not blocked by the flex tube
lFix the chimney top part on its support with two screws (Fig. 7).
lSlide the lower section of the chimney down- wards and insert it on its proper housing on the upper side of the hood (Fig. 7).
Mounting of carbon filter (for recirculating version)
lRemove the grease filter.
lFix the carbon filter with its two screws (Fig. 8).
lReplace the grease filter.
Fig. 7
Fig. 8
b
a![]()
45