Fitting the Cooker Hood to the Wall
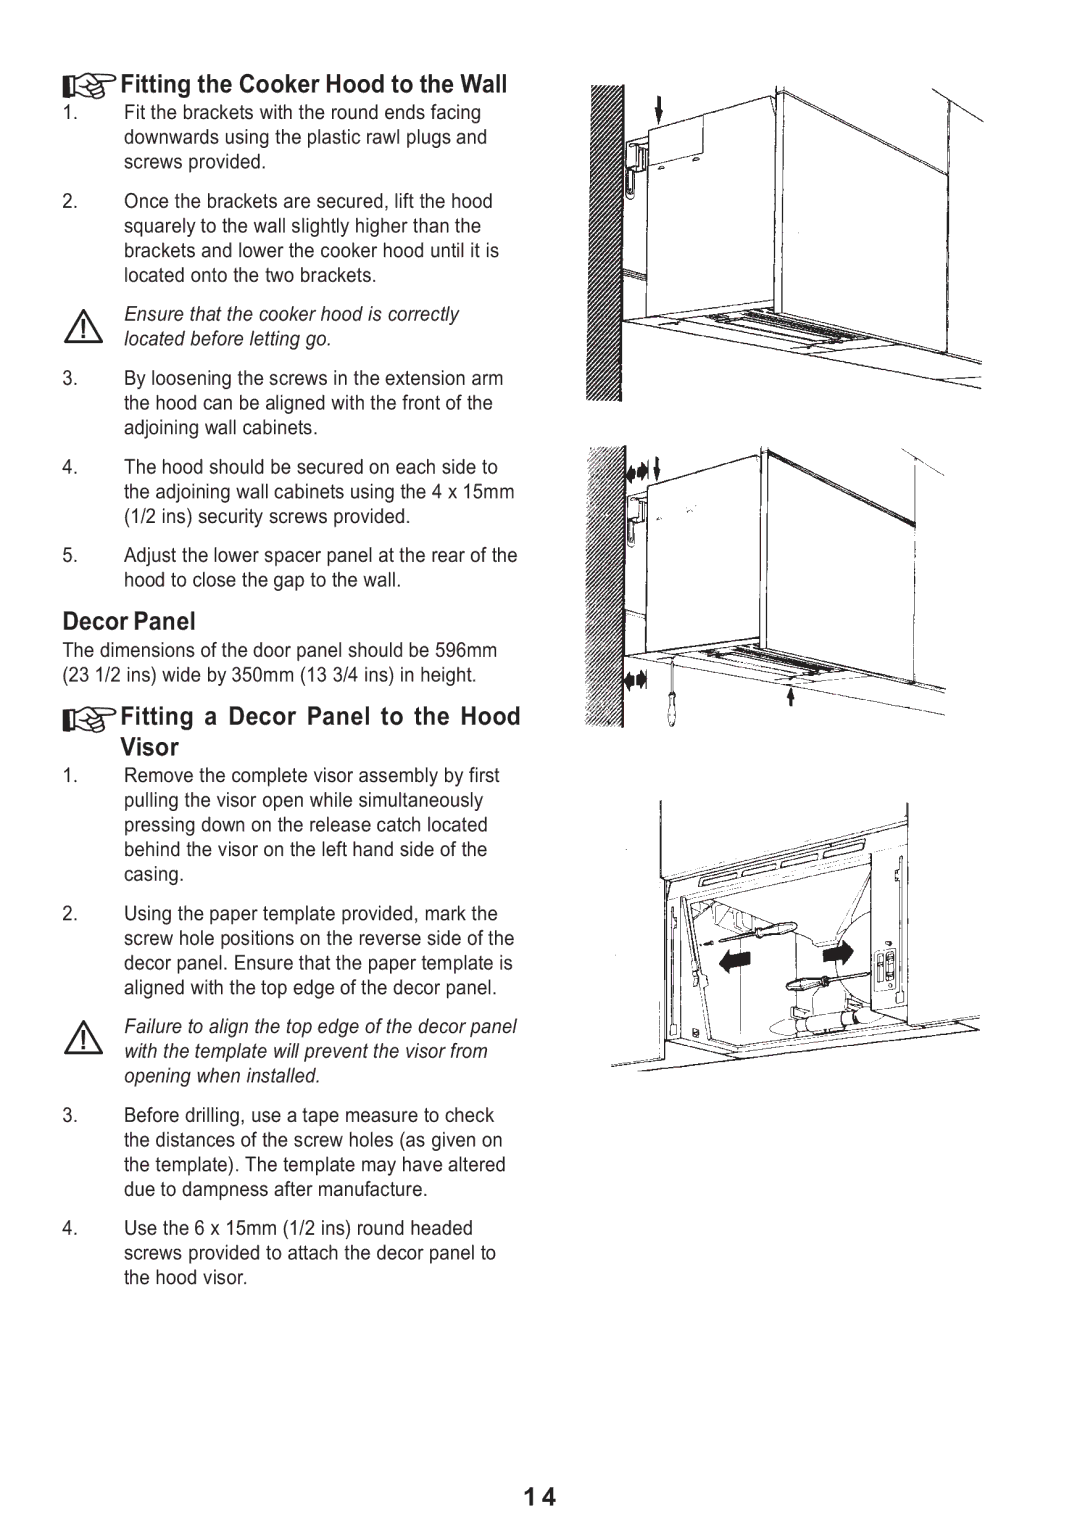
1.Fit the brackets with the round ends facing downwards using the plastic rawl plugs and screws provided.
2.Once the brackets are secured, lift the hood squarely to the wall slightly higher than the brackets and lower the cooker hood until it is located onto the two brackets.
Ensure that the cooker hood is correctly located before letting go.
3.By loosening the screws in the extension arm the hood can be aligned with the front of the adjoining wall cabinets.
4.The hood should be secured on each side to the adjoining wall cabinets using the 4 x 15mm (1/2 ins) security screws provided.
5.Adjust the lower spacer panel at the rear of the hood to close the gap to the wall.
Decor Panel
The dimensions of the door panel should be 596mm (23 1/2 ins) wide by 350mm (13 3/4 ins) in height.
 Fitting a Decor Panel to the Hood Visor
1.Remove the complete visor assembly by first pulling the visor open while simultaneously pressing down on the release catch located behind the visor on the left hand side of the casing.
2.Using the paper template provided, mark the screw hole positions on the reverse side of the decor panel. Ensure that the paper template is aligned with the top edge of the decor panel.
Failure to align the top edge of the decor panel with the template will prevent the visor from opening when installed.
3.Before drilling, use a tape measure to check the distances of the screw holes (as given on the template). The template may have altered due to dampness after manufacture.
4.Use the 6 x 15mm (1/2 ins) round headed screws provided to attach the decor panel to the hood visor.
1 4