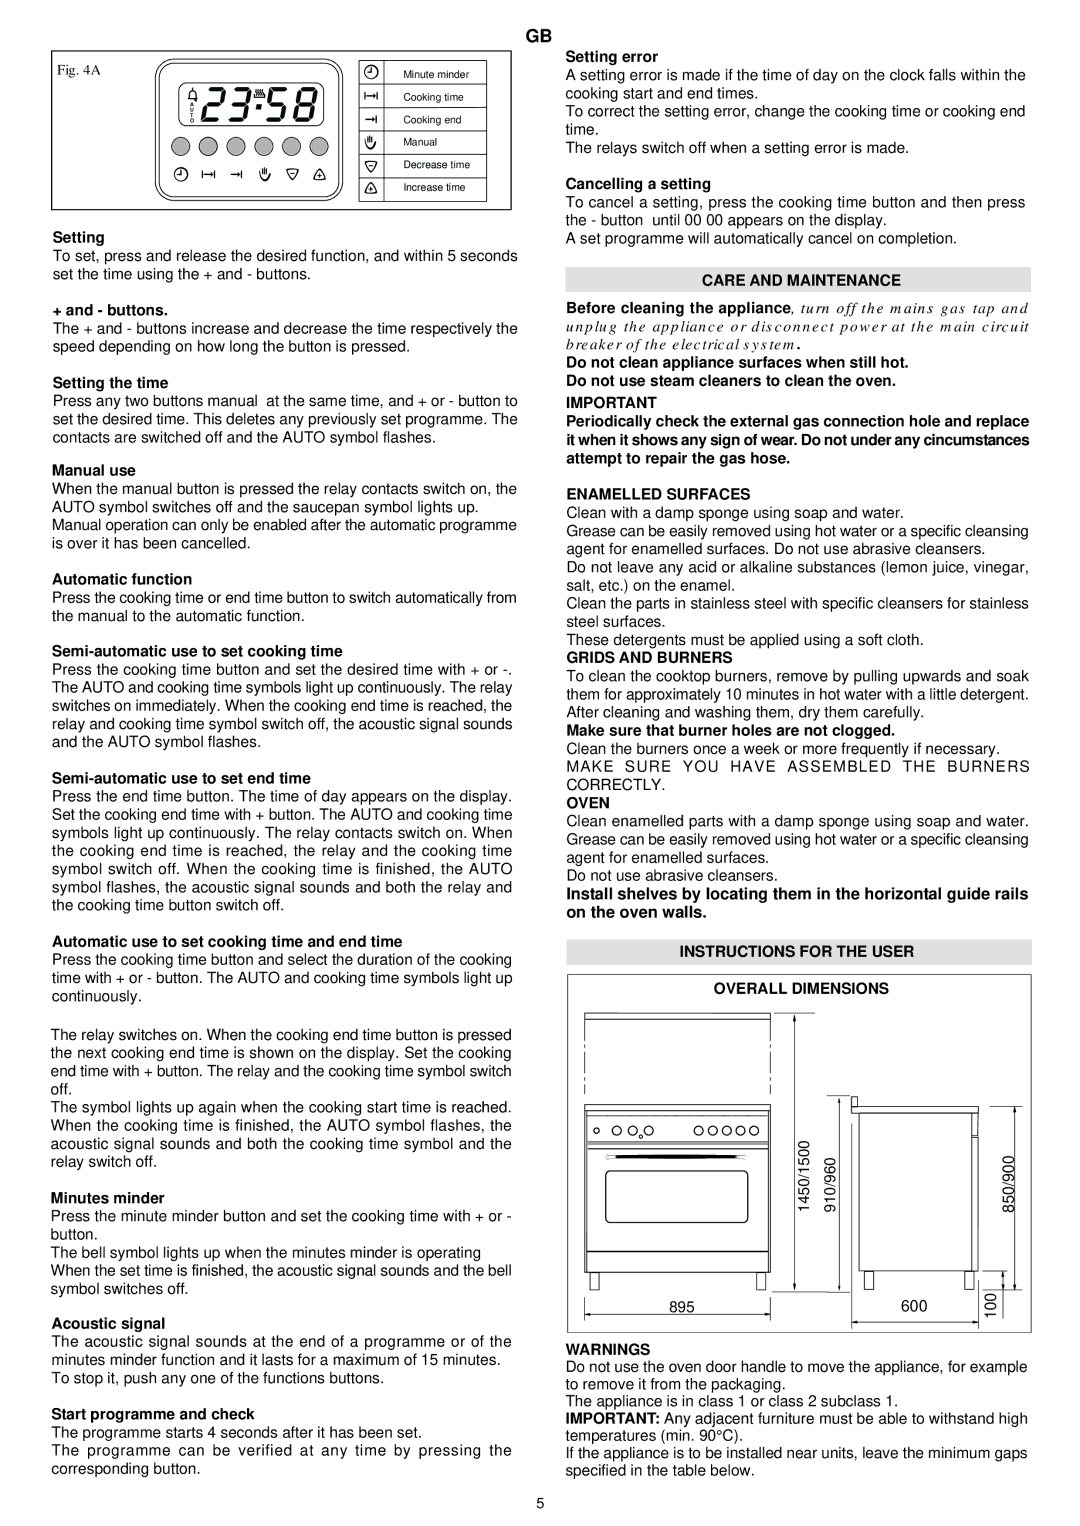
Fig. 4A

A

U

T

O

GB

Minute minder

Cooking time

Cooking end

Manual

Decrease time

Increase time

Setting error

A setting error is made if the time of day on the clock falls within the cooking start and end times.

To correct the setting error, change the cooking time or cooking end time.

The relays switch off when a setting error is made.

Cancelling a setting

To cancel a setting, press the cooking time button and then press the - button until 00 00 appears on the display.

Setting

To set, press and release the desired function, and within 5 seconds set the time using the + and - buttons.

+ and - buttons.

The + and - buttons increase and decrease the time respectively the speed depending on how long the button is pressed.

Setting the time

Press any two buttons manual at the same time, and + or - button to set the desired time. This deletes any previously set programme. The contacts are switched off and the AUTO symbol flashes.

Manual use

When the manual button is pressed the relay contacts switch on, the AUTO symbol switches off and the saucepan symbol lights up. Manual operation can only be enabled after the automatic programme is over it has been cancelled.

Automatic function

Press the cooking time or end time button to switch automatically from the manual to the automatic function.

Semi-automatic use to set cooking time

Press the cooking time button and set the desired time with + or -. The AUTO and cooking time symbols light up continuously. The relay switches on immediately. When the cooking end time is reached, the relay and cooking time symbol switch off, the acoustic signal sounds and the AUTO symbol flashes.

Semi-automatic use to set end time

Press the end time button. The time of day appears on the display. Set the cooking end time with + button. The AUTO and cooking time symbols light up continuously. The relay contacts switch on. When the cooking end time is reached, the relay and the cooking time symbol switch off. When the cooking time is finished, the AUTO symbol flashes, the acoustic signal sounds and both the relay and the cooking time button switch off.

A set programme will automatically cancel on completion.

CARE AND MAINTENANCE

Before cleaning the appliance, turn off the mains gas tap and unplug the appliance or disconnect power at the main circuit breaker of the electrical system.

Do not clean appliance surfaces when still hot. Do not use steam cleaners to clean the oven.

IMPORTANT

Periodically check the external gas connection hole and replace it when it shows any sign of wear. Do not under any cincumstances attempt to repair the gas hose.

ENAMELLED SURFACES

Clean with a damp sponge using soap and water.

Grease can be easily removed using hot water or a specific cleansing agent for enamelled surfaces. Do not use abrasive cleansers.

Do not leave any acid or alkaline substances (lemon juice, vinegar, salt, etc.) on the enamel.

Clean the parts in stainless steel with specific cleansers for stainless steel surfaces.

These detergents must be applied using a soft cloth.

GRIDS AND BURNERS

To clean the cooktop burners, remove by pulling upwards and soak them for approximately 10 minutes in hot water with a little detergent. After cleaning and washing them, dry them carefully.

Make sure that burner holes are not clogged.

Clean the burners once a week or more frequently if necessary.

MAKE SURE YOU HAVE ASSEMBLED THE BURNERS CORRECTLY.

OVEN

Clean enamelled parts with a damp sponge using soap and water. Grease can be easily removed using hot water or a specific cleansing agent for enamelled surfaces.

Do not use abrasive cleansers.

Install shelves by locating them in the horizontal guide rails on the oven walls.

Automatic use to set cooking time and end time

Press the cooking time button and select the duration of the cooking time with + or - button. The AUTO and cooking time symbols light up continuously.

The relay switches on. When the cooking end time button is pressed the next cooking end time is shown on the display. Set the cooking end time with + button. The relay and the cooking time symbol switch off.

The symbol lights up again when the cooking start time is reached. When the cooking time is finished, the AUTO symbol flashes, the acoustic signal sounds and both the cooking time symbol and the relay switch off.

Minutes minder

Press the minute minder button and set the cooking time with + or - button.

The bell symbol lights up when the minutes minder is operating When the set time is finished, the acoustic signal sounds and the bell symbol switches off.

Acoustic signal

The acoustic signal sounds at the end of a programme or of the minutes minder function and it lasts for a maximum of 15 minutes. To stop it, push any one of the functions buttons.

Start programme and check

The programme starts 4 seconds after it has been set.

The programme can be verified at any time by pressing the corresponding button.

INSTRUCTIONS FOR THE USER

OVERALL DIMENSIONS


1450/1500

910/960


850/900

895


600

100


WARNINGS

Do not use the oven door handle to move the appliance, for example to remove it from the packaging.

The appliance is in class 1 or class 2 subclass 1.

IMPORTANT: Any adjacent furniture must be able to withstand high temperatures (min. 90°C).

If the appliance is to be installed near units, leave the minimum gaps specified in the table below.

5

Page 5
Image 5
Electrolux EKM 90310 X, EKM 90410 X manual Care and Maintenance, Enamelled Surfaces, Grids and Burners, Oven

EKM 90310 X, EKM 90410 X specifications

Electrolux has long been synonymous with quality and innovative kitchen appliances, and the EKM 90410 X and EKM 90310 X stand as prime examples of their commitment to user-friendly design and advanced technology. These stand mixers are engineered to make baking and cooking not only more accessible but also more enjoyable for both amateur home cooks and experienced chefs.

The EKM 90410 X is a powerful stand mixer with a 1000-watt motor, making it capable of handling a wide variety of tasks with ease. It features a generous 4.8-liter stainless steel bowl, which is perfect for mixing large batches of dough or batter. This mixer is equipped with 10 speed settings, allowing users to adjust the mixing speed according to their specific needs, whether it’s gently folding in ingredients or whipping cream to soft peaks. Additionally, the EKM 90410 X comes with a variety of attachments, including a whisk, dough hook, and flat beater, providing versatility for numerous recipes.

On the other hand, the EKM 90310 X offers a slightly more compact design with a 900-watt motor and a 4.5-liter bowl. It retains many of the powerful features found in its higher-powered counterpart, including multiple speed settings and a range of useful attachments. Both models are designed with a planetary mixing action, ensuring that every ingredient is thoroughly combined, leaving no dry spots in your dough or batter.

One of the standout features of these mixers is their elegant design, with a sleek stainless steel finish that adds a touch of sophistication to any kitchen. The user-friendly controls and tilt-head design make it easy to access the bowl, swap out attachments, and scrape down the sides as needed during mixing.

Safety is also a priority in the design of the EKM series. Both models are equipped with a safety switch that prevents operation if the bowl isn't securely locked in place. This attention to detail ensures that even novice users can operate the mixers with confidence.

In terms of storage, both mixers come with integrated cable storage, minimizing clutter on your countertop. The Electrolux EKM 90410 X and EKM 90310 X stand mixers not only enhance culinary skills but also bring style and efficiency to your kitchen, making them essential tools for anyone passionate about cooking and baking. These mixers embody Electrolux's dedication to quality, functionality, and cutting-edge design, providing a delightful experience for users.