
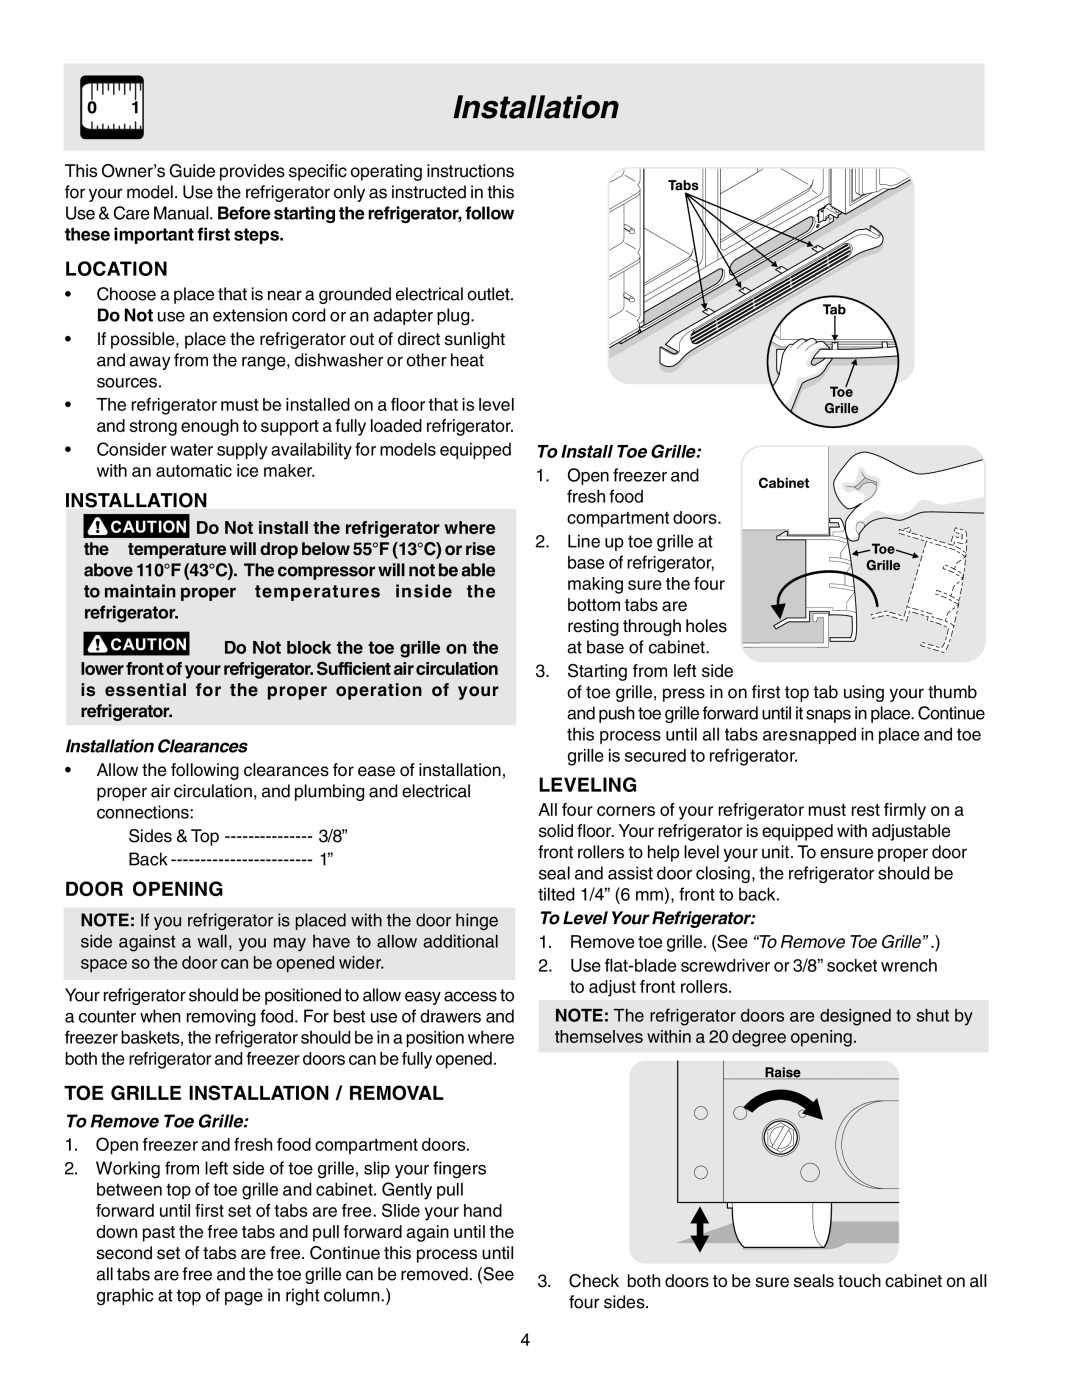
241512200A specifications
Electrolux has been a trusted name in home appliances for decades, and the Gibson 241512200A is a prime example of their commitment to quality and innovation. This model combines versatility with advanced technology to elevate the cooking experience, making it an ideal choice for modern kitchens.One of the standout features of the Gibson 241512200A is its spacious design. With a generous interior capacity, this appliance can accommodate large dishes, making it particularly suitable for families or those who enjoy entertaining. The thoughtful layout allows for easy organization and access, so users can find their cooking essentials without hassle.
The Gibson 241512200A utilizes advanced cooking technologies that enhance its performance. It features precise temperature control, which ensures that food cooks evenly and to perfection. This is especially important for baking and roasting, where consistent heat is critical. Additionally, the appliance incorporates innovative heating elements that contribute to faster cooking times, saving users valuable time in the kitchen.
Another remarkable technology integrated into the Gibson 241512200A is its user-friendly interface. The digital control panel is intuitive, allowing users to adjust settings with the touch of a button. This feature is complemented by a variety of cooking presets, which simplify meal preparation by automatically setting optimal cooking times and temperatures for different dishes.
Safety is also a major consideration in the design of the Gibson 241512200A. The appliance comes equipped with features such as an automatic shut-off function that provides peace of mind, especially for busy households. The cool-touch exterior ensures that the surface remains safe to touch during and after cooking, minimizing the risk of burns.
In terms of energy efficiency, the Gibson 241512200A excels as well. It is designed to consume minimal energy without compromising performance, making it an environmentally friendly option for consumers looking to reduce their carbon footprint.
In conclusion, the Electrolux Gibson 241512200A stands out due to its combination of spacious design, advanced cooking technologies, user-friendly interface, safety features, and energy efficiency. This appliance truly encapsulates what a modern kitchen needs, making it an essential tool for both novice cooks and seasoned chefs alike. Its blend of functionality and innovation ensures that users can enjoy a seamless cooking experience, resulting in delicious meals for family and friends.