PREPARE THE HOOD
(NON - DUCTED HOODS ONLY)
Note: The following materials must be purchased separately for
•Non - Ducted Recirculation Kit, Model DFKTWC50EC.
•5” diameter metal duct.
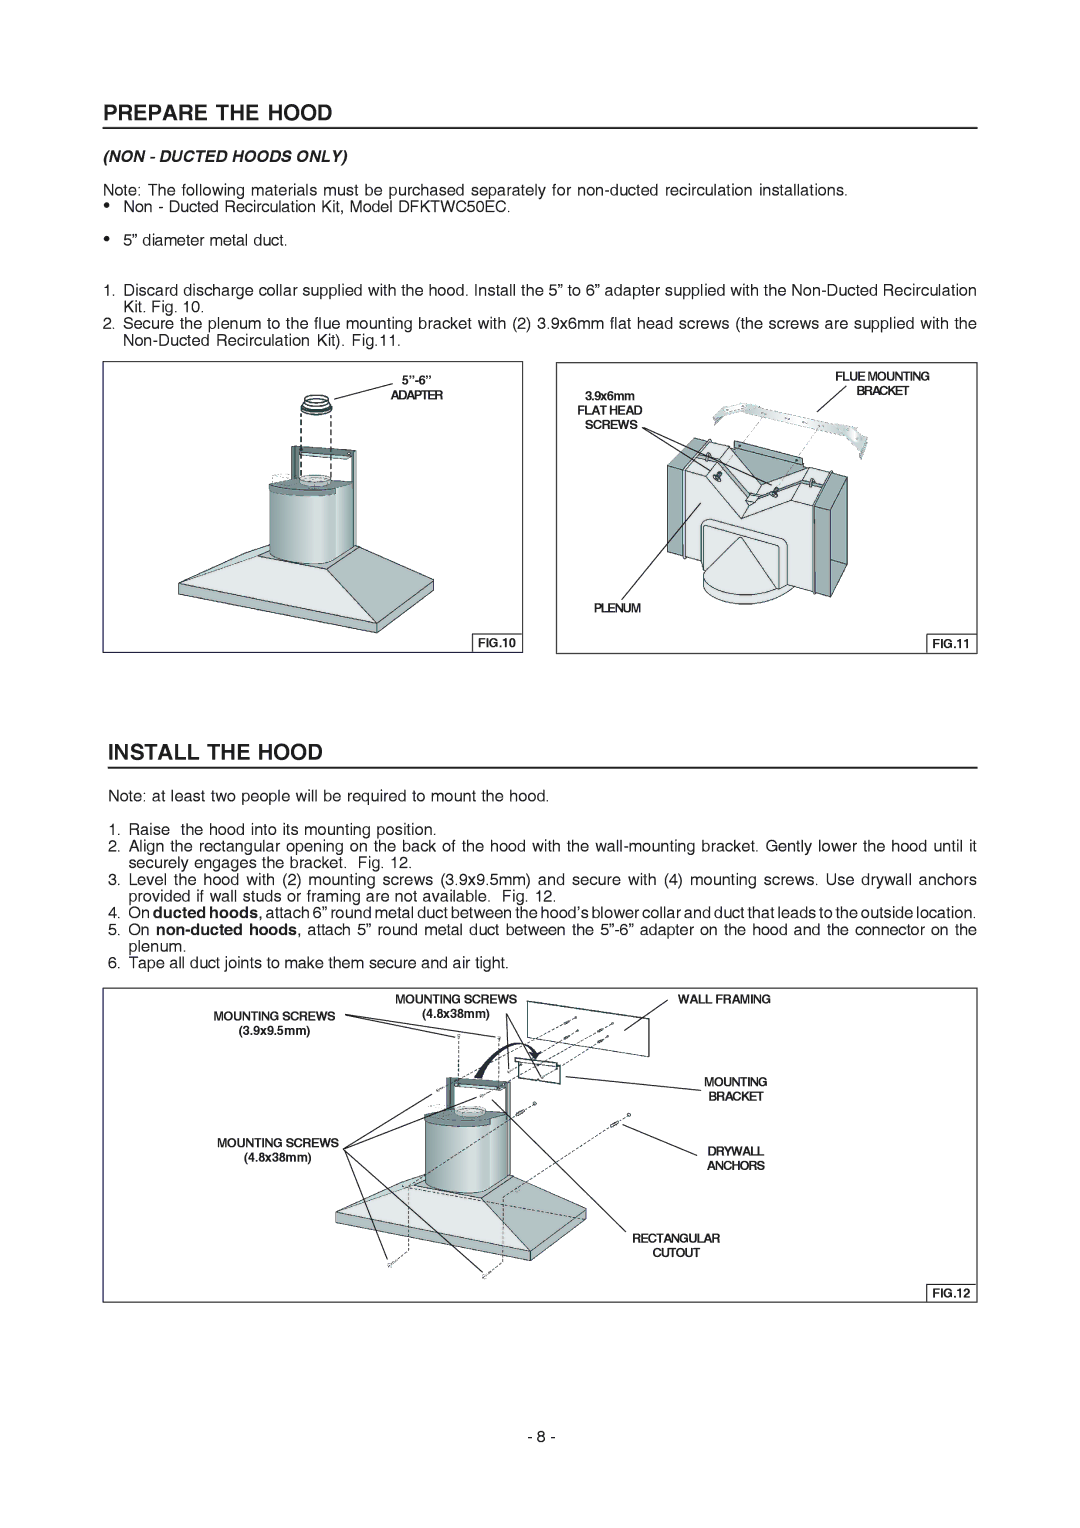
1.Discard discharge collar supplied with the hood. Install the 5” to 6” adapter supplied with the
2.Secure the plenum to the flue mounting bracket with (2) 3.9x6mm flat head screws (the screws are supplied with the
ADAPTER
FLUE MOUNTING
3.9x6mmBRACKET FLAT HEAD
SCREWS
FIG.10
PLENUM
FIG.11
INSTALL THE HOOD
Note: at least two people will be required to mount the hood.
1.Raise the hood into its mounting position.
2.Align the rectangular opening on the back of the hood with the
3.Level the hood with (2) mounting screws (3.9x9.5mm) and secure with (4) mounting screws. Use drywall anchors provided if wall studs or framing are not available. Fig. 12.
4.On ducted hoods, attach 6” round metal duct between the hood’s blower collar and duct that leads to the outside location.
5.On
6.Tape all duct joints to make them secure and air tight.
| MOUNTING SCREWS | WALL FRAMING |
MOUNTING SCREWS | (4.8x38mm) |
|
(3.9x9.5mm) |
|
|
|
| MOUNTING |
|
| BRACKET |
MOUNTING SCREWS
(4.8x38mm)DRYWALL ANCHORS
RECTANGULAR
CUTOUT
FIG.12
- 8 -