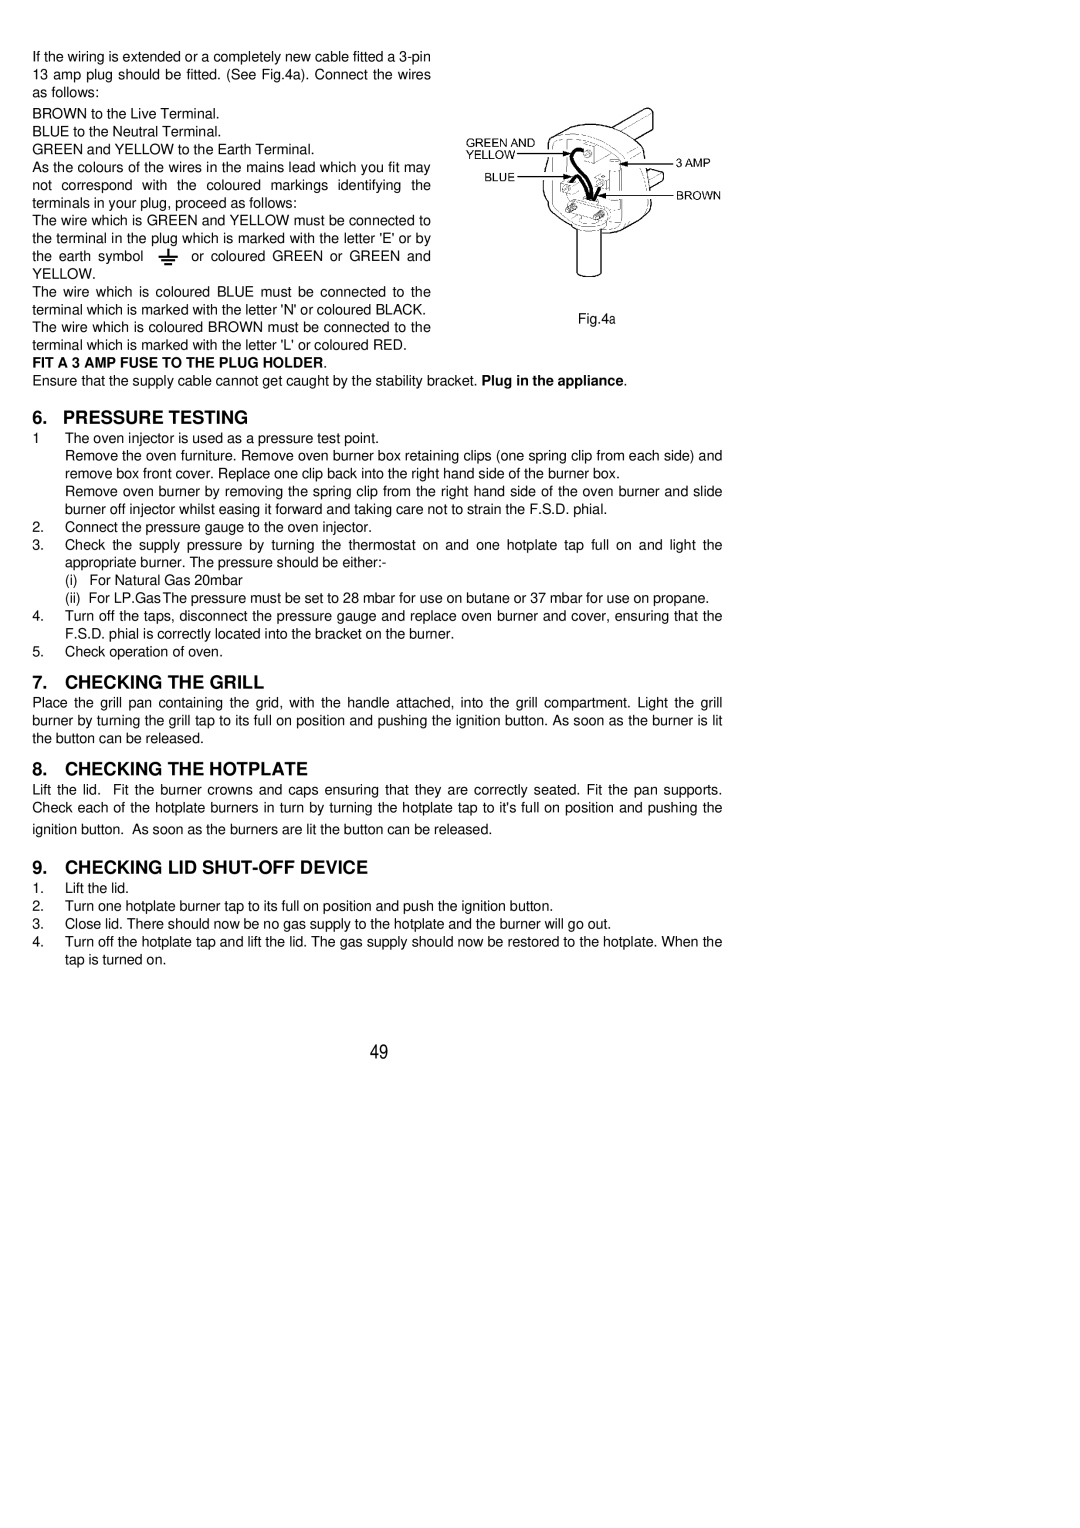
If the wiring is extended or a completely new cable fitted a 3-pin 13 amp plug should be fitted. (See Fig.4a). Connect the wires as follows:

BROWN to the Live Terminal. BLUE to the Neutral Terminal.

GREEN and YELLOW to the Earth Terminal.

As the colours of the wires in the mains lead which you fit may not correspond with the coloured markings identifying the terminals in your plug, proceed as follows:

The wire which is GREEN and YELLOW must be connected to the terminal in the plug which is marked with the letter 'E' or by

the earth symbol or coloured GREEN or GREEN and

YELLOW.

The wire which is coloured BLUE must be connected to the terminal which is marked with the letter 'N' or coloured BLACK. The wire which is coloured BROWN must be connected to the terminal which is marked with the letter 'L' or coloured RED.

FIT A 3 AMP FUSE TO THE PLUG HOLDER.

Ensure that the supply cable cannot get caught by the stability bracket.

Fig.4a

Plug in the appliance.

6. PRESSURE TESTING

1The oven injector is used as a pressure test point.

Remove the oven furniture. Remove oven burner box retaining clips (one spring clip from each side) and remove box front cover. Replace one clip back into the right hand side of the burner box.

Remove oven burner by removing the spring clip from the right hand side of the oven burner and slide burner off injector whilst easing it forward and taking care not to strain the F.S.D. phial.

2.Connect the pressure gauge to the oven injector.

3.Check the supply pressure by turning the thermostat on and one hotplate tap full on and light the appropriate burner. The pressure should be either:-

(i)For Natural Gas 20mbar

(ii)For LP.GasThe pressure must be set to 28 mbar for use on butane or 37 mbar for use on propane.

4.Turn off the taps, disconnect the pressure gauge and replace oven burner and cover, ensuring that the F.S.D. phial is correctly located into the bracket on the burner.

5.Check operation of oven.

7. CHECKING THE GRILL

Place the grill pan containing the grid, with the handle attached, into the grill compartment. Light the grill burner by turning the grill tap to its full on position and pushing the ignition button. As soon as the burner is lit the button can be released.

8. CHECKING THE HOTPLATE

Lift the lid. Fit the burner crowns and caps ensuring that they are correctly seated. Fit the pan supports. Check each of the hotplate burners in turn by turning the hotplate tap to it's full on position and pushing the

ignition button. As soon as the burners are lit the button can be released.

9. CHECKING LID SHUT-OFF DEVICE

1.Lift the lid.

2.Turn one hotplate burner tap to its full on position and push the ignition button.

3.Close lid. There should now be no gas supply to the hotplate and the burner will go out.

4.Turn off the hotplate tap and lift the lid. The gas supply should now be restored to the hotplate. When the tap is turned on.

49

Page 49
Image 49
Electrolux SIG 555 Pressure Testing, Checking the Grill, Checking the Hotplate, Checking LID SHUT-OFF Device

SIG 555 specifications

The Electrolux SIG 555 is a standout model in the realm of modern kitchen appliances, combining cutting-edge technology with functionality to meet the demands of today's homeowners. This multi-functional appliance serves as a one-stop solution for various kitchen tasks, particularly cooking, baking, and food preparation.

One of the primary features of the SIG 555 is its advanced cooking technology. Equipped with a powerful induction cooktop, it offers precise temperature control and instant heat adjustments, ensuring that meals are cooked evenly and efficiently. This induction technology not only enhances performance but also promotes energy efficiency, making it an eco-friendly option for conscientious consumers.

In addition to induction cooking, the Electrolux SIG 555 includes a built-in oven that boasts multiple cooking settings. Whether you are baking, roasting, or broiling, the range of preset programs simplifies the cooking process. One of its remarkable characteristics is the convection cooking feature, which circulates hot air for uniform cooking results. This is particularly beneficial for items like pastries and bread that require even heat distribution for optimal results.

The appliance's design is another highlight. The sleek and modern aesthetic seamlessly integrates into any kitchen décor, with a user-friendly interface that makes operation straightforward even for novice chefs. A touch control panel offers access to various cooking modes, timer settings, and temperature adjustments, ensuring ease of use.

Safety is also a priority in the design of the Electrolux SIG 555. The appliance features child lock settings, automatic shut-off functions, and heat indicators that prevent accidental burns. These elements provide peace of mind, especially in households with children.

The SIG 555 is also designed with easy maintenance in mind. The smooth surface of the induction cooktop is not only easy to clean but also resists scratches and stains, ensuring longevity. The oven's self-cleaning feature eliminates the need for harsh chemicals or scrubbing, making it easier to keep the kitchen tidy.

Overall, the Electrolux SIG 555 combines innovative technology, user-friendly features, and a stylish design, making it an excellent choice for anyone looking to elevate their cooking experience. Its versatility and focus on safety, efficiency, and ease of maintenance ensure that it will remain a valuable asset in the kitchen for years to come.