Unpacking
The fittings supplied to install this cooker hood can be found with the instruction book inside the packaging and consists of the following:
Ducting spigot
Blanking plate
Wall Fitting
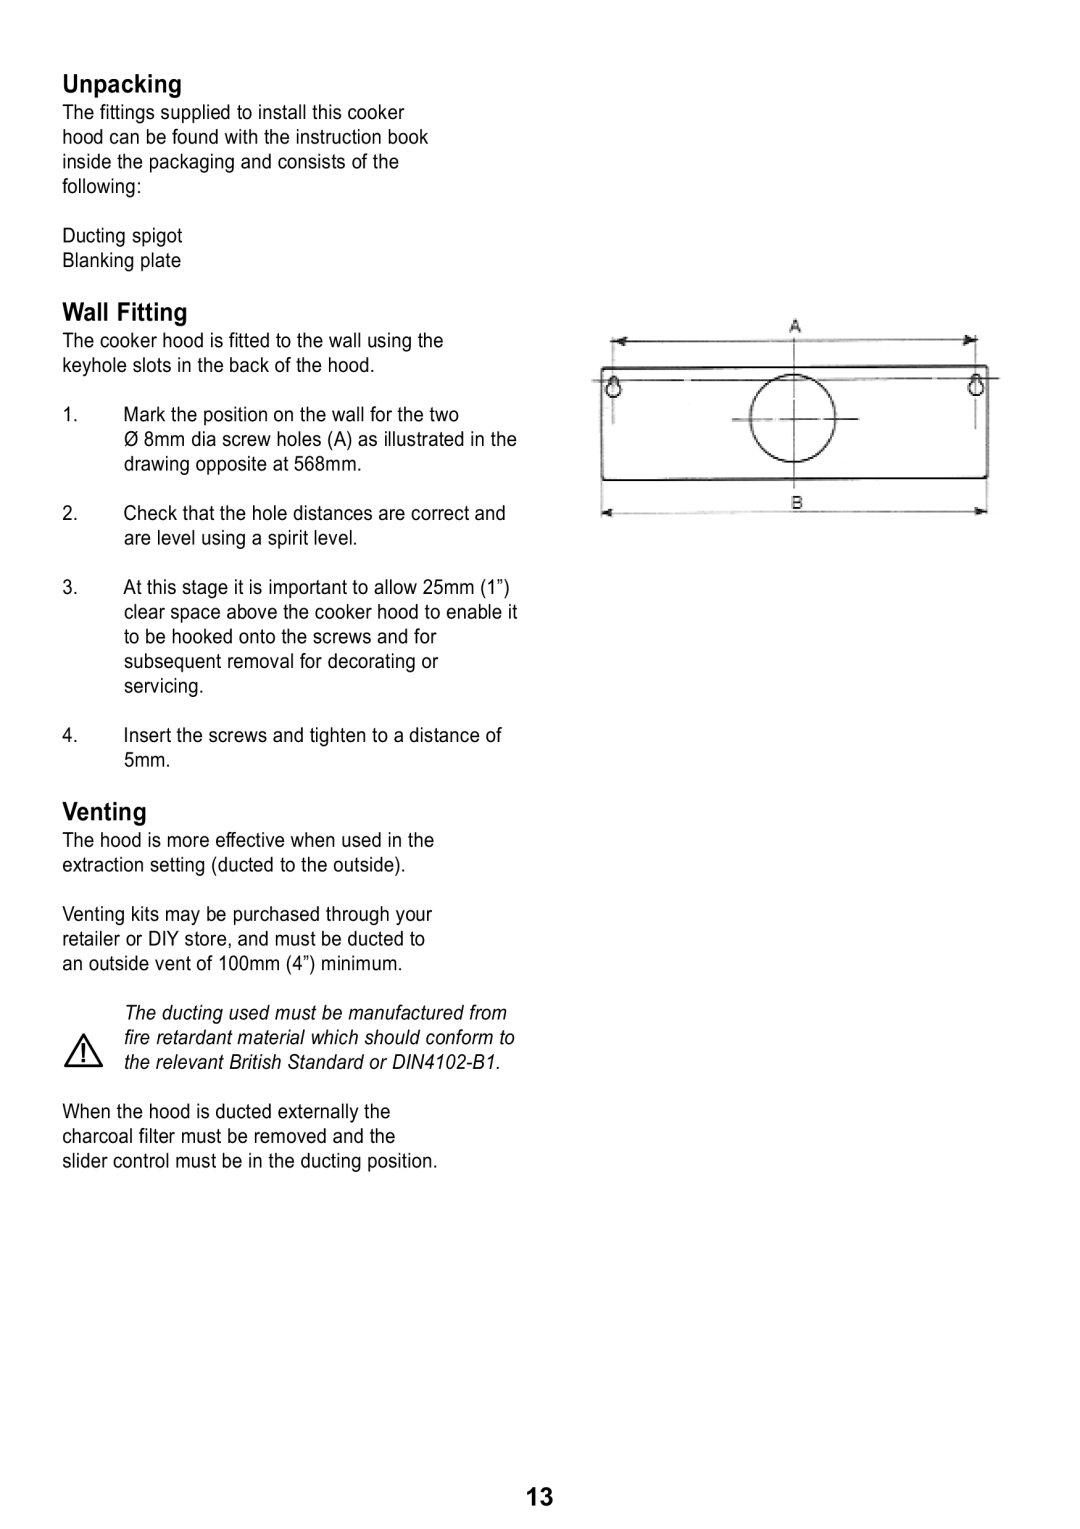
The cooker hood is fitted to the wall using the keyhole slots in the back of the hood.
1.Mark the position on the wall for the two
Ø 8mm dia screw holes (A) as illustrated in the drawing opposite at 568mm.
2.Check that the hole distances are correct and are level using a spirit level.
3.At this stage it is important to allow 25mm (1”) clear space above the cooker hood to enable it to be hooked onto the screws and for subsequent removal for decorating or servicing.
4.Insert the screws and tighten to a distance of 5mm.
Venting
The hood is more effective when used in the extraction setting (ducted to the outside).
Venting kits may be purchased through your retailer or DIY store, and must be ducted to an outside vent of 100mm (4”) minimum.
The ducting used must be manufactured from fire retardant material which should conform to the relevant British Standard or
When the hood is ducted externally the charcoal filter must be removed and the slider control must be in the ducting position.
13