Required Tool
Phillips Head Screwdriver
Use of connecting bolts when assembling the components
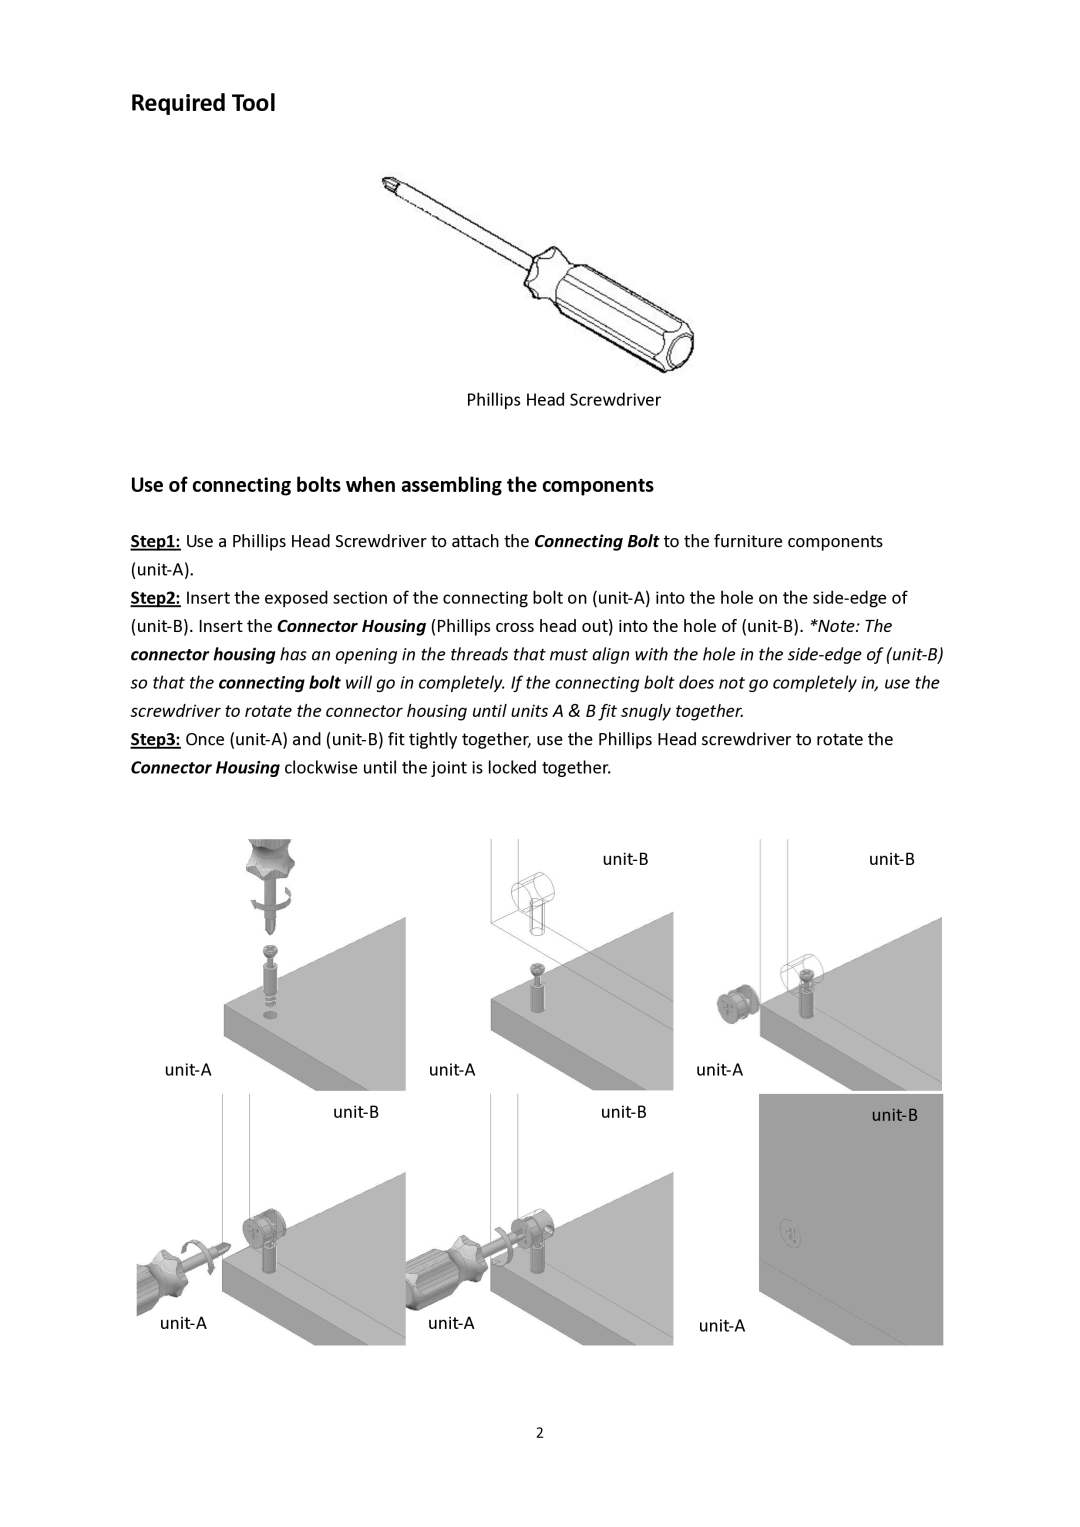
Step1: Use a Phillips Head Screwdriver to attach the Connecting Bolt to the furniture components (unit-A).
Step2: Insert the exposed section of the connecting bolt on (unit-A) into the hole on the side-edge of
(unit-B). Insert the Connector Housing (Phillips cross head out) into the hole of (unit-B). *Note: The connector housing has an opening in the threads that must align with the hole in the side-edge of (unit-B) so that the connecting bolt will go in completely. If the connecting bolt does not go completely in, use the screwdriver to rotate the connector housing until units A & B fit snugly together.
Step3: Once (unit-A) and (unit-B) fit tightly together, use the Phillips Head screwdriver to rotate the Connector Housing clockwise until the joint is locked together.
unit-Bunit-B
unit-A | unit-A | unit-A |
unit-B | unit-B | unit-B |
2

