2. SETTING UP AND STORING
2-1 SETTING UP
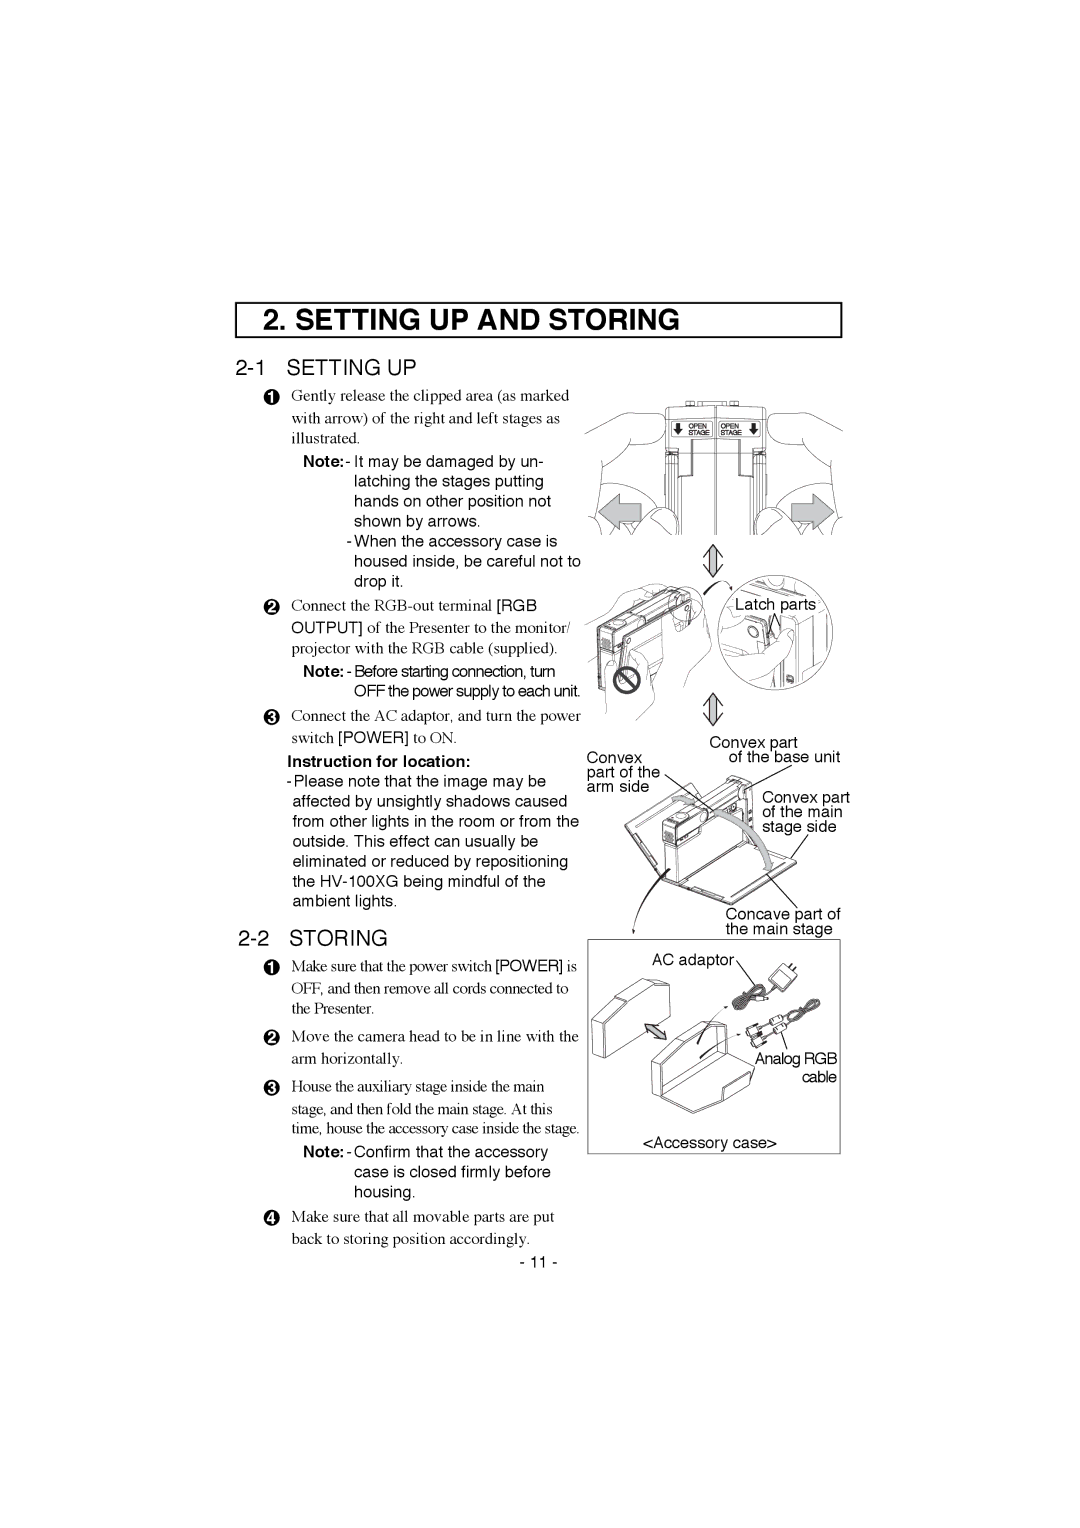
Gently release the clipped area (as marked with arrow) of the right and left stages as illustrated.
Note:- It may be damaged by un- latching the stages putting hands on other position not shown by arrows.
-When the accessory case is housed inside, be careful not to drop it.
OPEN OPEN STAGE STAGE
Connect the |
| Latch parts | |
OUTPUT] of the Presenter to the monitor/ |
|
| |
projector with the RGB cable (supplied). |
|
| |
Note: - Before starting connection, turn |
|
| |
OFF the power supply to each unit. |
|
| |
Connect the AC adaptor, and turn the power |
|
| |
switch [POWER] to ON. |
| Convex part | |
Instruction for location: | Convex | of the base unit | |
- Please note that the image may be | part of the |
| |
arm side | Convex part | ||
affected by unsightly shadows caused | |||
| |||
from other lights in the room or from the |
| of the main | |
| stage side | ||
outside. This effect can usually be |
| ||
|
| ||
eliminated or reduced by repositioning |
|
| |
the |
|
| |
ambient lights. |
|
|
|
| Concave part of | |
STORING | the main stage | ||
AC adaptor | |||
| Make sure that the power switch [POWER] is | ||
|
| ||
| OFF, and then remove all cords connected to |
| |
| the Presenter. |
| |
| Move the camera head to be in line with the |
| |
| arm horizontally. | Analog RGB | |
| House the auxiliary stage inside the main | cable | |
|
| ||
| stage, and then fold the main stage. At this |
| |
| time, house the accessory case inside the stage. | <Accessory case> | |
| Note: - Confirm that the accessory | ||
|
| ||
| case is closed firmly before |
| |
| housing. |
| |
| Make sure that all movable parts are put |
| |
| back to storing position accordingly. |
| |
| - 11 - |
|