CF654ORB00, CF654AW00, CF654WB00, CF654WW00 specifications
The Emerson CF654 series ceiling fans, including the CF654ORB00, CF654WB00, CF654AW00, and CF654WW00, are designed to enhance both comfort and aesthetic appeal in a variety of indoor spaces. Each model boasts a thoughtfully crafted design that blends modern elegance with functional efficiency.One of the primary features of the CF654 series is its Quiet Motor Technology. This innovation ensures minimal noise while operating, making these fans ideal for use in bedrooms, living rooms, or any area where serenity is a priority. The fans are equipped with the Emerson direct-drive motor, known for its reliability and longevity, offering robust air movement without the clatter associated with traditional ceiling fans.
Another standout characteristic is the aesthetic versatility. The models in this series come in several stylish finishes—Oil-Rubbed Bronze (CF654ORB00), White (CF654WB00), Antique White (CF654AW00), and Walnut (CF654WW00). This variety allows homeowners to select a fan that harmonizes with their existing décor, whether it’s modern, rustic, or traditional.
Additionally, the CF654 series offers impressive airflow efficiency, making them suitable for both warm and cooler climates. With a blade span of 52 inches, these fans are optimal for medium to large rooms. They can effectively circulate air, potentially reducing reliance on air conditioning and helping to create a comfortable space with lower energy costs.
The airflow can be adjusted through three speed settings, allowing users to customize their experience based on the season or personal preference. This ensures that whether it's a hot summer day or a frigid winter evening, the fan operates effectively throughout the year.
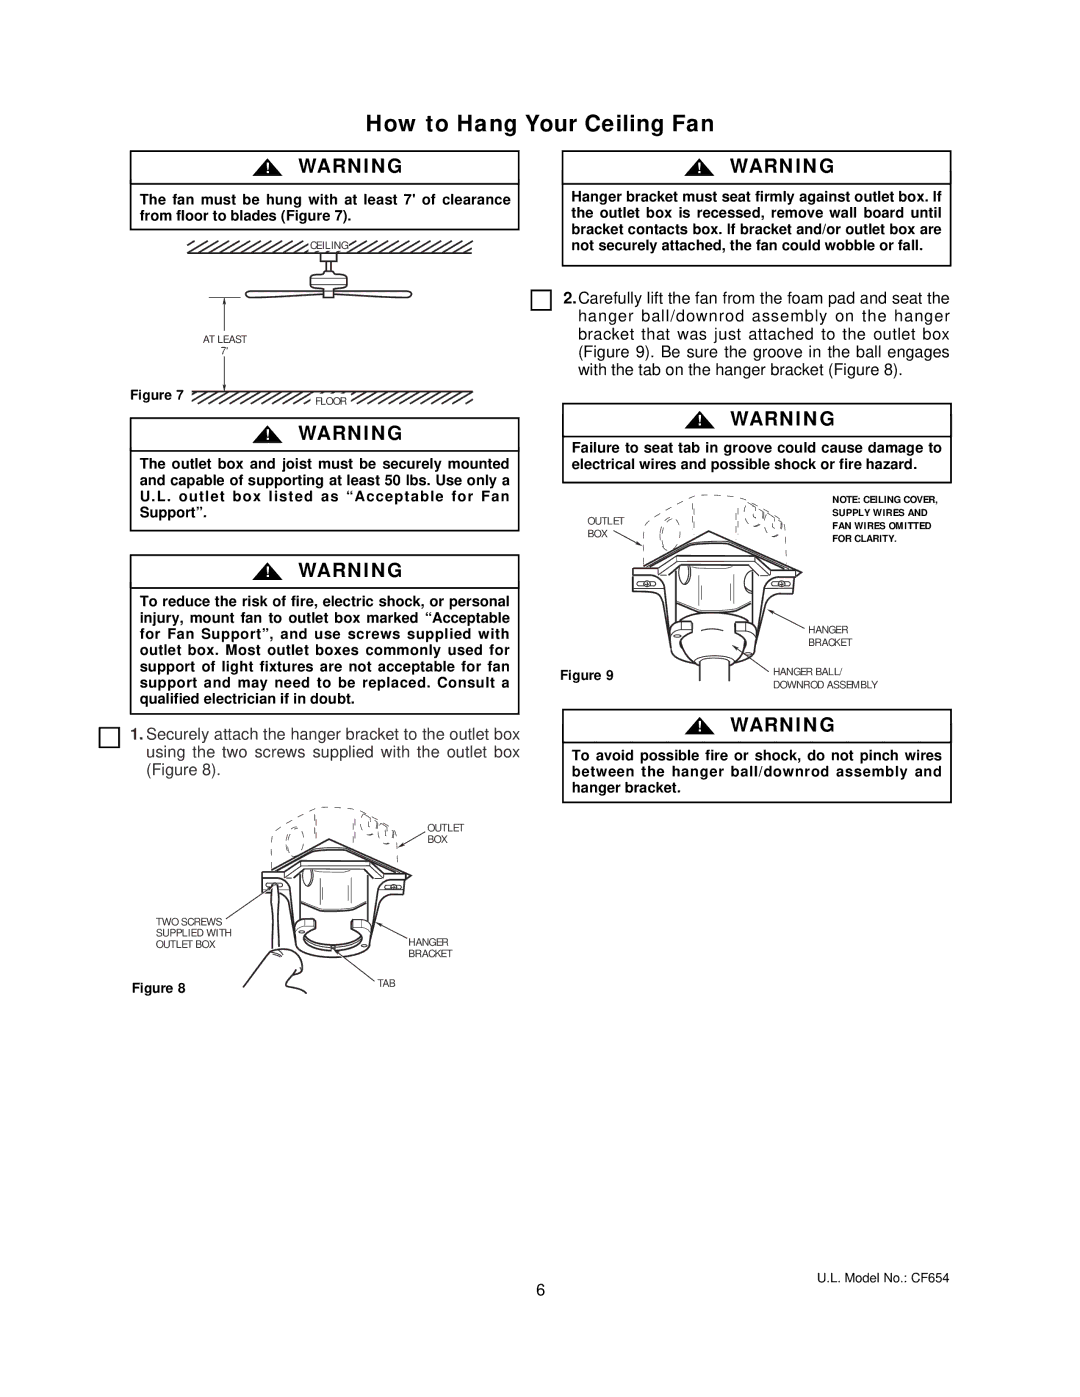
Installation is simplified with a comprehensive mounting system, allowing for both standard and angled ceiling mounting. The included instructions make setup manageable for DIY enthusiasts, while the sleek design maintains an unobtrusive profile.
In conclusion, the Emerson CF654 series ceiling fans combine advanced technology, versatile design, and user-friendly features, making them a great choice for enhancing comfort and style in any home. With options to suit various interior aesthetics and robust performance capabilities, these fans stand out as a reliable home improvement investment.