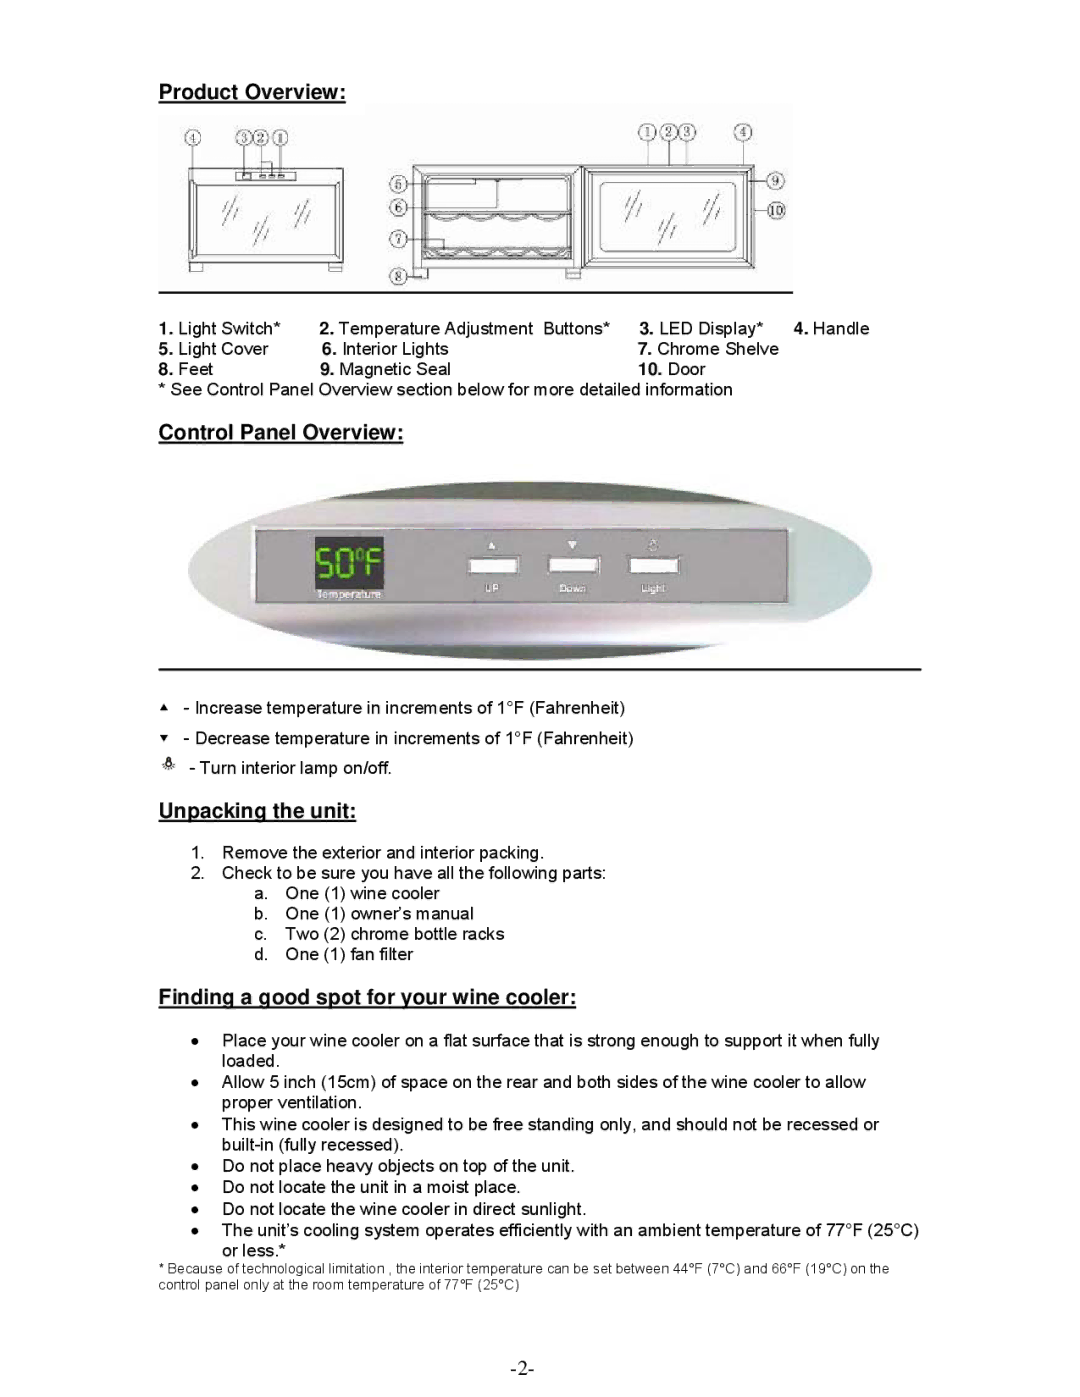
Product Overview:
1. | Light Switch* | 2. Temperature Adjustment Buttons* | 3. LED Display* | 4. Handle |
5. | Light Cover | 6. Interior Lights | 7. Chrome Shelve |
|
8. | Feet | 9. Magnetic Seal | 10. Door |
|
* See Control Panel Overview section below for more detailed information
Control Panel Overview:
▲- Increase temperature in increments of 1°F (Fahrenheit) ▼ - Decrease temperature in increments of 1°F (Fahrenheit) ![]() - Turn interior lamp on/off.
- Turn interior lamp on/off.
Unpacking the unit:
1.Remove the exterior and interior packing.
2.Check to be sure you have all the following parts:
a.One (1) wine cooler
b.One (1) owner’s manual
c.Two (2) chrome bottle racks
d.One (1) fan filter
Finding a good spot for your wine cooler:
•Place your wine cooler on a flat surface that is strong enough to support it when fully loaded.
•Allow 5 inch (15cm) of space on the rear and both sides of the wine cooler to allow proper ventilation.
•This wine cooler is designed to be free standing only, and should not be recessed or
•Do not place heavy objects on top of the unit.
•Do not locate the unit in a moist place.
•Do not locate the wine cooler in direct sunlight.
•The unit’s cooling system operates efficiently with an ambient temperature of 77°F (25°C) or less.*
*Because of technological limitation , the interior temperature can be set between 44°F (7°C) and 66°F (19°C) on the control panel only at the room temperature of 77°F (25°C)
