
XMT-P-FF/FI specifications
The Emerson XMT-P-FF/FI is an advanced control system designed for process automation and monitoring, particularly in the oil and gas, chemical, and water treatment industries. With its robust set of features and cutting-edge technologies, the XMT-P-FF/FI offers a reliable solution for ensuring the optimal performance of various processes.One of the main features of the XMT-P-FF/FI is its flexibility. This system can be configured to meet the specific requirements of a wide range of applications. It supports both flow and level measurement, and thanks to its modular design, users can easily expand and adapt the system to include additional functionalities as needed. This versatility allows operators to optimize their control strategies to improve efficiency and reduce costs.
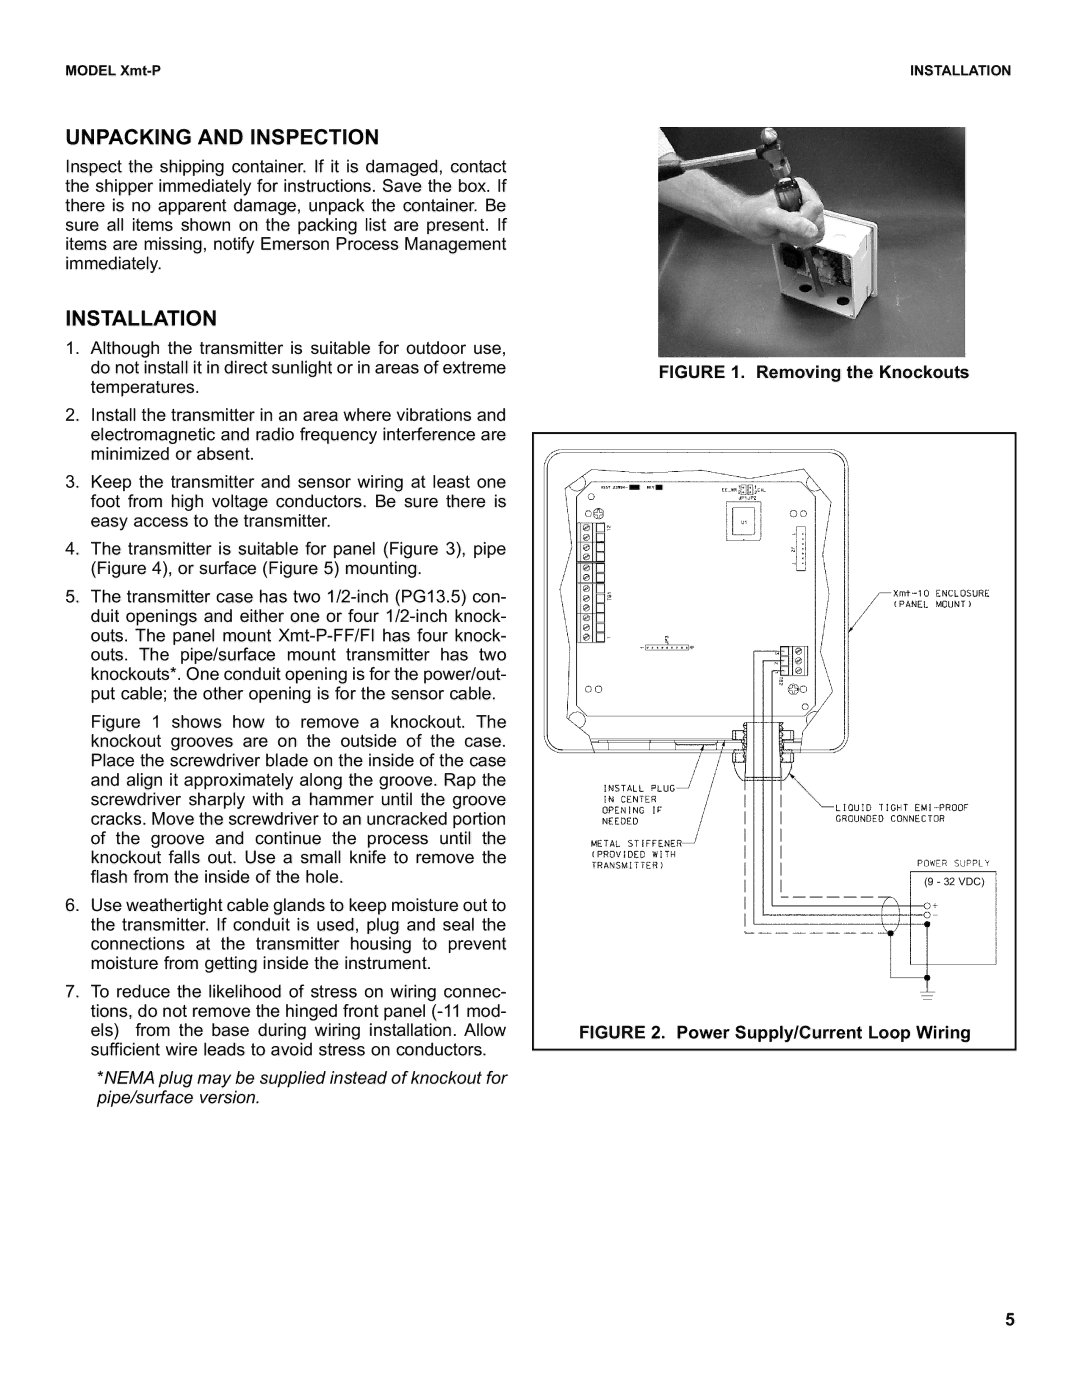
The XMT-P-FF/FI incorporates advanced technologies that enhance its performance and reliability. Its intelligent algorithms facilitate real-time data processing, enabling users to make informed decisions based on accurate, up-to-date information. The system is equipped with multiple communication options, including Ethernet, Modbus, and other industry-standard protocols, ensuring seamless integration with existing systems and devices.
This control system is also designed with a focus on ease of use. Its intuitive interface allows operators to monitor and control processes with minimal training. Users can access system diagnostics, alarm management, and historical data directly from the interface, which aids in troubleshooting and overall system optimization.
Furthermore, the XMT-P-FF/FI is built to withstand harsh environmental conditions, making it suitable for deployment in challenging industrial settings. Its rugged construction ensures durability and longevity, reducing maintenance needs and overall operational costs.
Another notable characteristic is its commitment to safety and compliance. The XMT-P-FF/FI adheres to relevant industry regulations and standards, ensuring that operations remain safe and environmentally responsible. It can also support various safety functions, further enhancing process reliability.
In summary, the Emerson XMT-P-FF/FI is a powerful and flexible solution for process automation. With advanced technologies, user-friendly features, and a strong focus on safety and reliability, it stands out as a capable control system for various industrial applications, enhancing productivity and operational efficiency.